EasyManua.ls Logo

Kurzweil Mark-Pro TWOi User Manual

Kurzweil Mark-Pro TWOi
50 pages
To Next Page IconTo Next Page
Page #1 background imageLoading...
Page #1 background image
The lightning flash with the arrowhead symbol, within an equilateral triangle, is intended to
alert the user to the presence of uninsulated “dangerous voltage” within the product’s
enclosure that may be of sufficient magnitude to constitute a risk of electric shock to
persons.
The exclamation point within an equilateral triangle is intended to alert the user to the
presence of important operating and maintenance (servicing) instructions in the literature
accompanying the product.
IMPORTANT SAFETY & INSTALLATION INSTRUCTIONS
INSTRUCTIONS PERTAINING TO THE RISK OF FIRE, ELECTRIC SHOCK, OR INJURY TO PERSONS
RADIO AND TELEVISION INTERFERENCE
SAVE THESE INSTRUCTIONS
WARNING
: When using electric products, basic precautions should always be
followed, including the following:
1. Read all of the Safety and Installation Instructions and Explanation of
Graphic Symbols before using the product.
2. This product must be grounded. If it should malfunction or break down,
grounding provides a path of least resistance for electric current to reduce
the risk of electric shock. This product is equipped with a power supply cord
having an equipment-grounding conductor and a grounding plug. The plug
must be plugged into an appropriate outlet which is properly installed and
grounded in accordance with all local codes and ordinances.
DANGER
: Improper connection of the equipment-grounding conductor
can result in a risk of electric shock. Do not modify the plug provided with
the product-if it will not fit the outlet, have a proper outlet installed by a
qualified electrician. Do
not use an adaptor which defeats the function of the
equipment-grounding conductor. If you are in doubt as to whether the
product is properly grounded, check with a qualified serviceman or electrician.
3. Do not use this product near water-for example, near a bathtub, washbowl,
kitchen sink, in a wet basement, or near a swimming pool, or the like.
4. This product should only be used with a stand or cart that is recommended
by the manufacturer.
5. This product, either alone or in combination with an amplifier and speakers
or headphones, may be capable of producing sound levels that could cause
permanent hearing loss. Do not operate for a long priod of time at a high
volume level or at a level that is uncomfortable. If you experience any
hearing loss or ringing in the ears, you should consult an audiologist.
6. The product should be located so that its location or position does not
interfere with its proper ventilation.
7. This product should be located away from heat sources such as radiators,
heat registers, or other products that produce heat.
8. This product should be connected to a power supply only of the type
described in the operating instructions or as marked on the product.
9. This product may be equipped with a polarized line plug (one blade wider
than be other). This is a safety feature. If you are unable to insert the plug
into the outlet, contact an
electrician to replace your obsolete outlet. Do not
defeat the safety purpose of the plug.
10. The power supply cord of the product should be unplugged from the outlet
when left unused for a long period of time. When unplugging the power
supply cord, do not pull on the cord, but grasp it by the plug.
11. Care should be taken so that objects do not fall and liquids are not spilled
into the enclosure through openings.
12. The product should be serviced by qualified service personnel when:
A. The power supply cord or the plug has been damaged;
B. Objects have fallen, or liquid has been spilled into the product;
C. The product has been exposed to rain;
D. The product does not appear to be operating normally or exhibits a
marked change in performance;
E. The product has been dropped, or the enclosure damaged.
13. Do not attempt to service the product beyond that described in the user
maintenance instructions. All other servicing should be referred to qualified
service personnel.
14.
WARNING
: Do not place objects on the product’s power supply cord, or
place the product in a position where anyone could trip over, walk on, or roll
anything over cords of any type. Do not allow the product to rest on or be
installed over cords of any type. Improper installations of this type create the
possibility of a fire hazard and/or personal injury.
WARNING
: Changes or modifications to this instrument not expressly
approved by KURZWEIL could void your authority to operate the instrument.
IMPORTANT
: When connecting this product to accessories and/or other
equipment use only high quality shielded cables.
NOTE
: This instrument has been tested and found to comply with the limits for
a Class B digital device,
pursuant to Part 15 of the FCC Rules. These limits are
designed to provide reasonable protection against harmful interference in a
residential installation. This instrument generates, uses, and can radiate radio
frequency energy and, if not installed and used in accordance with the
instructions, may cause harmful interference to radio communications. However,
there is no guarantee that interference will not occur in a particular installation.
If this instrument does cause harmful interference to radio or television
reception, which can be determined by turning the instrument off and on, the
user is encouraged to try to correct the interference by one or more of the
following measures:
Reorient or relocate the receiving antenna.
Increase the separation between the instrument and the receiver.
Connect the instrument into an outlet on a circuit other than the one to which
the receiver is connected.
If necessary consult your dealer or an experienced radio/television
technician for additional suggestions.
NOTICE
This apparatus does not exceed the Class B limits for radio noise emissions
from digital apparatus set out in the Radio Interference Regulations of the
Canadian Department of Communications.
AVIS
Le present appareil numerique n’emet pas de bruits radioelectriques depassant
les limites applicables aux appareils numeriques de la class B prescrites dans le
Reglement sur le brouillage radioelectrique edicte par le ministere des
Communications du Canada.
Question and Answer IconNeed help?

Do you have a question about the Kurzweil Mark-Pro TWOi and is the answer not in the manual?

Kurzweil Mark-Pro TWOi Specifications

General IconGeneral
TypeDigital Piano
Number of Keys88
EffectsReverb, Chorus
DisplayLCD
Key ActionHammer action
ConnectivityUSB, MIDI
Polyphony64-note

Summary

Features

Installation

Checking the Parts

Verify all included parts before starting assembly.

Assembling the Stand

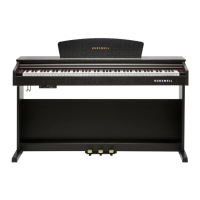
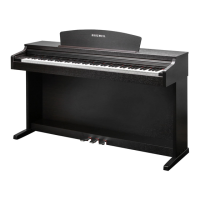
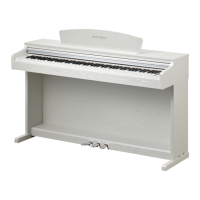
Instructions for assembling the digital piano stand.

Installing the Keyboard onto the Stand

Steps to securely place and attach the keyboard unit onto the assembled stand.

Power Supply

Details on connecting the digital piano to a power source.

Controlling the Main Volume

How to adjust the overall volume using the main volume knob.

The Controls & Connectors

The Front Panel

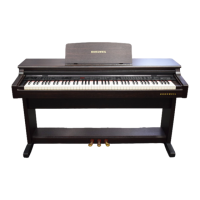
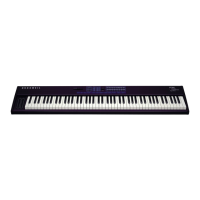
Overview of buttons, knobs, and display on the front of the instrument.

The Rear Panel

Identification of ports and connections on the back of the unit.

Bottom Surface

Location of headphone jacks and other connections on the underside.

The Keyboard

Description of the 88 weighted hammer action keys and their touch sensitivity.

The Pedals

Explanation of the functions of the sustain, sostenuto, and soft pedals.

Listen to the Demo Songs

Ensemble Demos and Piano Demos

Instructions for playing pre-programmed ensemble and piano demonstrations.

Instrumental Demos

How to select and play instrumental demonstrations.

Beyer

Information on using the Education mode for Beyer songs.

Voice Select

Layering Voices

How to combine two voices to create layered sounds.

Adjusting the Volume Balance

Steps to balance the volume levels of layered or split voices.

Left Split

Activate left Split

How to divide the keyboard into two sections with different voices.

Split Point

How to change the key where the keyboard is split.

Adjusting the Volume Balance

Adjusting the volume balance between the left and right keyboard sections.

Drum Maps

Kurzweil Map and GM ReMap

Explanation of the two available drum map settings for percussion sounds.

Drum Maps

Detailed chart showing keyboard notes and their corresponding drum sounds.

Reverbs and Effects

Reverbs

Explanation of reverb types and how to change reverb settings.

Changing Wet/Dry Mix

Adjusting the balance between the original sound and the reverb effect.

Effects

Information on available effects and how to change effect settings.

Recording and Playing

Recording

Steps for recording performances onto the instrument's song spaces.

Using the Metronome while recording

How to use the metronome during the recording process.

Seleting a track to recored

How to choose between Track 1 and Track 2 for recording.

Track Mute

Muting individual tracks during playback or recording.

Erasing a Recoreded Track

Procedure to delete recorded data from a track.

Start Recording with keyboard or Pedal

Methods to initiate recording using keys or pedals.

Playing Back

Instructions for playing back recorded performances.

Metronome

Adjusting Tempo

How to set the tempo for the metronome.

Tap Tempo

Using the Tap Tempo feature to set the metronome speed.

Rhythms

Selecting Rhythms

How to choose from the available rhythm patterns.

Playing Rhythms

Starting and stopping rhythm playback.

Changing Tempo

Adjusting the tempo of a selected rhythm.

Rhythm Volume

Controlling the volume level of the rhythms.

Transposition and Tuning

Transposition by Half Steps

Shifting the keyboard pitch up or down by half steps.

Fine Tuning within a Half Step

Adjusting the pitch by cents for fine-tuning.

Scale or Intonation

Selecting different tuning scales and intonations.

Like a Piano

Reset to Piano Voice

Returning the instrument to the default Grand Piano sound.

Piano Lock

Disabling non-piano functions for simpler operation.

Global

Local

Controlling local keyboard operation vs. MIDI device control.

Tune

Fine-tuning the keyboard pitch by cents.

Touch

Adjusting the keyboard's touch sensitivity levels.

DrumMap

Selecting between Kurzweil and GM drum maps.

USB

Configuring USB connectivity for external devices.

Intonation

Selecting alternative tuning scales and intonations.

Loop

Setting the playback mode for demo songs.

Reset

Returning the instrument to its factory default settings.

MIDI

MIDI Connection

Connecting the instrument to other MIDI devices via ports.

MIDI Channels

Understanding and using MIDI channels for communication.

MIDI Messages

Explanation of MIDI messages like Note On/Off and Control Change.

Audio In/Out

Audio In

Connecting external audio sources to the instrument.

Audio Out

Connecting the instrument's audio output to external devices.

Headphone Out

Using headphone jacks for private practice and speaker muting.

Appendix

Specifications

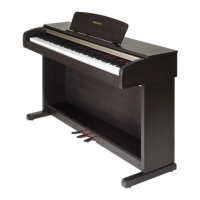
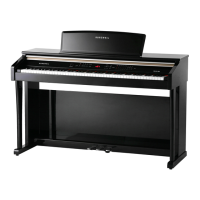
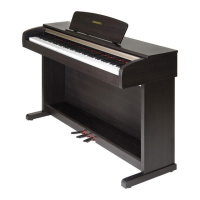
Technical details and physical characteristics of the instrument.

Voice List

A comprehensive list of all available instrument voices.

Piano Demo Song List

A list of classical piano pieces included as demo songs.

MIDI Implementation Chart

A technical chart detailing MIDI message support.

Related product manuals