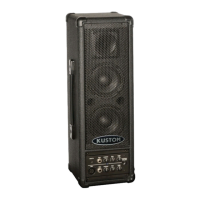
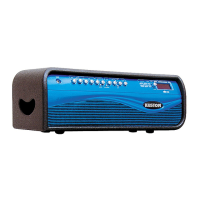
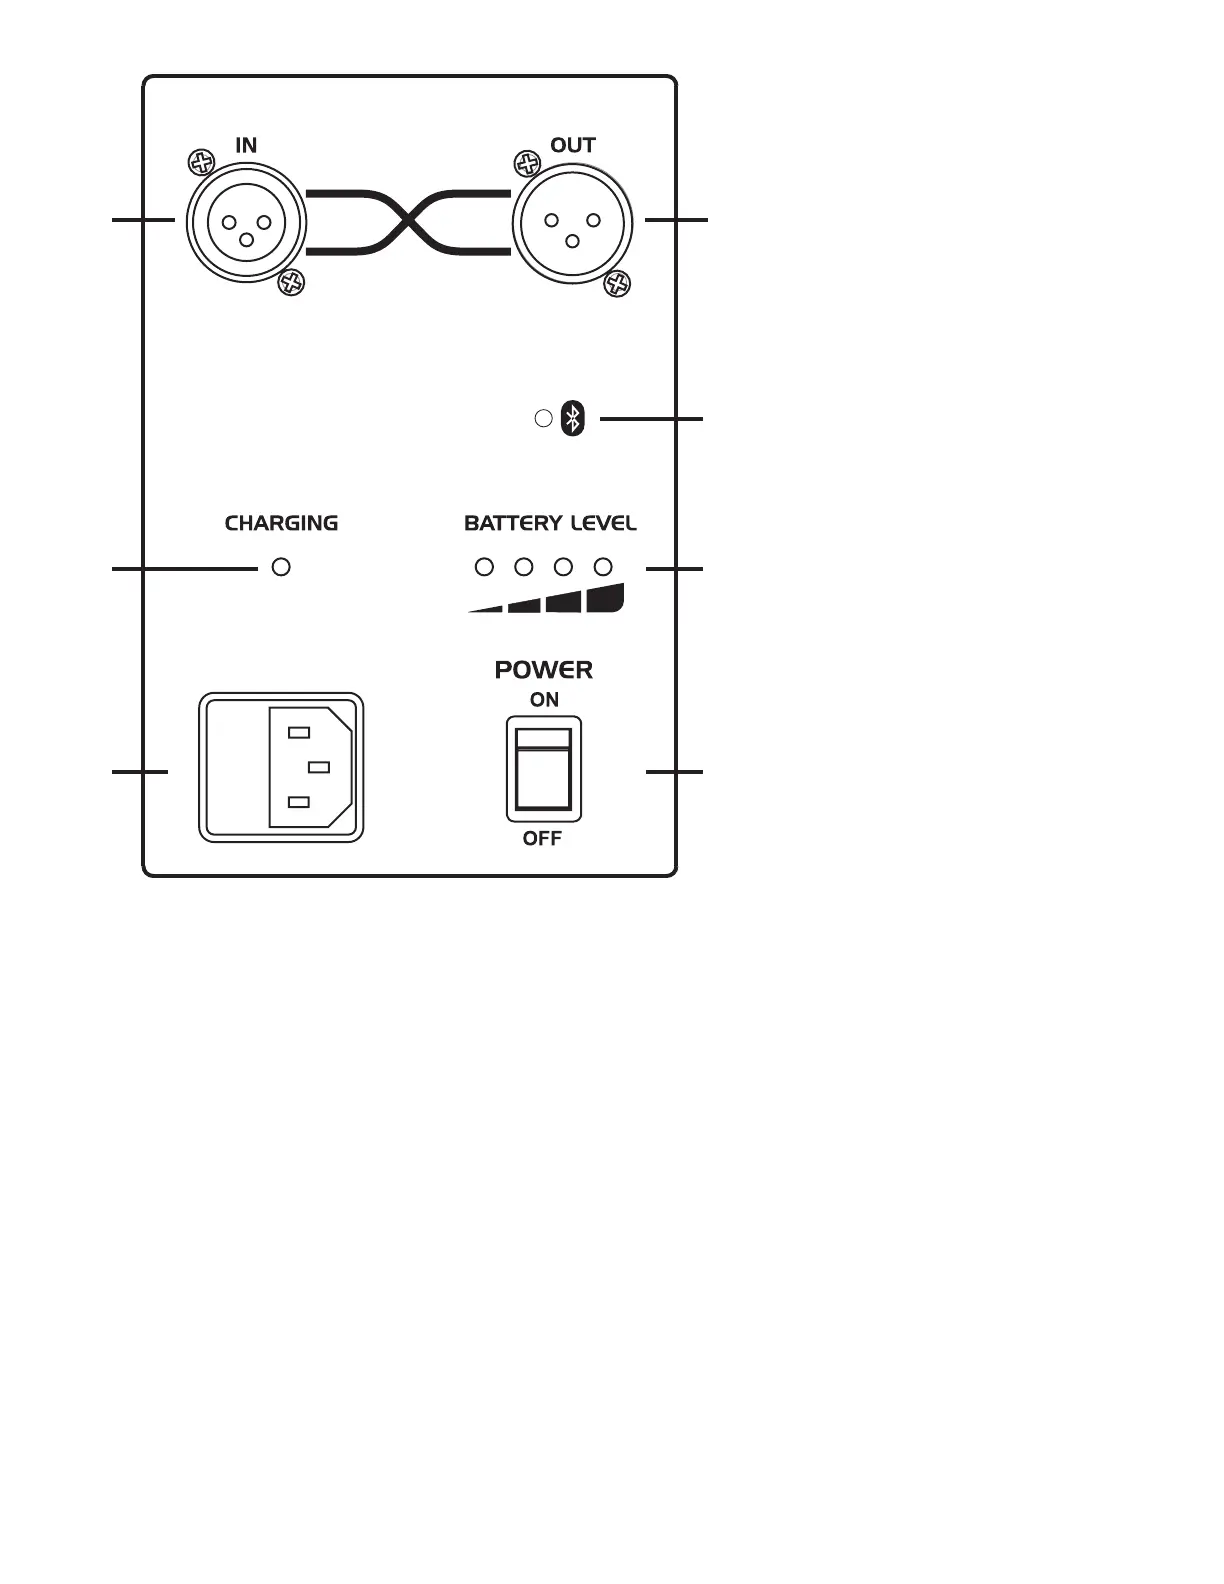
1. SYNC IN: This balanced XLR Jack accepts the SYNC output from another PA unit using a standard mic cable. Channels from both
units are summed together. Use the channel volume controls to get the mix of the channels (If a channel is not used turn the volume all
the way down). MASTER volume controls the loudness of the mix. It does not affect volume of a linked PA product.
Note: The shield connection (pin 1) on this jack is connected to chassis ground. It is not lifted.
2. SYNC OUT: This balanced XLR Jack accepts the SYNC input from another PA unit using a standard mic cable. Channels from both
units are summed together. Use the channel volume controls to get the mix of the channels (If a channel is not used turn the volume all
the way down). MASTER volume controls the loudness of the mix through the primary unit, not the linked unit. This jack may also be
used to connect the PA product to the balanced line input of a power amp.
Note: The shield connection (pin 1) on this jack does not connect to chassis ground, it is lifted.
3. Bluetooth LED (PA40BATBT ONLY): Indicates that a Bluetooth equipped device has successfully paired with the PA40BATBT.
4. CHARGING LED: Indicates the battery is charging. It is recommended to charge for 12 hours after use. Battery charges even if the
unit is ON under normal volume conditions. When played loud, the battery will stop charging to allow higher power demand. To resume
charging, uplug AC power cord, then reconnect after 10 seconds.
Note: LED indicates “rapid charge” stage and will turn off when unit enters “oat charge” stage.
5. BATTERY LEVEL INDICATOR: During use, the BATTERY LEVEL indicator LED’s show the remaining battery power. When the red
light on the left is on, turn off the unit and recharge to avoid excessive battery drain.
6. AC Power Cord Receptacle: Insert the AC cord rmly into the AC receptacle. Power circuit is on whenever AC cable is connected
to unit and plugged into wall. Be sure to use the cable provided with your PA40BAT or PA40BATBT. The power cord can be removed
for storage or replacement if damaged. Note: Replace the AC cord if its protective jacket is damaged or ground pin is damaged or
removed.
7. Power: This switch activates power to the Battery Powered PA.
Note: Power is supplied to the unit for charging even if Power switch is off.
21
4
6
5
3
7
PA40BATBT:
BLUETOOTH PAIRING INSTRUCTIONS
To connect your Bluetooth device to the
Kustom Bluetooth receiver for the rst time,
navigate to the Bluetooth settings menu on
you Bluetooth enabled device. Ensure that
Bluetooth is enabled and your Kustom product
is powered on. Perform a scan for available
devices. Select and pair to the Kustom product
in the list of available devices. Enter 0000
for the passcode if prompted. Once paired, a
connection can be established. Depending
on the device, future connections may be
established automatically when a previously
paired Bluetooth device is in range of the
Kustom Bluetooth receiver.
The Bluetooth receiver in Kustom Bluetooth
products is an A2DP device and will work with
other A2DP compatible Bluetooth devices
including most smart phones. Additional
hardware and/or driver software may be
required for computers with integrated Bluetooth
adaptors due to a lack of support for A2DP
devices by some operating systems.
A2DP protocol only allows for one to one device
connections. Therefore, only one Bluetooth
device can be connected to a Kustom Bluetooth
product at one time. Similarly, a Bluetooth
device can only be connected to one Kustom
Bluetooth product at one time. Plugging a 1/8”
connector into the AUX jack disables the Kustom
Bluetooth receiver.
SYNC
 Loading...