EasyManuals Logo

KYORITSU New SNAP 7 User Manual

KYORITSU New SNAP 7
12 pages
To Next Page IconTo Next Page
To Previous Page IconTo Previous Page
Page #4 background imageLoading...
Page #4 background image
NOTE: I()
F,NSI.,.RIJ
T}IE
N{AXI]\{LiN'I tsA.I.].F:RY
1,IFI],
BE SURE
TO
SWITC}{
OI..F
l'lilr l-O\\'I'lR I'.XCI:-P'|
WIILN MIIASLIRING CLRRtNT.
\IOLl',\(llr
:'IrS'I
I.FAilS
AND OL{NtPR()Ittr:
\1US'f IIE LIll-'T
RFIN{OVEI)
i'l{.OU
iiii lNSl RLirl!i:.N'i
\\}ll:.}i NO'l RI'l()tilRtD
IiOR
!{EASLiRFINIt'INTS
I
PRELIMINARY
INSTRUCTION
After
unpacking
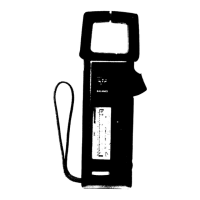
the KEWSNAP-7
you
will find one 9v
llveready
216(006P)
battery
and
one l.-5V
L,veready 815(UM-3)
battery
(for
ohmprobe) inside
the box
with the instrument.
Ilelore
proceeding
with measurements,
install
the
Eveready 216
battery
into
the battery
contpartment(Fig.2)
of thc
instrument
by
rernoving two
screws
on the battery
compartment
covcr
(Fie.
l).
Fig.-
1
Fig.-2
As
for the.[veready
815
battery,
refer to
Fig.
21,
page
9.
T
CHECKING
BATTERY
\\ll!-\
('1lF-CKIN(;
BAf
lL,RY.
I,lAKt'l SURt:
ll{Af
-flita
I i-jN{'l
I(lN 3l-.ill(l'f()R
-c'"VIl(
ll
lS
FLA{.'ID 1N
"flih
"UA'f'I'.OI;F"'
POSIl'lON.
Aftrrr the
battery
installation
insert the
prod of the
voltage.
test lcad
into the
"BATT.CHECK"
aperture
located on the
bottom
of the instrument
(Fig.
3).
lf
the mctcr
pointer
cleflects
and stays
within the
"BATT.OK"
area
of thc
scale, the
battcry
is o.K.
Rcplace
the battery
if the
pointer
does
not deflect
up
to
thc
"BATT.OK"
area
(Fig.
4).
F is.-3
(3)
Fin
-A

Questions and Answers:

Question and Answer IconNeed help?

Do you have a question about the KYORITSU New SNAP 7 and is the answer not in the manual?

KYORITSU New SNAP 7 Specifications

General IconGeneral
BrandKYORITSU
ModelNew SNAP 7
CategoryMultimeter
LanguageEnglish

Related product manuals