Do you have a question about the La Crosse Technology 513-1417ALv4 and is the answer not in the manual?
Guides users through initial clock setup including language, time zone, and display preferences.
Explains how the clock synchronizes with atomic time signals and manual search options.
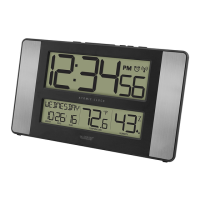
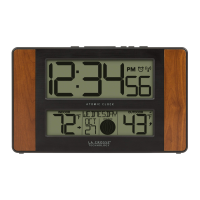
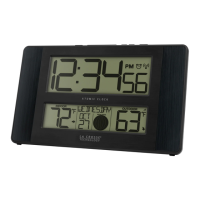
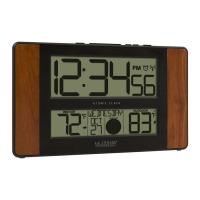
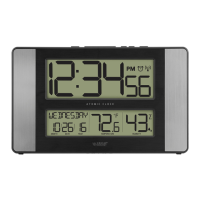
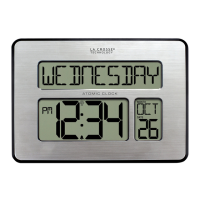
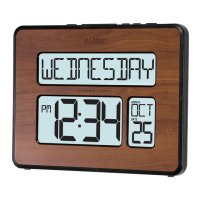
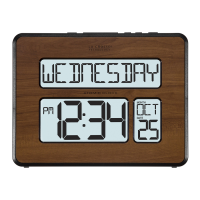
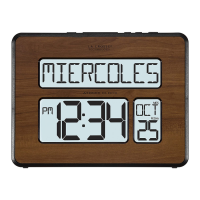
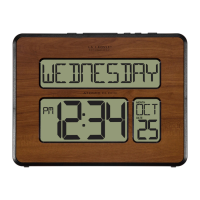
This document describes the La Crosse Technology Atomic Digital Clock with Temperature and Moon Phase, model 513-1417ALv4. This device is designed to provide accurate time, indoor and outdoor temperature readings, and moon phase information. It features an atomic clock for precise timekeeping and a remote sensor for outdoor temperature monitoring.
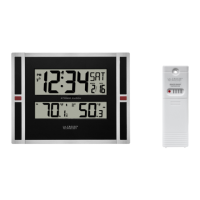
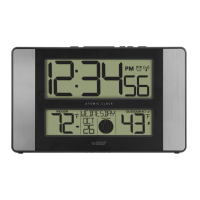
The core function of this device is to display the current time, which is automatically synchronized via an atomic time signal. This ensures high accuracy without manual adjustment. The clock also displays the indoor temperature, measured by a built-in sensor, and the outdoor temperature, received wirelessly from a remote sensor. A unique feature is the moon phase display, which is calculated based on the lunar calendar and the date settings. Additionally, the clock includes an alarm function, allowing users to set a specific time for an audible alert. The display also incorporates trend arrows for temperature, indicating whether the indoor and outdoor temperatures are rising, falling, or remaining unchanged. A low battery indicator is present for both the main clock and the remote sensor, prompting users when to replace batteries.
To begin using the clock, first insert two AA batteries into the remote sensor, observing correct polarity. Then, insert two AA batteries into the main clock unit, also ensuring correct polarity. After powering up, the clock will be ready for initial configuration.
To access the settings menu, press and hold the "SET" button for three seconds. Once in the menu, use the "+/-" buttons to adjust values and press "SET" to confirm each selection. The settings menu follows a specific order:
The clock automatically searches for the atomic time signal at UTC 7:00, 8:00, 9:00, 10:00, and 11:00. To manually initiate a search for the atomic time signal, press and release the "SET" button. The atomic time signal ensures accurate timekeeping. For more information about WWVB, the atomic time signal source, you can visit the provided URL.
For optimal performance, place the outdoor sensor in a shaded location. A north-facing wall or under an eave or deck rail is recommended. This helps ensure accurate temperature readings by avoiding direct sunlight. The sensor has a maximum wireless transmission range of over 300 feet (91 meters) in open air, but this range can be reduced by barriers such as walls or floors. Ensure the outdoor sensor is mounted vertically.
The clock display includes several icons to convey information:
To set the alarm, press and hold the "ALARM" button for three seconds. Use the "+/-" buttons to adjust the hour and minutes, and press "ALARM" to confirm. The alarm is active when the clock icon is displayed. To deactivate or activate the alarm, simply press and release the "ALARM" button. To silence a sounding alarm for 10 minutes, press and release the "SNOOZE" button. The snooze function can be repeated.
To view the highest recorded temperature, press the "PLUS" button. Press it again to view the lowest recorded temperature. To reset both the HI and LO temperature records, hold the "PLUS" button for five seconds. All records automatically reset at midnight.
The outdoor temperature trend indicators update every 15 minutes. They compare readings from the past hour, updating every 15 minutes. The arrows will change if the temperature rises or falls by 2°F (1°C) or more within that hour. An upward arrow indicates rising temperature, a downward arrow indicates falling temperature, and a horizontal arrow indicates an unchanged temperature.
The moon phase display is based on the lunar calendar and the Year, Month, and Date settings configured in the clock. It categorizes moon phases into New Moon, Small Waxing Crescent, Large Waxing Crescent, First Quarter, Small Waxing Gibbous, Large Waxing Gibbous, Full Moon, Large Waning Gibbous, Small Waning Gibbous, Last Quarter, Large Waning Crescent, and Small Waning Crescent.
The clock features a pullout stand for desk or table placement and openings on the back for wall mounting. For optimal atomic time reception, orient the clock with its front or back facing Ft. Collins, Colorado. It should be placed at least six feet away from other electronics like cordless phones, gaming systems, televisions, microwaves, and routers to avoid interference. Ensure the clock is within range of the outdoor sensor (up to 330 feet in open air).
If the outdoor readings show dashes, follow these steps:
Proper battery maintenance is crucial for the longevity and performance of the device:
If the sensor signal is lost, hold the "-" button for three seconds to search for the sensor. The signal strength icon will flash until the sensor signal is received or for three minutes if no signal is available. Once connected, the signal icon will appear solid.
The battery icon on the display indicates when the clock's batteries need to be changed. A separate battery icon for the outdoor temperature indicates when the sensor's batteries require replacement.
Mount the outdoor sensor on a north-facing wall or in any well-shaded area, such as under an eave or deck rail, to ensure accurate temperature readings. The sensor should be mounted vertically. The maximum wireless transmission range is over 300 feet (91 meters) in open air, but walls or floors can reduce this range.
La Crosse Technology encourages users to share ideas for features or support solutions via email. They also maintain a presence on social media platforms (YouTube, Facebook, Twitter) for promotions, product support, and giveaways. Online video support is available via a provided URL, and the full manual can be found under the Support Tab on their website. For customer support, users can contact them by phone or visit their online help section.
| Display | LCD |
|---|---|
| Temperature Sensor | Yes |
| Humidity Sensor | Yes |
| Backlight | Yes |
| Snooze | Yes |
| Type | Atomic Clock |
| Power Source | Battery |
| Time Display | 12/24-hour format |
| Time Signal Reception | Yes |
| Time Zone | Automatically updates to local time zone |