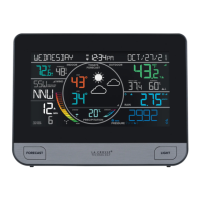
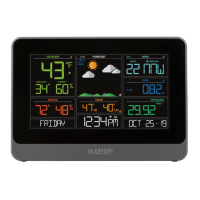
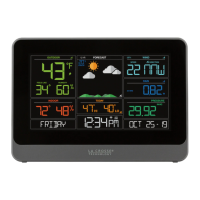
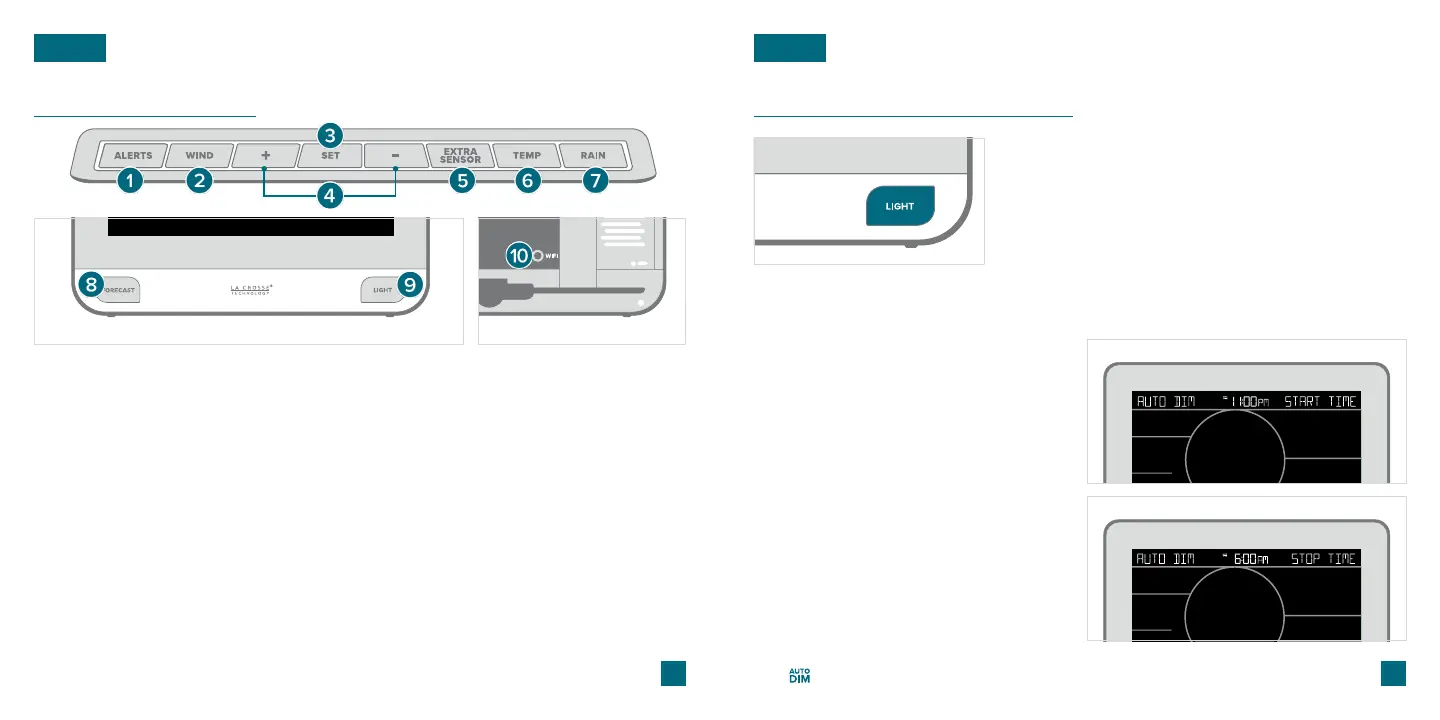
Buttons
BASICS
1. ALERTS: Hold to enter Alert Settings. Press to
confirm and move to next item.
2. WIND: Press to view Wind Speed History.
While viewing, hold the MINUS button to reset
the history value.
3. SET: Press to view Wi-Fi status. Hold to enter
Settings Menu.
* Your display must be connected to Wi-Fi to receive Daily/Hourly forecast information.
Please Note: Only the hour can be set.
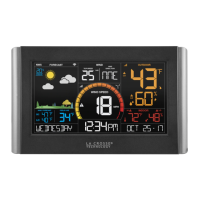
07
LCD Display Brightness
Auto-Dim Settings
Program your display to automatically dim during preselected times.
The icon will appear on the LCD when the Auto-Dim feature is activated.
BASICS
08
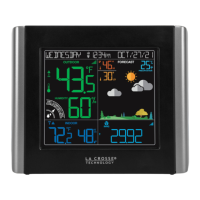
6. TEMP: Press to view Temp. & Humidity History.
While viewing, hold MINUS button to reset the
history value. Hold to search for TH reading.
7. RAIN: Press to view Rain History. While viewing,
hold the MINUS button to reset the history value.
5. EXTRA SENSOR: Press to view sensor ID
numbers. Hold to add sensors. While viewing,
hold the MINUS button delete the sensor.
4. PLUS/MINUS (+/-): Use to adjust values.
When in Alert Settings, press to arm/disarm alert.
10. WIFI: Press during initial setup for Wi-Fi
Connection. Hold to re-enter Configuration
Mode and clear previous Wi-Fi settings.
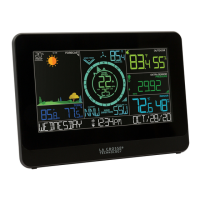
Adjusting the LCD Display Brightness
Press the LIGHT button on the front of the station
to adjust the backlight intensity. There are 4
brightness levels, plus an o option.
1. Hold the LIGHT button to enter
the Auto-Dim Settings Menu.
2. Press the +/- buttons to turn the
Auto-Dim feature on or o. Press
LIGHT to confirm.
3. Press the +/- buttons to adjust
the starting hour. Press LIGHT to
confirm.
4. Press the +/- buttons to adjust the
stopping hour. Press LIGHT to
confirm and exit.
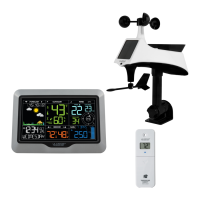
Front of Station Back of Station
8. FORECAST: Press to see Daily or Hourly
Forecast. Hold to auto-scroll Forecast data.*
9. LIGHT: Press to adjust backlight. Hold to enter
Auto-Dim settings.