Connection and Operation
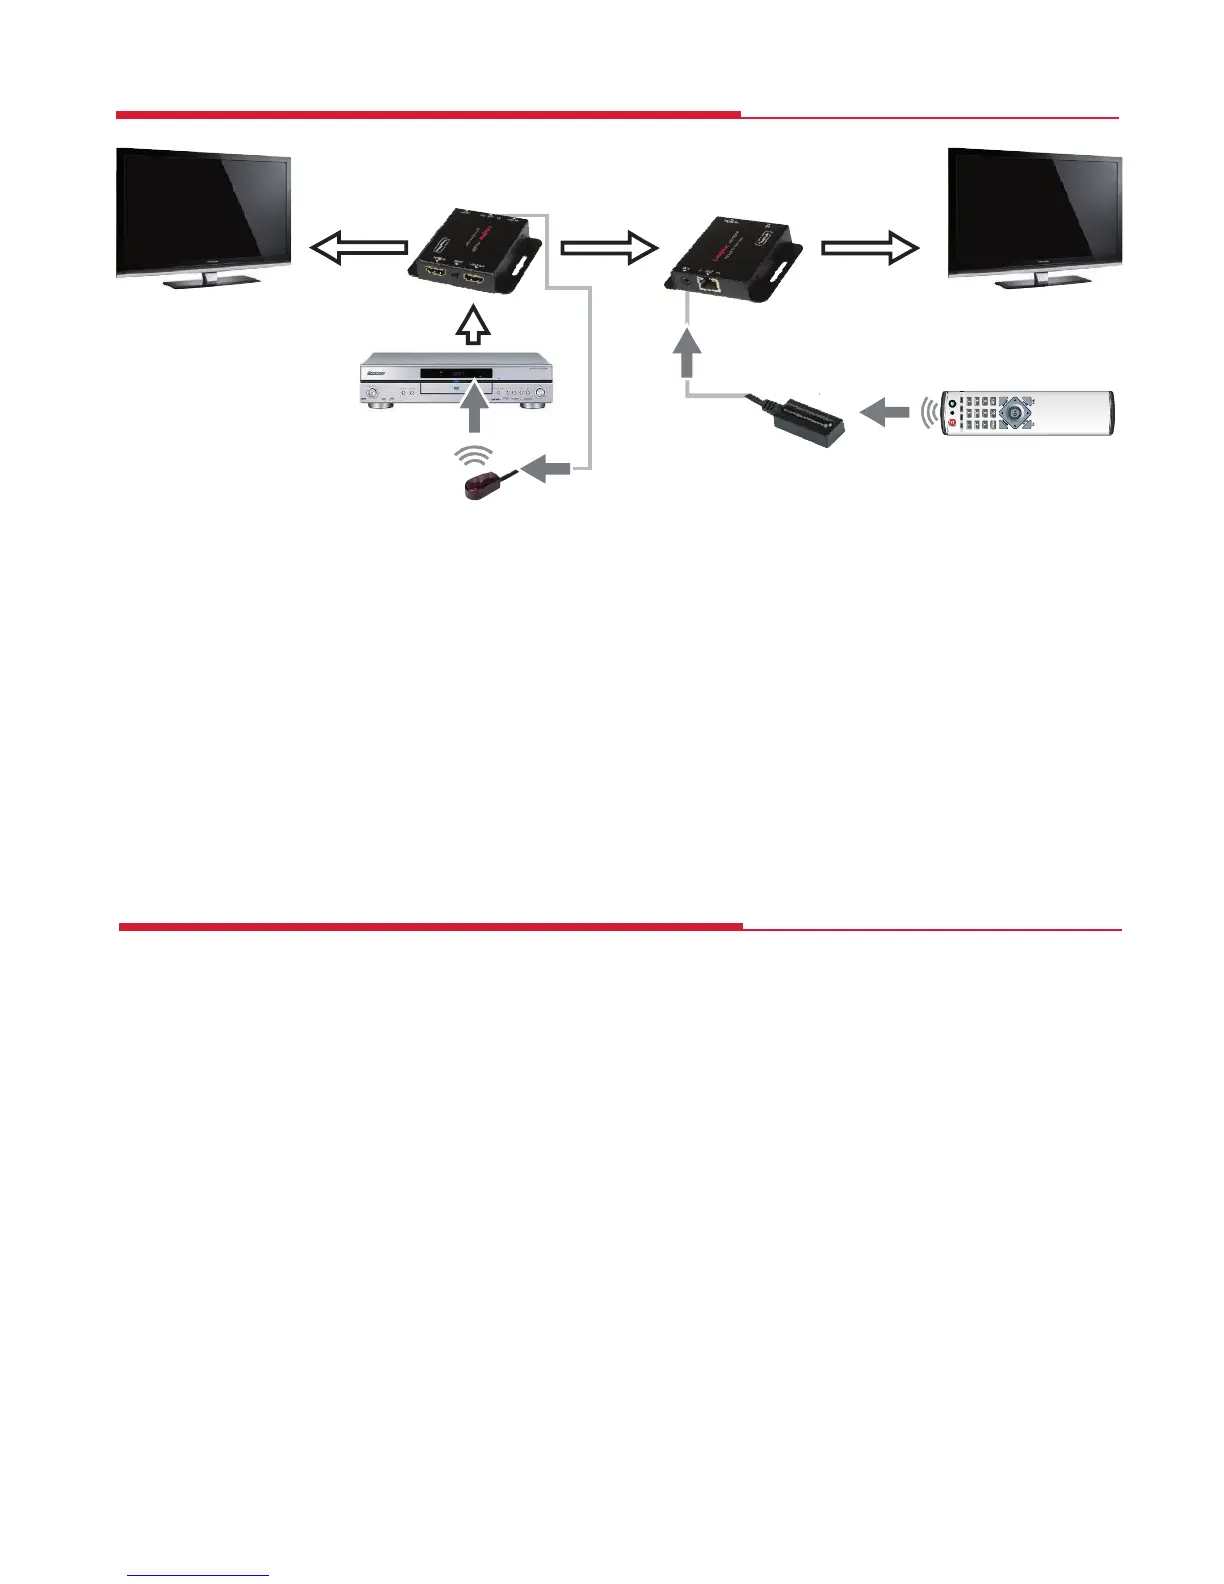
1. Connect a source such as a Blu-Ray Player, game console, A/V Receiver, Cable
or Satellite Receiver, etc. to the HDMI input on the Transmitter.
2. Connect a display such as an HDTV or HD Projector to the HDMI output on
the Receiver.
3. Connect a single CAT 5e/6/7 up to 60m long to the CAT output of the
Transmitter and the other end to the CAT input of the Receiver.
4. Plug the power supply into the Transmitter DC5V power socket and plug the
power adaptor into a mains socket.
5. Switch on the source and display(s).
At this point any displays connected to the Transmtter and Receiver should
display the signal from the source device connected to the Transmitter.
If no signal is being displayed, check the Receiver EQ switch setting is suitable for
the cable length.
If a display is not receiving a good signal, use the EDID switch to copy the EDID
information to the source (see the EDID section on page 4) or access the display’s
menu and adjust the resolution (lowest to highest until a good picture displayed).
N.B. A 24Hz vertical refresh rate may work better than 60 Hz or higher.
Use the source remote pointed at the IR Receiver sensor to test IR functionality.
If the IR remote function is not responding, check that the IR Blaster and Receiver
are placed correctly and are plugged into the correct IR sockets on the Extender
Receiver and Transmitter.
DVD
TX
IR Receiver
HDMI Cable HDMI CableNetwork Cable
RX
HDMI Cable
TV
Troubleshooting
6