23
the palm of your hand to knock the wheel
out of the front fork.
(f). Lafree’s support stand will hold the bike
upright, but for additional safety we
recommend that you place a support
under the fork for added stability. Do not
let Lafree rock forward onto the fork so
that the fork is touching the ground as
damage can occur to the lead acid
battery.
WARNING: Lafree’s lead acid battery
must never be laid on it’s side or tilted
in any way. If removing the front wheel,
do not let Lafree rock forward onto the
fork so that the fork is touching the
ground as damage can occur to the
lead acid battery.
7.7.4 Installing a Quick-Release Front
Wheel
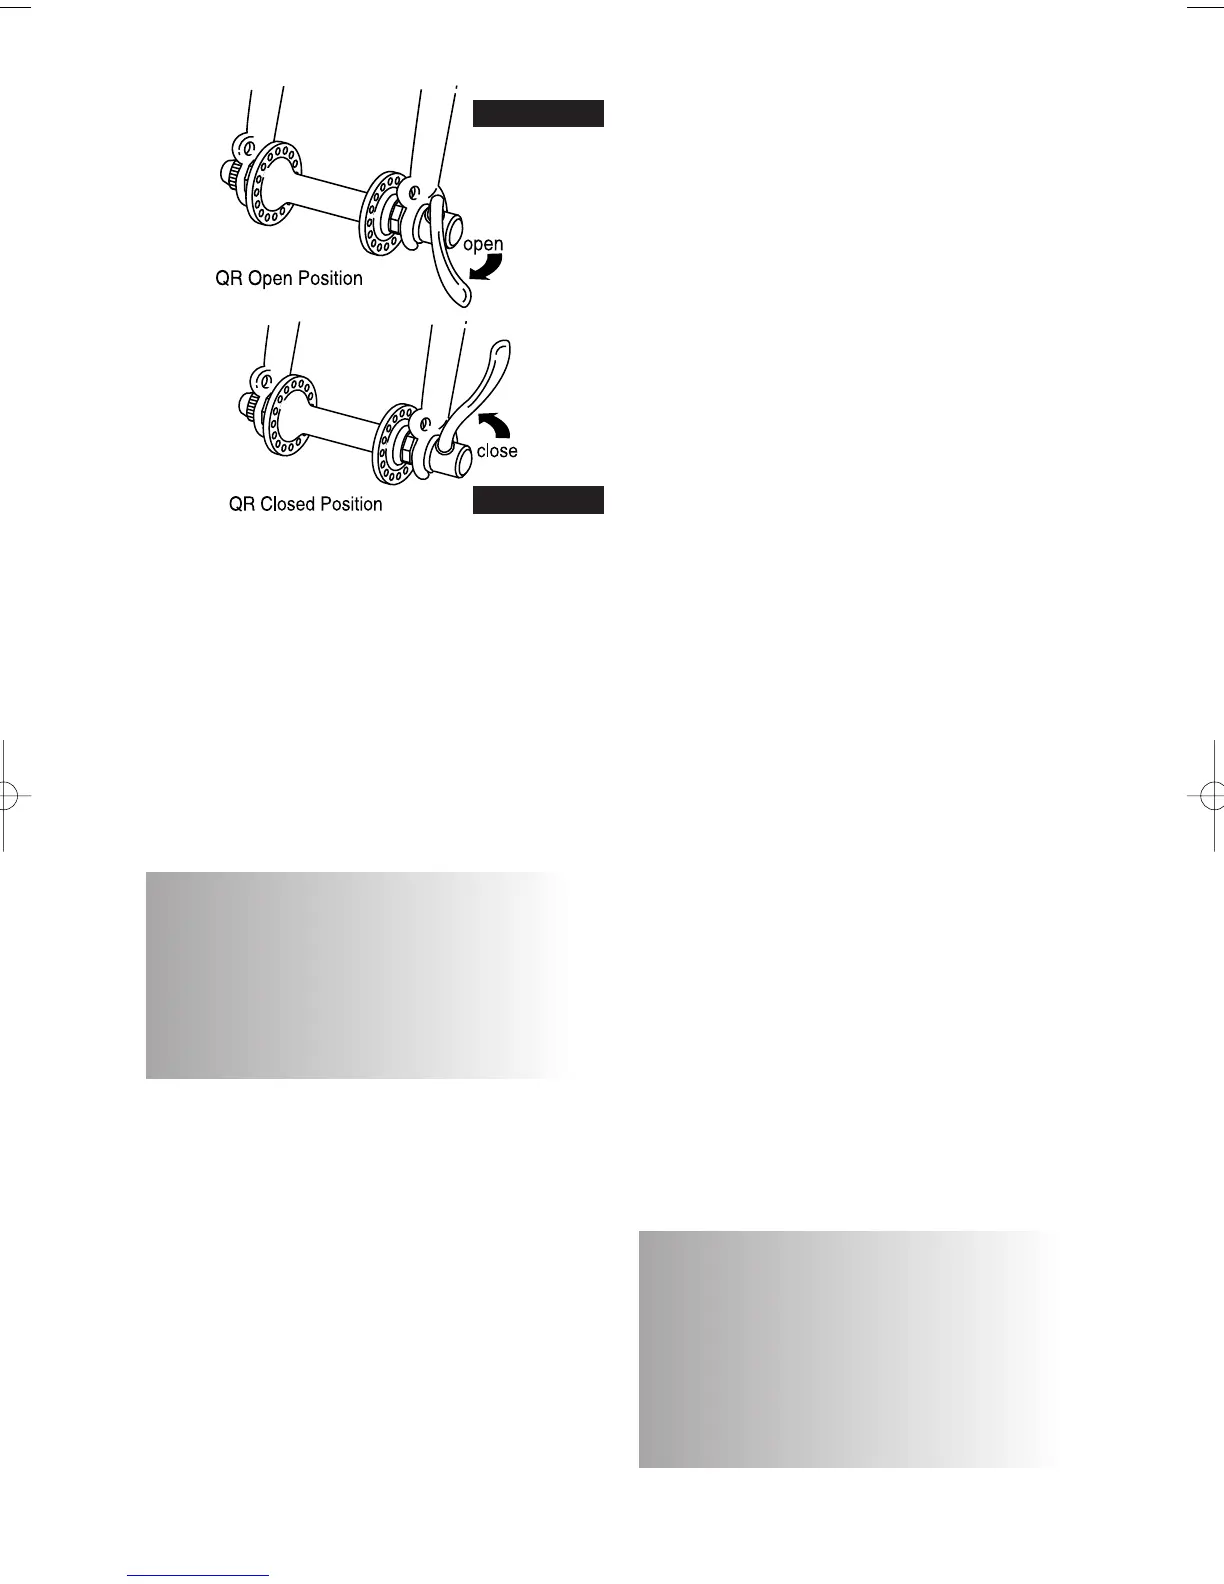
(a) Rotate the quick-release lever so that it
curves away from the wheel (Fig. 7C).
This is the OPEN position (you can read
OPEN on the lever).
(b) Remove support from under fork. With the
fork facing forward, insert the wheel
between the fork blades so that the axle
seats firmly to the top of the slots which
are at the tips of the fork blades - the fork
dropouts. The quick-release lever should
be on the left side of the bicycle (Fig. 7F).
(c)
Holding the quick-release lever in the
OPEN position with your right hand,
tighten the tension adjusting nut with your
left hand in a clockwise direction until it is
finger tight against the fork dropout (Fig.
7D).
(d)
While pushing the wheel firmly to the top
of the slots in the fork dropouts, and at the
same time centring the wheel rim in the
fork, rotate the quick-release lever
upwards and push it into the CLOSE
position (Fig. 7G). To do this use the palm
of your hand while wrapping your fingers
around the right fork blade and squeezing
the lever closed using your fingers and
hand together. You have the proper
tension if the lever leaves an impression
in the palm of your hand. The lever should
be parallel to the fork blade/pointing
upward and curved toward the wheel.
CAUTION: If you can fully close the quick-
release without wrapping your fingers around
the fork blade for leverage, and the lever does
not leave a clear imprint in the palm of your
hand, the tension is insufficient. Open the
lever; turn the tension adjusting nut clockwise
a quarter turn; then try again.
(e) If the lever cannot be pushed all the way
to a position parallel to the fork blade,
return the lever to the OPEN position.
Then turn the tension adjusting nut
counterclockwise one-quarter turn and
close the lever again.
(f) Reattach the elbow cable guide to close
the brake shoes; then spin the wheel to
make sure that it is centred in the frame
and clears the brake shoes.
WARNING: Secondary retention
devices are not a substitute for correct
quick-release adjustment. Failure to
properly adjust the quick-release
mechanism can cause the wheel to
wobble or disengage, which could
cause you to lose control and fall,
which may result in serious injury.
FIGURE 7F
FIGURE 7G
0288 Opm Binnenwerk 11-02-2000 10:46 Pagina 23