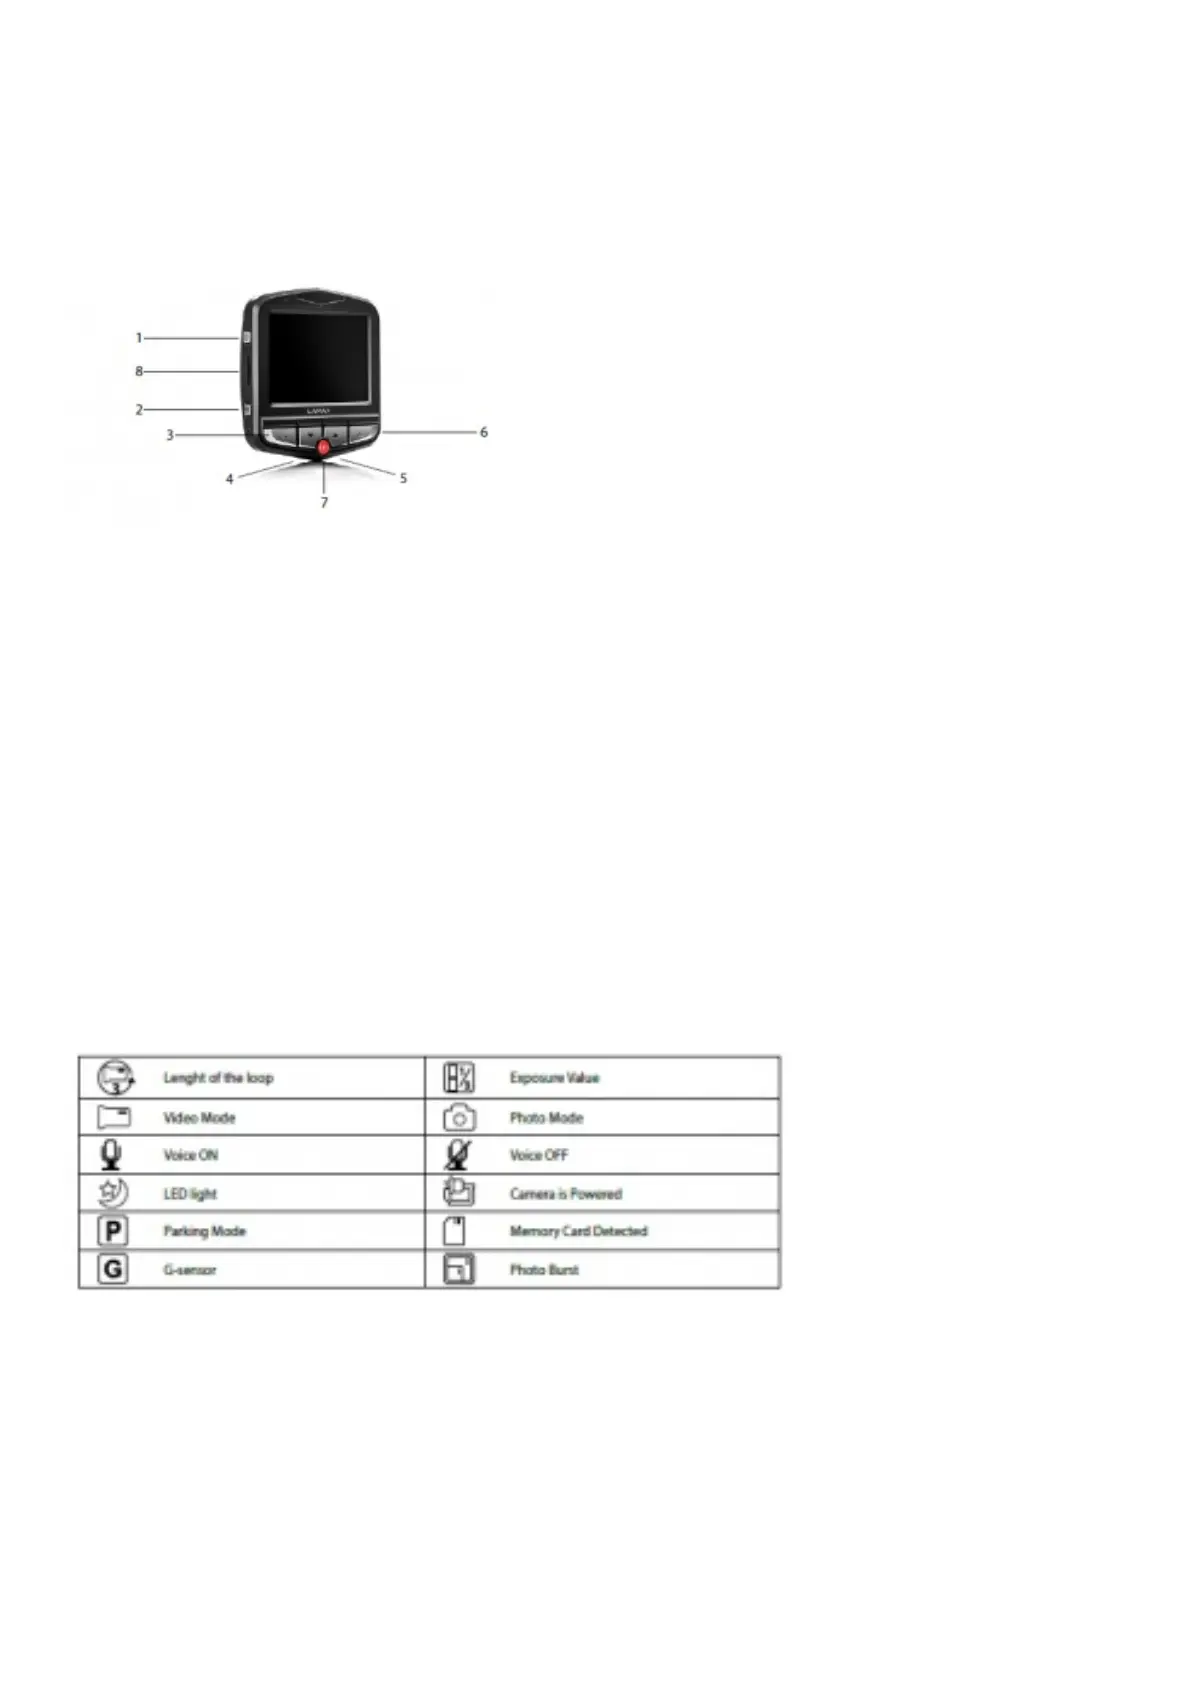
Product picture
1. ON/OFF
2. Menu
3. OK (shutter)
4. Down arrow
5. Up arrow
6. Mode
7. Parking mode
8. Micro SD card slot
Product installation
1. Connect the power cable to the cigarette lighter. Ensure the cable is placed around the windscreen so as not to obstruct the driver’s view and
then fix it securely in place. Attach the device between the glass and the mirror. This will give you the optimal picture.
2. Do not install in a position which obstructs the driver’s view or distracts them.
3. Some vehicles continue to supply power to the cigarette lighter, even when the engine is turned off. In this case, before leaving the vehicle,
unplug the cable from the cigarette lighter.
4. When using the device for the first time, the battery may be low. If you cannot switch on the device due to low power, manually connect the
external power cable to charge the battery.
5. Use only a high-quality micro SDHC card of class 10 or higher. For optimal recording use, we recommend cards with a capacity of at least 8GB
up to a maximum of 32GB. If this is the first use of the card, we recommend formatting it first.
Quick functions
1. LED light – tap the “ON/OFF” button.
2. Parking mode – hold the “PARKING MODE” button.
3. Switch OFF screen – tap the “PARKING MODE” button.
4. Audio recording – tap the “UP” arrow.
5. File lock – when recording video, lock the current recording by tapping the “MODE” button.
Icons annotation
Using the LAMAX C3 car camera
1. Inserting a micro SDHC card
Insert or remove the micro SDHC card from the card slot only when the camera is turned off and not connected to a computer or power supply.
2. Power
a) Camera can be powered using a USB cable connected to a computer or using the car cigarette lighter.
b) Camera is designed to be powered continuously. Built-in battery can not be removed or replaced.
c) Integrated battery is primarily for use in parking mode.
3. Turning the camera on and off
a) To switch on the camera, press the ON/OFF button.
b) Cameras automatically turns on when connected to a power supply.
c) To switch off the camera, press and hold the ON/OFF button for 3-5 seconds.
d) Camera automatically turns off after disconnecting the power supply.
4. Changing modes and menu navigation