15
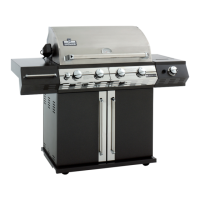
GRILLCHEF
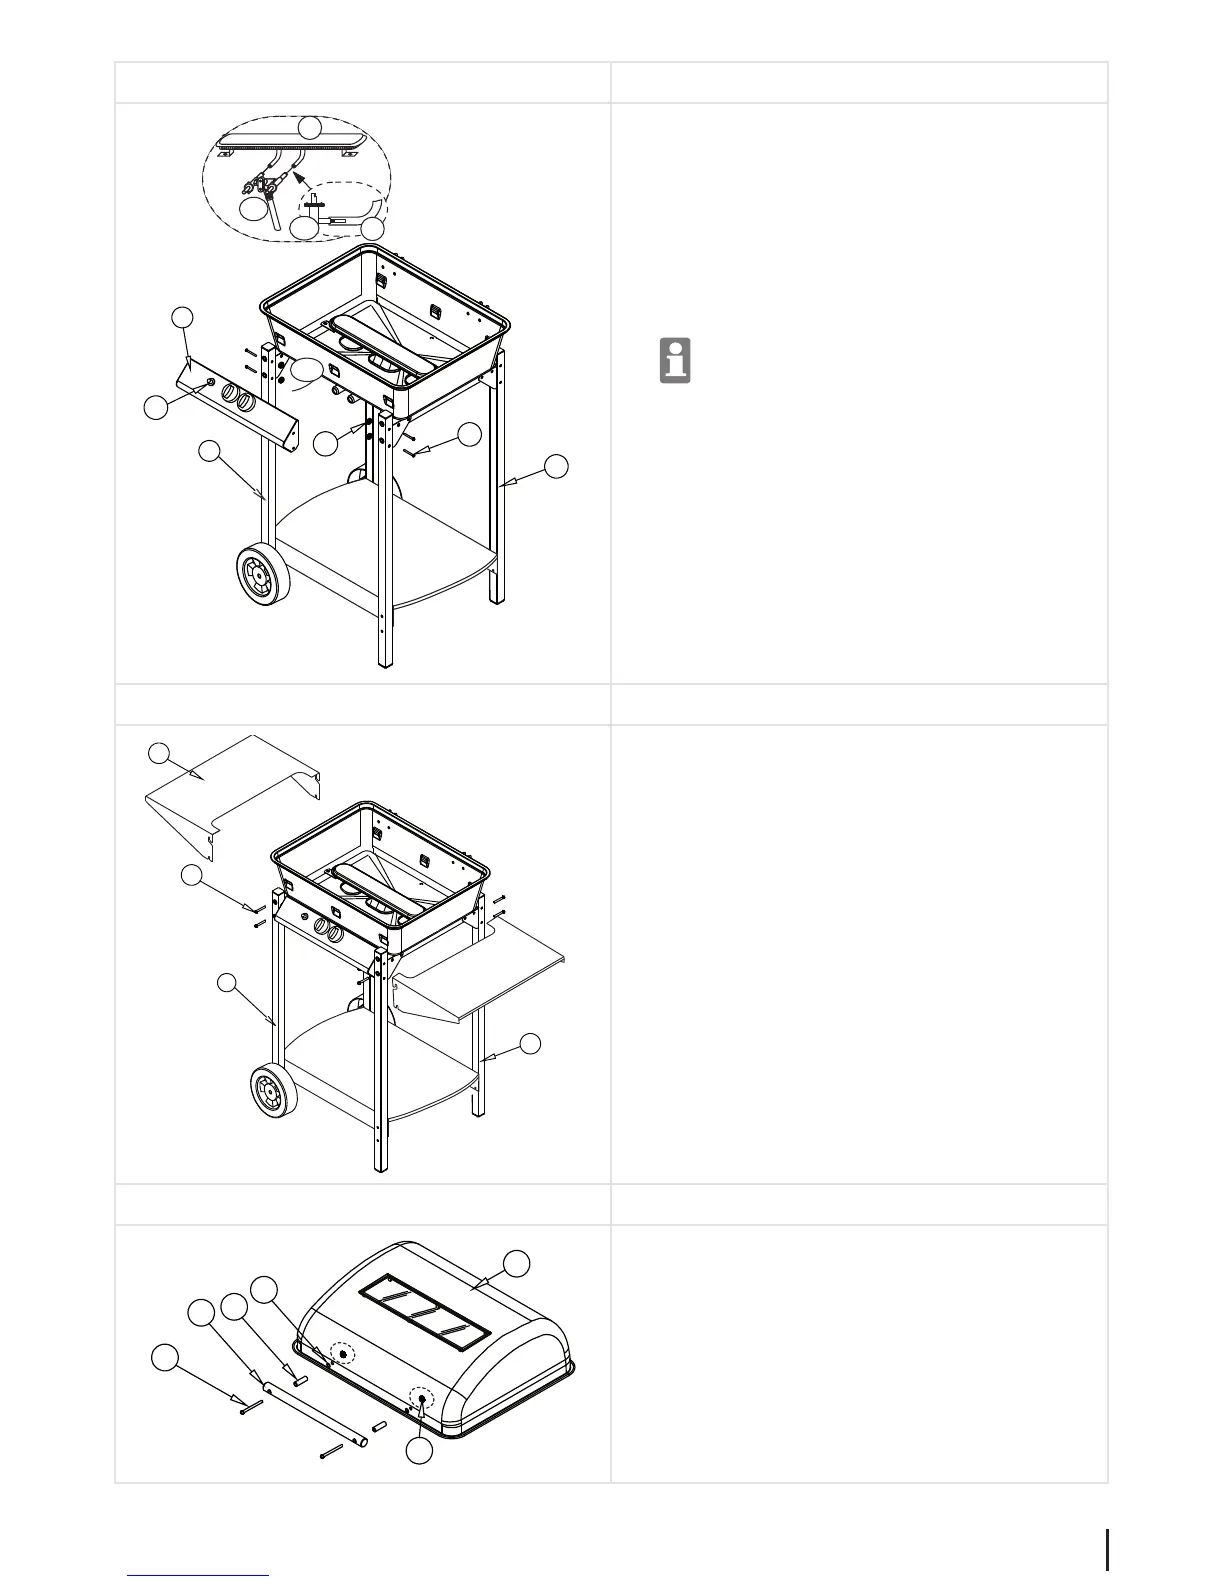
Assembly step 5
10
10
16b
16b
19
20
10b
24
16
31
28
• Connect the igniter cable (10b) to the pin on the Pi-
ezo igniter (31). Make sure that it is rmly secured in
place.
• Position the front panel (16) between the wheel leg
(20) and the standing leg (19) so that the nozzles of
the adjusting element (16a) are inserted in the burner
hoses (10a).
The loose contact between the burner hoses (10a)
and the nozzles on the adjusting element (16a) is
intentional, as a gas/air mixture is formed via the air
vents, without which the ame would not reach a suf-
cient temperature.
• Secure the left and right side of the front panel (16) to
the wheel leg (20) and the standing leg (19). Do this
using two M5x35 bolts (24) and M5 nuts (28).
• Check to ensure that the jet on the setting device (16a)
is inserted approximately 3 - 5 mm into the burner
hose (10a).
Assembly step 6
19
20
14
27
• First screw the lower holes of the side table (14) to the
legs (19 + 20).
Do this using M6x10 bolts with integrated sleeve
(27).
• Now screw the upper M6x10 bolts with integrated
sleeve (27) into the threaded holes and mount the
side table via the upper recesses.
Assembly step 7
28
31
5
6
7
1
• Attach the lid handle (6) to the lid (1) using M5x60
bolts (7), spacer sleeves (5), heat-resistant washers
(31) and M5 nuts (28).