Do you have a question about the Landmann REXON 3.1 and is the answer not in the manual?
Guidance on positioning the gas cylinder next to the barbecue for safe operation.
Statement of compliance with EU regulations for the gas appliance, including type examination details.
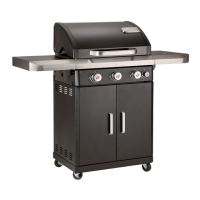
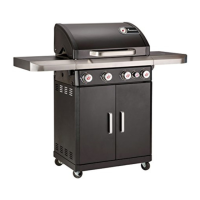
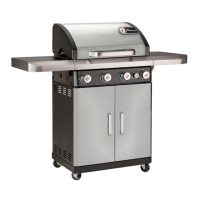
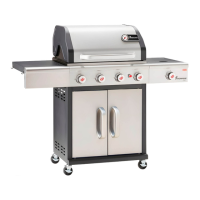
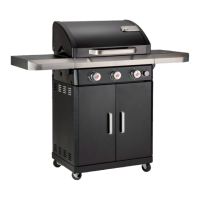
Identifies key control knobs and their functions on the barbecue.
Step-by-step guide to safely igniting the grill burners using the piezo ignition system.
Instructions for safely shutting down the barbecue by closing the gas supply.
Guidelines for using cookware on the side burner, specifying minimum and maximum diameters for stability.
Securing the bottom panel (9) using screws (A) and attaching wheel casters (10, 11).
Attaching the left side panel (13) to the base assembly using screws.
Attaching the right side panel (14) to the base assembly using screws.
Fitting the back panel (15) to the side panels using screws (A).
Mounting the sturt (16) to the side panels with screws (A).
Mounting the door handles (18) onto the doors (17) using screws (D).
Connecting the side panels (13, 14) to the top structure using screws (A).
Mounting the doors (17) onto the main frame with screws (D).
Fitting the pre-mounted burner unit (1) into the main body.
Mounting the lid hinge mechanism (16) to the main body.
Attaching the left (5) and right (6) side shelves to the grill body.
Installing the warming rack (2) onto the main grill structure.
Fitting the side burner rack (20) to the side of the barbecue.
Placing the cooking grills (3) into their designated positions.
Positioning the flame tamers (4) over the burners.
Fitting the grease tray (19) into its holder below the burners.
Placing the control knobs (A) onto the burner control shafts.
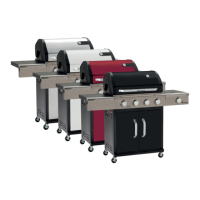
| Burners | 3 |
|---|---|
| Type | Gas Grill |
| Burner Material | Stainless Steel |
| Warming Rack | Yes |
| Thermometer | Yes |
| Ignition System | Piezo ignition |
| Model | REXON 3.1 |
| Ash Pan | No |
| Grill Material | Cast iron |
| Ignition Type | Piezo ignition |
| Grease Management System | Yes |
| Material | Steel, Enameled Cast Iron |
| Wheels | 2 |