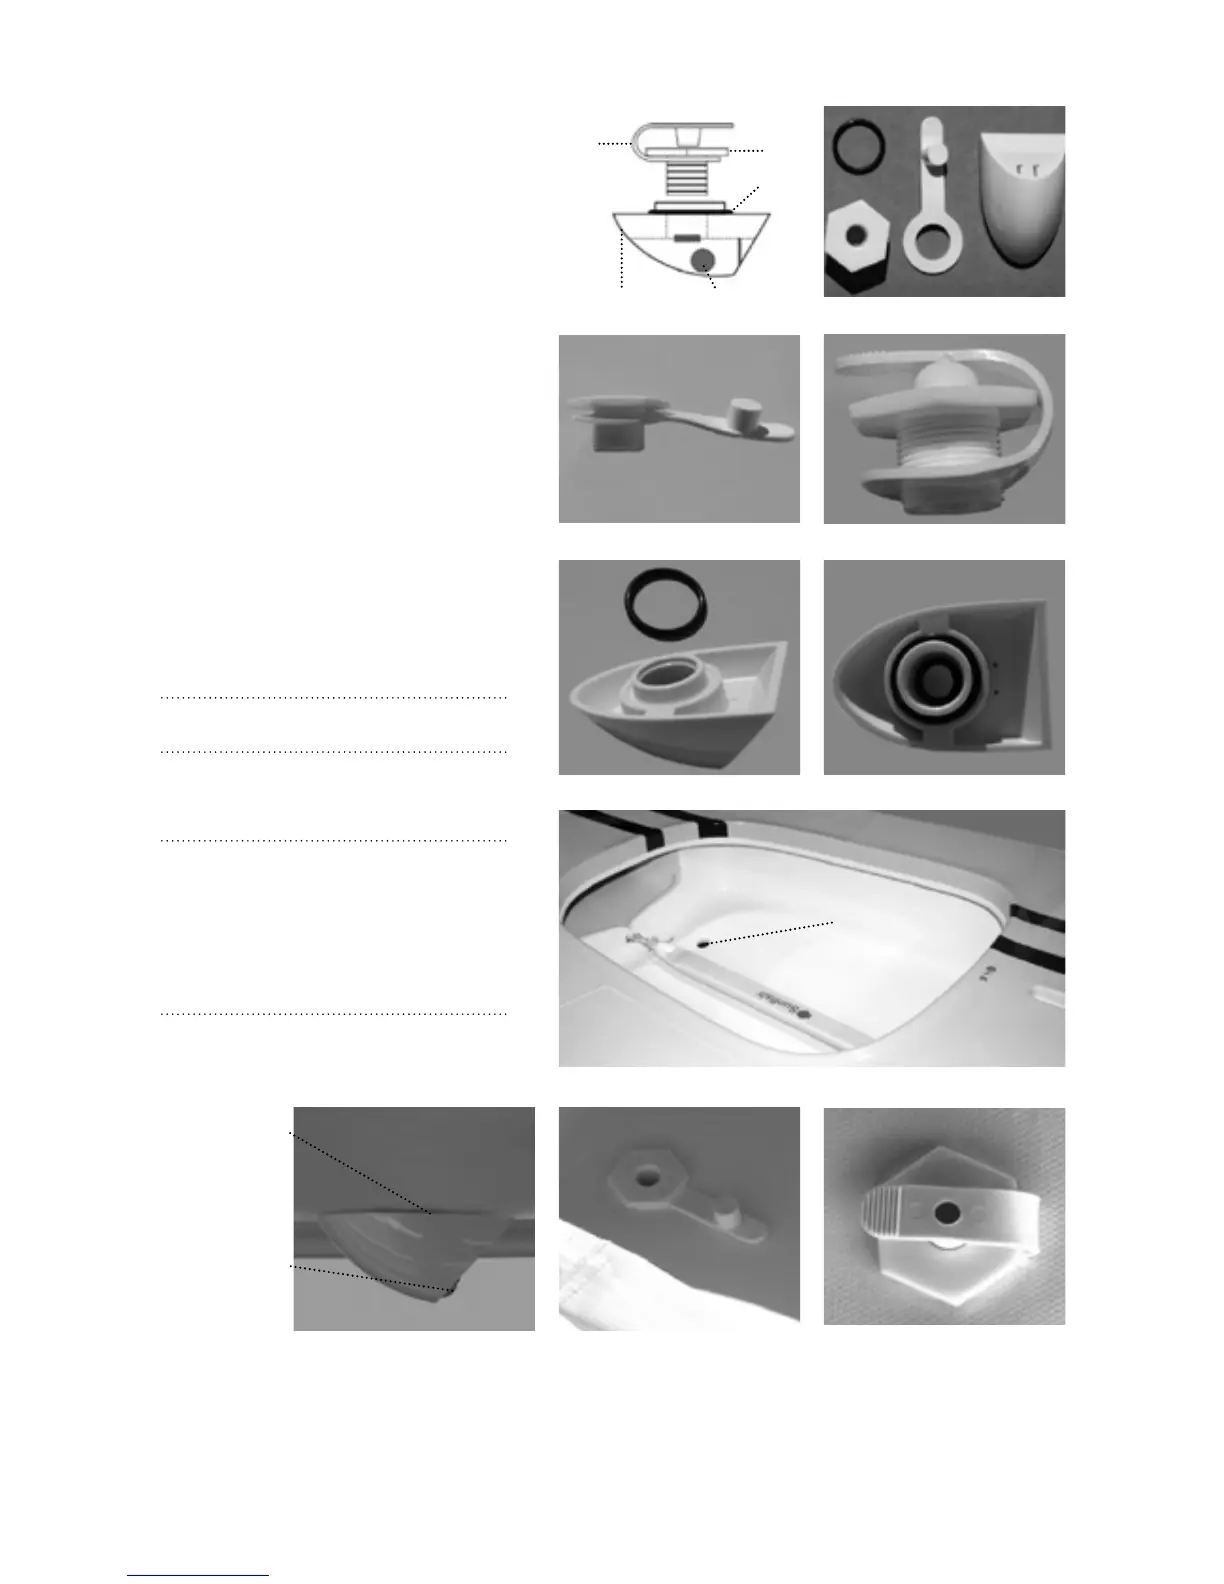
4. Bailer Installation
1. Locate the bailer O-ring (A), cap (B), plug
(C) and housing (D) from the delivery kit
(figure 7).
2. Fit the bailer cap into the hole of the
plug so that the plug stopper faces upward
(figure 8). Fold the rubber plug over the cap
to close (figure 9).
3. Locate the bailer housing and O-ring
(figure 10). Place the O-ring over the neck
of the bailer and push it down completely
(figure 11).
4. Locate the bailer opening in the cockpit
(figure 12). Take the bailer housing with
O-ring and place it under the hull, sliding
it up through the cockpit. Make sure that
the ball in the housing is facing towards
the stern of the boat (figure 13).
5. While holding the housing in place,
thread the bailer cap through the cockpit
hole and into the bailer housing. Tighten
the bailer so that it is hand tight.
Note: e bailer will not sit flush to the bottom of
the hull.
6. When open, the stopper of the bailer
plug should lie on the cockpit floor point
-
ing towards the bow (Figure 14).
Reminder: e bailer lets water out of the cockpit
while you are sailing. Insert the bailer plug in the
cap before launching and during sailing (Figure 15).
If the cockpit begins to collect water open the bailer
to release the water. Note: the boat needs to be mov
-
ing quickly in order to allow the water to release and
not take on more water at the same time.
figure 7
figure 8 figure 9
figure 11figure 10
figure 12
figure 15figure 14figure 13
PLUG
CAP
O-RING
BAILER BALLBAILER HOUSING
A
B
C
D
BAILER OPENING
SPACE BETWEEN
HULL AND BAILER
BALL TOWARD
STERN