Rev. C 8/05
8
2084537
Rev. C 8/05
1
2084537
1. Read all instructions before using Fan.
2. Make certain that the power source conforms to the electrical
requirements of the Fan.
3. Use this Fan only as described in this manual. Any other use
not recommended by the manufacturer may cause fire,
electrical shock, or injury to persons.
4. To reduce the risk of personal injury and electric shock, the
Fan should not be played with or placed where small
children can reach it.
5. Unplug power cord before installing, servicing, or moving the Fan.
WARNING: DO NOT DEPEND UPON THE ON-OFF
SWITCH AS THE SOLE MEANS OF DISCONNECTING
POWER WHEN INSTALLING OR SERVICING THE FAN.
ALWAYS UNPLUG THE POWER CORD.
6. This Fan must NOT be used in potentially dangerous locations
such as flammable, explosive, chemical-laden or wet atmospheres.
7. DO NOT use Fan in or near a window. Rain may create an
electrical hazard.
8. Completely assemble Fan, according to instructions, before
connecting to power supply.
WARNING: THIS APPLIANCE HAS A POLARIZED PLUG
(ONE BLADE IS WIDER THAN THE OTHER). TO REDUCE
THE RISK OF ELECTRIC SHOCK, THIS PLUG IS
INTENDED TO FIT IN A POLARIZED OUTLET ONLY ONE
WAY. MATCH WIDE BLADE OF PLUG TO WIDE SLOT,
FULLY INSERT. IF THE PLUG DOES NOT FIT FULLY INTO
THE OUTLET, REVERSE THE PLUG. IF IT STILL DOES
NOT FIT, CONTACT A QUALIFIED ELECTRICIAN. DO NOT
ATTEMPT TO DEFEAT THIS SAFETY FEATURE.
WARNING: THIS PLUG IS A SAFETY DEVICE. TO
REDUCE THE RISK OF FIRE, SHOCK, AND PERSONAL
INJURY, DO NOT REMOVE, REPLACE, REPAIR OR
TAMPER WITH THE ORIGINALLY SUPPLIED PLUG. IF THE
FAN DOES NOT FUNCTION PROPERLY, IT MAY BE DUE
TO THE SAFETY DEVICE INCORPORATED IN THIS PLUG.
RETURN TO AN AUTHORIZED SERVICE CENTER OR
CALL 800-233-0268, MONDAY THRU FRIDAY, BETWEEN
8:00AM AND 5:00PM EST. IF THE PLUG WARNING LABEL
IS MISSING OR DAMAGED, CALL THE TOLL FREE
NUMBER FOR A REPLACEMENT LABEL.
9. Where possible, avoid the use of extension cords. If they
must be used, minimize the risk of overheating by ensuring
that they are UL listed. Never use a single extension cord
to operate more than one Fan.
10.Do not operate any Fan with a damaged cord or plug or after
the Fan malfunctions, has been dropped or damaged in any
manner. Return Fan to authorized service facility for
examination, electrical or mechanical adjustment or repair.
11.Do not insert or allow fingers or foreign objects to enter any
ventilation or exhaust opening as it may cause an electric
shock or fire, or damage the Fan. Do not block or tamper with
the Fan in any manner while it is in operation.
12.Always place the Fan on a stable, flat, level surface when
operating, to avoid the chance of the Fan overturning. Locate
the Power Cord so the Fan or other objects are not resting on
it. Do not run Power Cord under carpeting. Do not cover Power
Cord with throw rugs, runners, or the like. Arrange Power Cord
away from room traffic and where it will not be tripped over.
13.This Fan is not intended for use in wet or damp
locations. Never locate a Fan where it may fall into a
bathtub or other water container.
14. Do not use Fan outdoors.
WARNING: REDUCE THE RISK OF FIRE OR ELECTRIC
SHOCK – DO NOT USE THIS FAN WITH ANY SOLID STATE
SPEED CONTROL DEVICES.
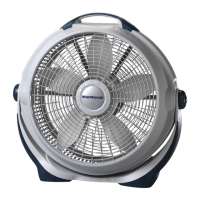
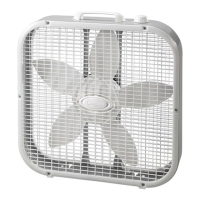
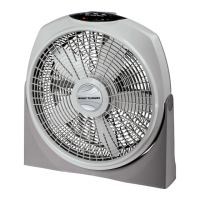
This Fan is for residential use only.
It is not intended to be used in commercial or industrial settings.
GENERAL SAFETY INFORMATION
When using electrical appliances, basic precautions should always be followed
to reduce the risk of fire, electric shock and injury to persons, including the following:
READ AND SAVE THESE INSTRUCTIONS
READ CAREFULLY BEFORE ATTEMPTING TO ASSEMBLE, INSTALL, OPERATE OR MAINTAIN THE PRODUCT DESCRIBED.
PROTECT YOURSELF AND OTHERS BY OBSERVING ALL SAFETY INFORMATION. FAILURE TO COMPLY WITH
INSTRUCTIONS COULD RESULT IN PERSONAL INJURY AND/OR PROPERTY DAMAGE!
RETAIN INSTRUCTIONS FOR FUTURE REFERENCE.
IMPORTANT INSTRUCTIONS -
OPERATING MANUAL
SAVE THESE INSTRUCTIONS
LASKO PRODUCTS, INC.
1700 Meacham Boulevard
Fort Worth, Texas 76106
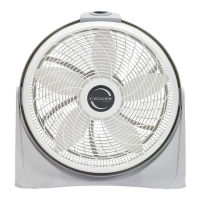
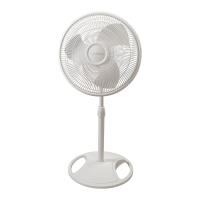
ASSEMBLY OF 12" and 16" OSCILLATING FANS
COMMERCIAL WARRANTY
This fan is warranted to be free from mechanical and electrical defects for a period of one year from the
date of purchase when used under normal conditions and serviced properly. If this product is determined
to be defective, notify:
CUSTOMER SERVICE DEPARTMENT
300 Confederate Drive • Franklin, TN 37065-0569
Phone (800) 233-0268