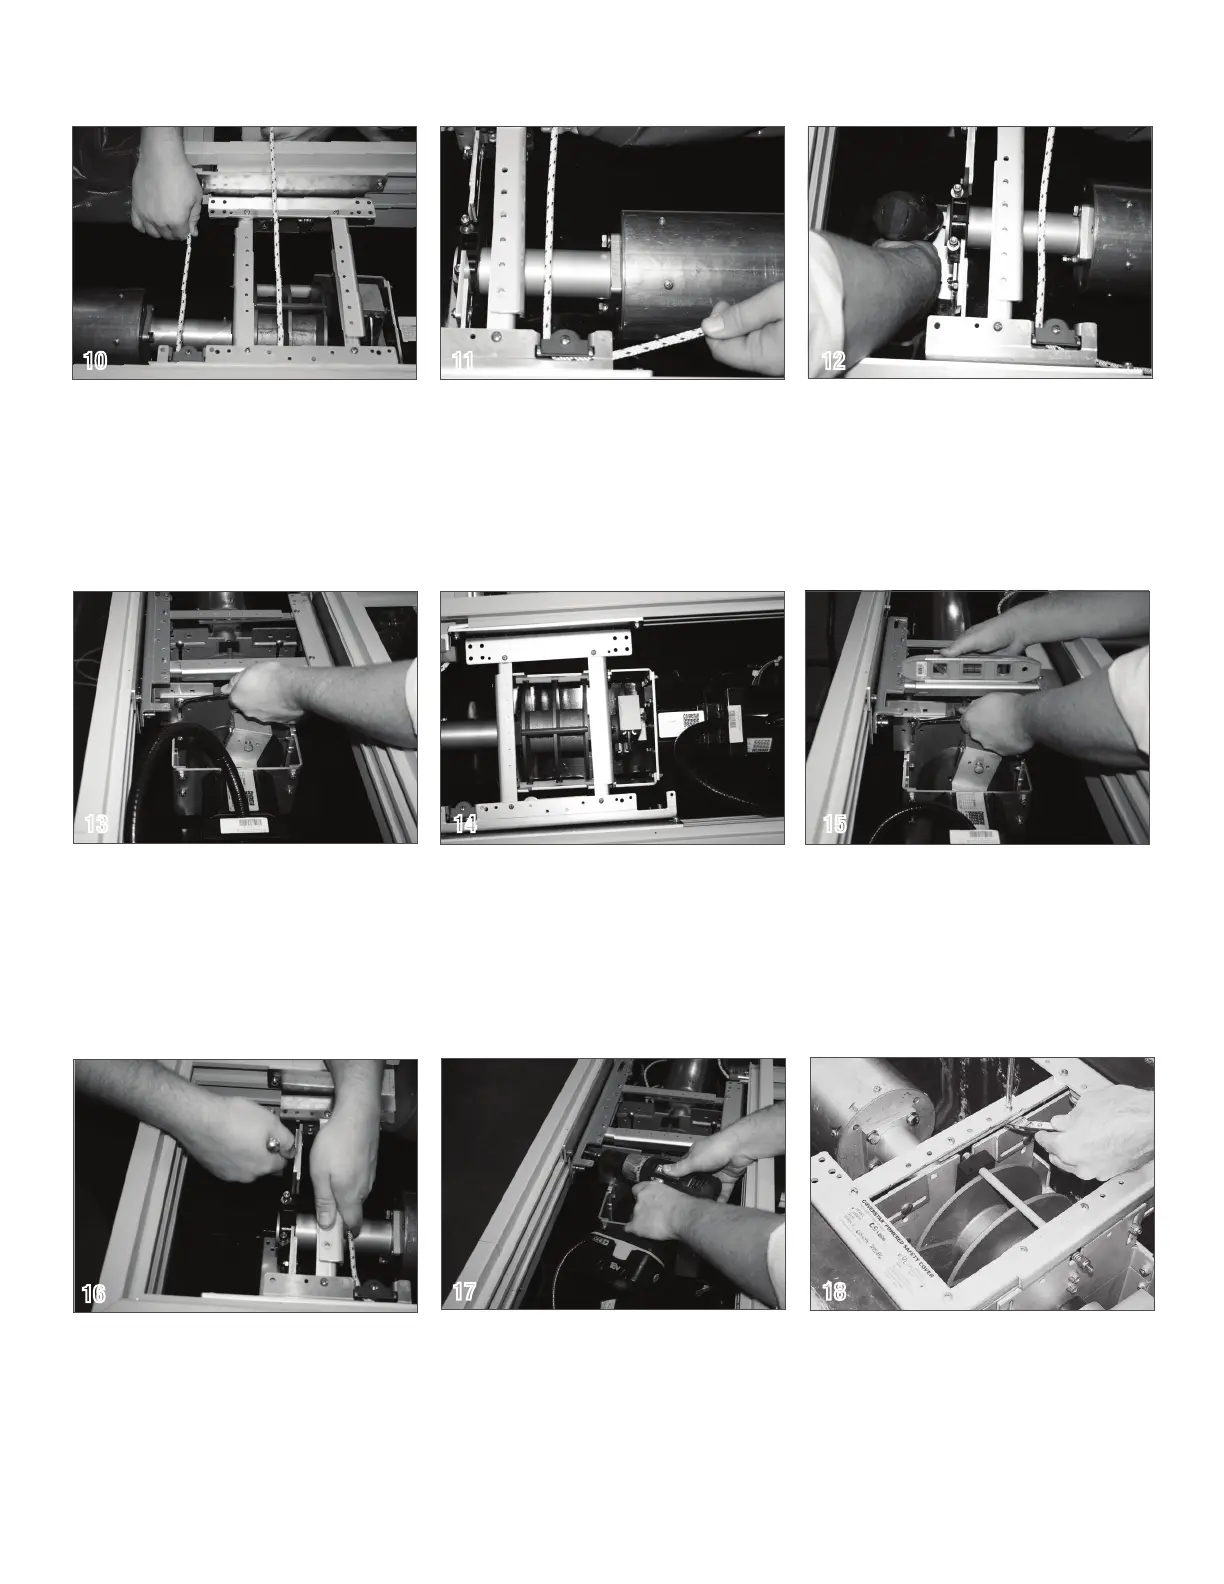
Align the mechanism on the motor side first
by using a straight edge or a piece of rope
and extending it from the back side of the
cover track to the pulley to make sure the
rope is running straight into pulley #1.
Tip: The pulley bracket on the front side of
the cover housing should be 1 inch from
outside of track.
Extending the Pulley Brackets
Loosen the nuts in the four positions on the
adjustable brackets of the mechanism. Spread
the brackets outward against the walls of the
housing.
Raise the pulley brackets up so that the top of
the bracket is even with the top of the
encapsulation or guide. This insures the ropes
will be level.
With the brackets in position, level the
pulley brackets. Tighten the four nuts on
the adjustable brackets.
Now loosen the bolts and spread the pulley
brackets at the non-motor end making sure
they are also level. Raise the pulley bracket so
it is flush with the top of the encapsulation.
Anchoring the Pulley Brackets
Anchor the motor and non-motor end
brackets into the housing in as many
places as possible.
10
11 12
13
14 15
17 18
Anchoring the Mechanism
Center the motor end and non-motor end in
the housing front to back. Anchor the non-
motor and motor end feet into the housing
using as many anchor points as possible.
16
On the motor and non-motor side, use a
3/16” bit and drill through the cross braces.
To secure, use the half inch screws (28) and
nylock nuts (29) provided and bolt the cross
braces together in two places on each cross
bracket.
On the non-motor end, make sure the
rope will travel straight from the track to
the pulley. It is important that the roll-
up tube be centered between the cover
tracks.
Tip: The end of the roll-up tube should be
1-1/2 inches from the inside edge of the
cover track.
© Latham Pool Products, Inc. 2019. All rights reserved.
Step By Step Instructions
Numbers in parenthesis refer to hardware shown on page 3.