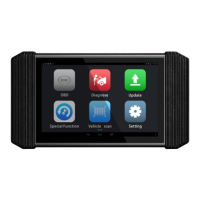
Preparation Job Menu
43
It mainly includes the following function modules:
To configure the tool to operate as a professional
diagnostic tool.
This option presents a quick way to check for DTCs,
isolate the cause of the illuminated Malfunction
Indicator Lamp (MIL), check monitor status prior to
emissions certification testing, verify repairs, and
perform a number of other services that are
emission-related.
A quick access to the I/M Readiness function of
OBD II Diagnosis.
Measures the current voltage of the vehicle's
battery.
To update vehicle diagnostic software and APK.
*Note: This function requires a stable network
connection.
Includes Diagnostic report, Diagnostic record,
Feedback and DTC library etc.
To make some system settings, including Network
setup, Email and Brightness etc.
Diagnose
OBD II
Reset
I/M
Battery
Voltage
Update
Data
Settings
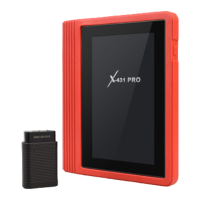
Diagnostic Cable
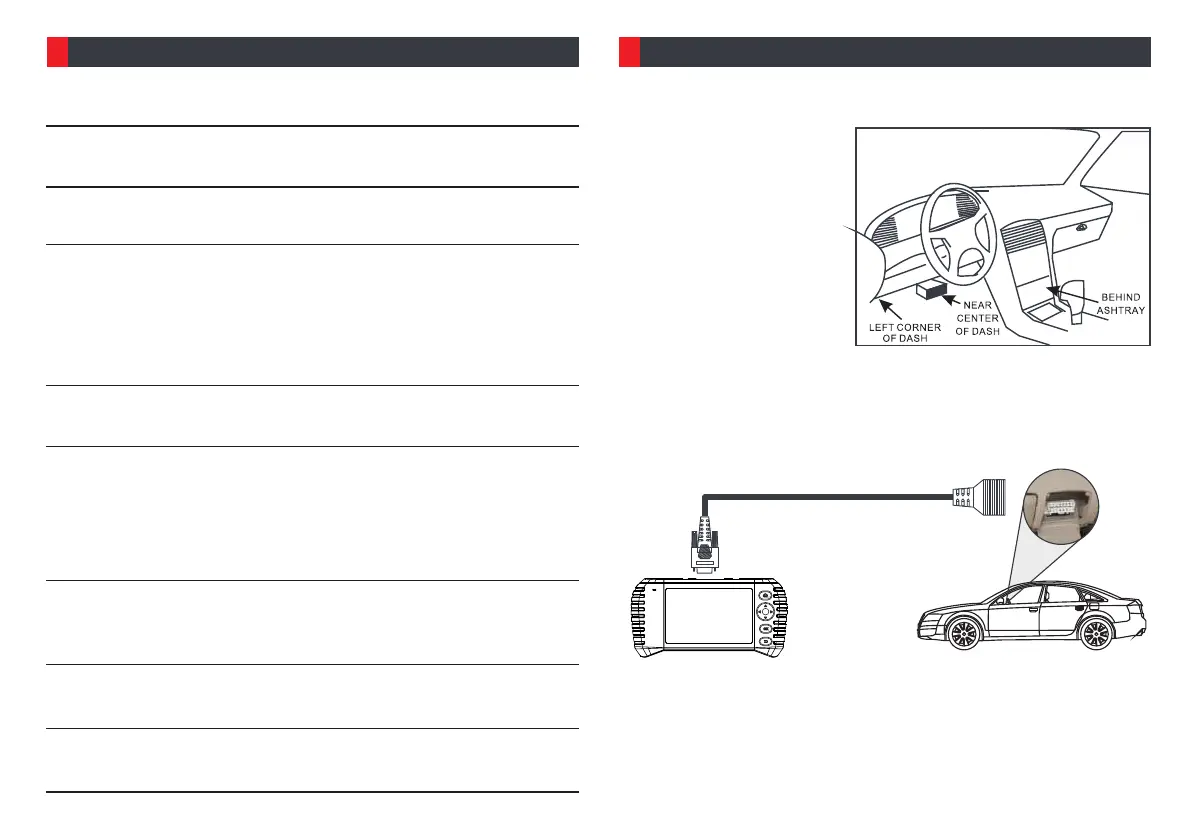
1. Turn the ignition off.
2. Locate vehicle's DLC: It
provides standard 16 pins
and is generally located on
driver's side, about 12
inches away from the
center of dashboard. See
Figure DLC Location. If
DLC is not equipped under
dashboard, a label
indicating its position will
be given.
3. Plug one end of the diagnostic cable into the DB-15 connector of
the tool, and tighten the captive screws. Connect the other end to
the vehicle's DLC.
Vehicle
DLC
Display Tablet
*Note: The tool ONLY works with the 12V passenger cars equipped with
standard OBD-II diagnostic socket.
4. Turn the ignition key on.
In case no DLC is found, please refer to Automobile Repair Manual.
To perform common repair & maintenance items,
which includes Oil Lamp Reset, Steering Angle
Sensor (SAS) Reset, Electronic Parking Brake
(EPB), Battery Maintenance System (BMS) Reset,
Diesel Particulate Filter (DPF), Electronic Throttle
Position Reset, ABS bleeding.