15
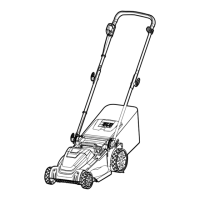
ASSEMBLY
NOTE: If desired, to save initial set-up time the robotic mower can be charged in the unsecured
base station while the boundary wire is laid. Make sure the contact strip on the base station and
the charging strips on the mower are connected properly. The robotic mower will be ready to mow
immediately after connecting the boundary wire to the base station. Ensure that the base station is
disconnected from the power source when connecting the boundary wires to the terminals. Refer
to page 18 for connecting the base station to the power source.
Lay the Boundary Wire (See Figs. 5-17)
8VHWKHERXQGDU\ZLUHWRGH¿QHWKHPRZHUVZRUNLQJDUHD7KHERXQGDU\ZLUHZLOODOVRJXLGHWKH
mower to its base station.
NOTE: If your neighbour uses a robotic mower, keep a space of at least 1m between your
ERXQGDU\ZLUHDQG\RXUQHLJKERXUV
After a few weeks the grass will have grown over the boundary wire making it invisible. Use the
plier to pull out the pegs to release the boundary wire if you need to make adjustments to the
boundary loop.
Planning where to lay the boundary wire
Before laying the boundary wire, walk along the edge of the lawn and plan where and how to set
up the boundary wire. Take note of all obstacles and slopes if necessary.
NOTE:
Ŷ8VHRULJLQDOERXQGDU\ZLUHWRIRUPDORRSDURXQGWKHZRUNLQJDUHD,WLVVSHFLDOO\GHVLJQHGWREH
moisture-proof.
Ŷ7KHPD[LPXPSHUPLWWHGOHQJWKIRUWKHERXQGDU\ZLUHLVP
Laying the boundary wire
Follow the instructions listed as below to lay the boundary wire around the working area and
around obstacles. Use the supplied measurement gauge to lay the boundary wire properly.
NOTE: The boundary wire must be laid anti-clockwise around the lawn.
NOTE: The boundary wire is powered with a very low voltage, and it is safe for humans and pets.
NOTE: Start at the rear of the base station to lay the boundary wire anti-clockwise around the
lawn. End the boundary wire at the front of the base station, leaving enough wire to go underneath
WKHEDVHVWDWLRQWRWKHWHUPLQDODWWKHUHDU5HIHUWRVHFWLRQ³&RQQHFWDQG,QVWDOOWKH%DVH
6WDWLRQ´IRUPRUHLQIRUPDWLRQ
Ŷ6HFXUHWKHERXQGDU\ZLUHWRWKHJURXQGZLWKVXSSOLHGZLUHSHJV(DFKSHJVKRXOGEHSODFHG
around 50cm apart. Use the provided measurement gauge to ensure the proper distance. Keep
the boundary wire straight and tight. There should be no slack wire between the pegs (Fig. 5).
Ŷ:KHQOD\LQJWKHERXQGDU\ZLUHXVHWKHPHDVXUHPHQWJDXJHWRNHHSDFPVSDFHEHWZHHQ