13
To remove the shaft:
Ŷ6WRSWKHHQJLQHDQGUHPRYHWKHEDWWHU\SDFN
Ŷ/RRVHQWKHNQREE\WXUQLQJFRXQWHUFORFNZLVH
Ŷ3XVKLQWKHEXWWRQDQGWZLVWWKHVKDIWWRUHPRYH
INSTALLING AND REMOVING THE BATTERY PACK (See Figs. 6-7)
To install the battery pack:
Ŷ$OLJQWKHEDWWHU\SDFNZLWKWKHEDWWHU\VORW
Ŷ,QVHUWWKHEDWWHU\SDFNLQWRWKHEDWWHU\VORWXQWLOWKHEDWWHU\SDFNVHFXUHVLQWRSODFH0DNHVXUHWKHEDWWHU\
is inserted in the correct direction (Fig. 6).
Ŷ'RQRWXVHIRUFHZKHQLQVHUWLQJWKHEDWWHU\SDFN,WVKRXOGVOLGHLQWRSRVLWLRQDQGFOLFN
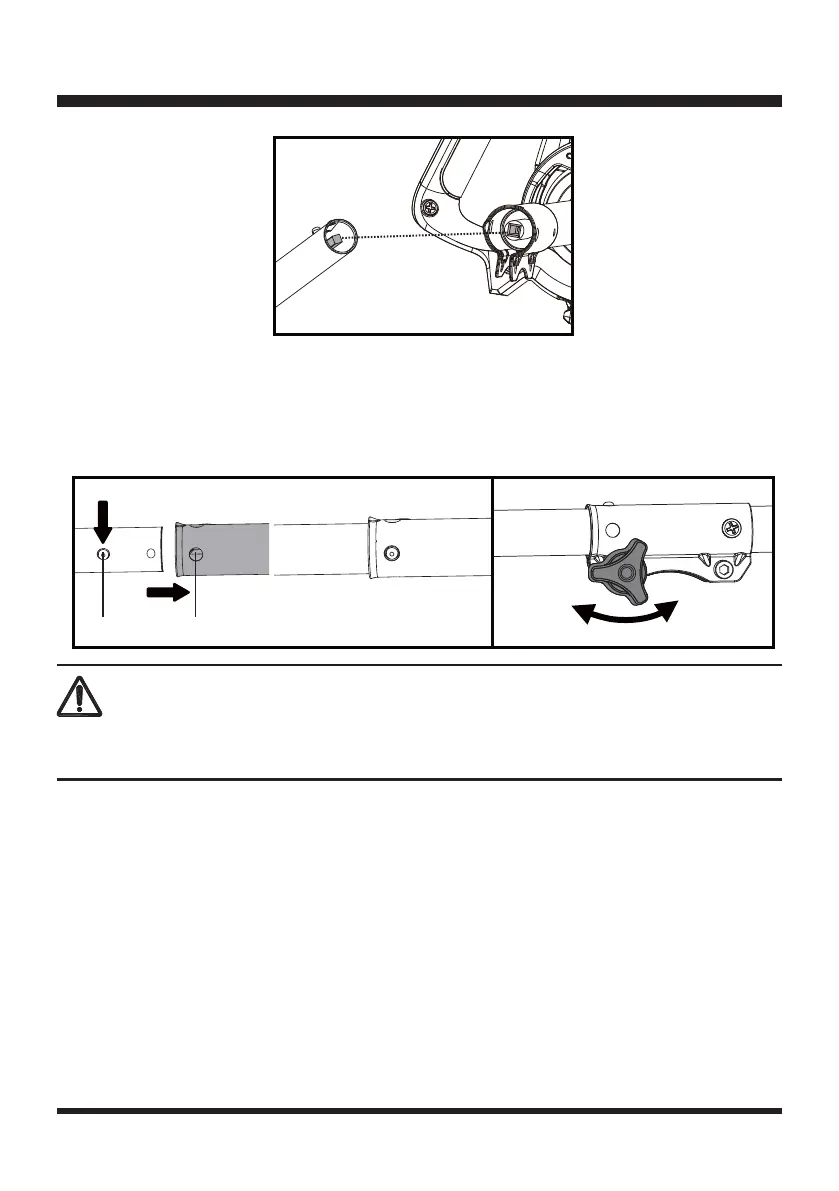
Ŷ3XVKLQWKHEXWWRQORFDWHGRQWKHVKDIW$OLJQWKHEXWWRQZLWKWKHSRVLWLRQLQJKROHRQWKHVKDIWFRQQHFWLRQ
sleeve. Slide the shaft into the shaft connection sleeve until the button locks into the positioning hole (Fig. 4).
NOTE: If the button does not release completely in the positioning hole, the shaft is not locked into place.
Slightly rotate from side to side until the button is locked into place.
Ŷ6HFXUHWKHVKDIWE\WXUQLQJWKHNQREFORFNZLVH)LJ
ASSEMBLY
WARNING
(QVXUHWKDWWKHNQRELVIXOO\WLJKWHQHGEHIRUHRSHUDWLQJWKHWRROFKHFNLWSHULRGLFDOO\IRUWLJKWQHVV
during use to avoid serious personal injury.
Ⅰ
Ⅱ
Fig. 3
Fig. 4 Fig. 5
Tight
Button Positioning Hole
Loosen

 Loading...