Locking tabs on
the trimmer head
housing
MAINTENANCE
Fig. 24
■ Refer to the Line Replacement section in this manual if only the line needs to be replaced.
■ Install the new spool into the trimmer head.
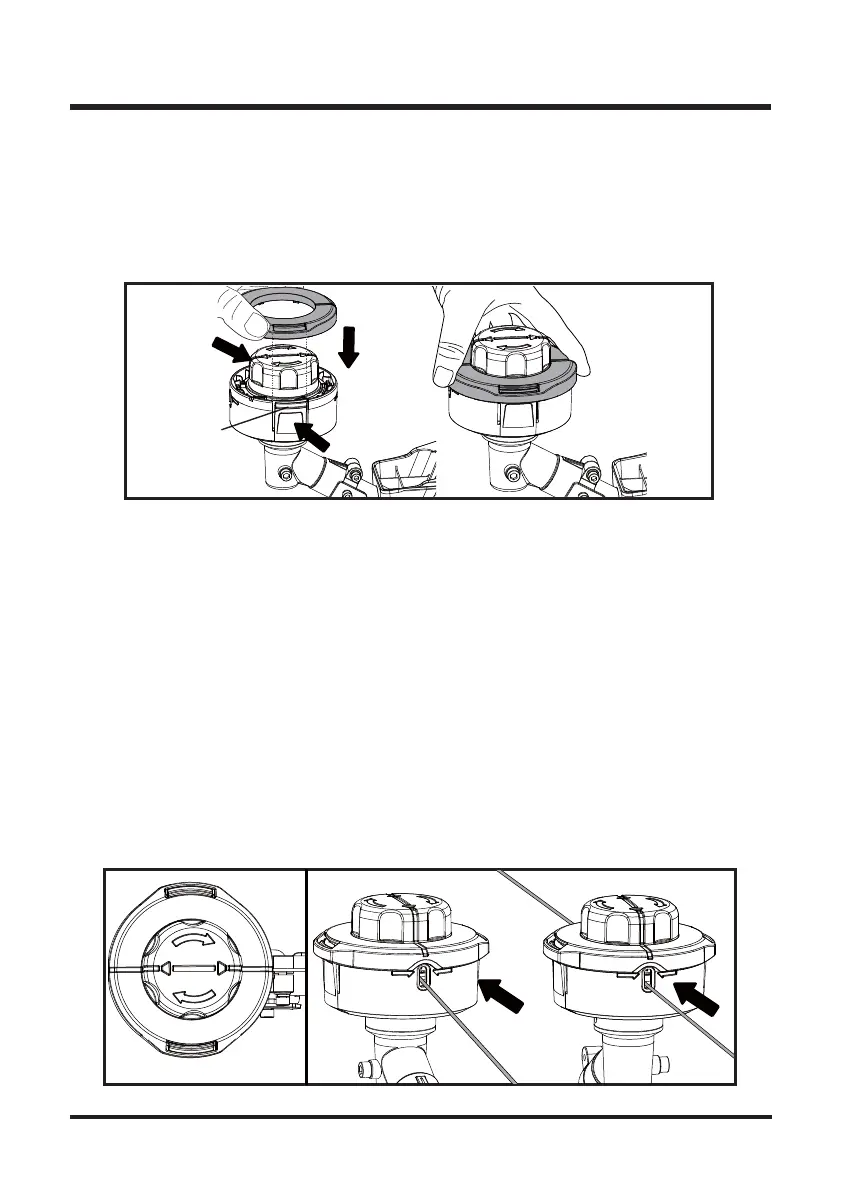
■ To reinstall the trimmer head cover, first align the mounting holes on the trimmer head cover
with the locking tabs on the trimmer head housing as shown. Then press the locking tabs and
push the trimmer head cover onto the trimmer head housing. Make sure they are secured
tightly (Fig. 24).
LINE REPLACEMENT (See Figs. 25-27)
■ You may wind new cutting lines onto an empty spool.
■ Replacement cutting line is available from the dealer.
■ Remove the empty spool from the grass trimmer referring to the Spool Replacement section.
■ Remove any remaining cutting line from the spool.
■ Re-install the empty spool to the trimmer head referring to the Spool Replacement section.
■ Press and rotate the spool head clockwise to align the arrow on spool head and the line on the
trimmer head cover as shown (Fig. 25).
NOTE: Use only round monofilament line with the recommended diameter.
■ Ensure that the new cutting line is sufficiently long, approximately 20 ft (6 m) for 0.08” line and
16 ft (5 m) for 0.095” line. First insert one end of the line into the eyelet on the trimmer head
housing and the spool in the trimmer head. Fully insert the line until you feel it stop and cannot
be inserted any further. Then insert the other end of the line into the other eyelet on the trimmer
head housing and the spool in the trimmer head. Ensure the line is fully inserted until it stops
(Fig. 26).
Fig. 25
Fig. 26
25

 Loading...