EasyManua.ls Logo

LCN 1450 Series User Manual

LCN 1450 Series
16 pages
To Next Page IconTo Next Page
Page #1 background imageLoading...
Page #1 background image
*71928*
71928
1
Pull Mount, Jamb Mount, and PA Mount
1450 & 1450DA Series
Installation Instructions
Choose Installation Type
Pull Side Mount (see page 2)
Push Side Top Jamb Mount (see page 3)
Push Side Parallel Arm (PA) (see page 4)
Hinge Edge
of Door
Left Hand
Door
Left Hand
Door
Right Hand
Door
Right Hand
Door
Right Hand
Door
Left Hand
Door
Hinge Edge
of Door
Hinge Edge
of Door
CAUTION
Improper installation or regulation may result in personal injury or property damage.
Follow all instructions carefully.
For questions, call LCN at 877 - 671 - 7011
Hold open arms must not be installed on re rated doors.
Opening the regulation valves too far may result in the closer leaking oil! This may result in closer and property damage, and
personal injury.
FOLLOW ALL INSTRUCTIONS CAREFULLY.
DO NOT USE THE CLOSER AS A DOOR STOP!
An auxiliary stop is recommended at the hold-open point or where the door cannot swing 180º.
PARTS
L Screw pack information is on page 5.
TOOLS
B\cx" or 4mm Hex Wrench
Adjustable wrench
Z\," Drill Bit
Phillips Head Screwdriver
L Hold Open wrench info on page 5.
PA Only
Question and Answer IconNeed help?

Do you have a question about the LCN 1450 Series and is the answer not in the manual?

LCN 1450 Series Specifications

General IconGeneral
BrandLCN
Model1450 Series
CategoryDoor Opening System
LanguageEnglish

Summary

Door Closer Installation Instructions

Parts Identification

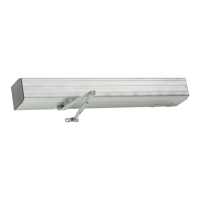
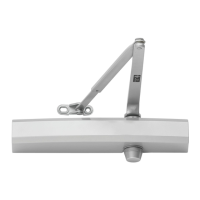
Identifies the components included with the door closer.

Tools Required

Lists the necessary tools for installation.

Installation Type Selection

Selects the appropriate mounting configuration for the door closer.

Pull Side Mount Installation

Mounting Hole Dimensions

Specifies hole locations for mounting.

Determine Door Opening and Dimensions

Guides on setting door opening angles and measuring dimensions.

Prepare and Drill Holes

Instructions for removing templates and drilling pilot holes.

Adjust Spring Power

How to set the closer's spring tension based on door width.

Install Closer and Shoe

Steps for attaching the closer body and shoe.

Install Main Arm

Attaching the closer arm to the closer shaft.

Route Forearm Rod

Connecting the rod into the forearm.

Preload and Tighten Arm

Setting initial arm position and securing it.

Adjust Closer Settings

Fine-tuning the closer's operation.

Install Cover and Cap

Finishing steps to cover the closer mechanism.

Push Side Top Jamb Mount Installation

Mounting Hole Dimensions

Specifies hole locations for mounting.

Determine Door Opening and Dimensions

Guides on setting door opening angles and measuring dimensions.

Prepare and Drill Holes

Instructions for removing templates and drilling pilot holes.

Adjust Spring Power

How to set the closer's spring tension based on door width.

Install Closer and Shoe

Steps for attaching the closer body and shoe to frame and door.

Install Main Arm

Attaching the closer arm to the closer shaft.

Route Forearm Rod

Connecting the rod into the forearm.

Preload and Tighten Arm

Setting initial arm position and securing it.

Adjust Closer Settings

Fine-tuning the closer's operation.

Install Cover and Cap

Finishing steps to cover the closer mechanism.

Push Side Parallel Arm (PA) Installation

Mounting Hole Dimensions

Specifies hole locations for mounting.

Determine Door Opening and Dimensions

Guides on setting door opening angles and measuring dimensions.

Prepare and Drill Holes

Instructions for removing templates and drilling pilot holes.

Adjust Spring Power

How to set the closer's spring tension based on door width.

Install Closer

Steps for attaching the closer body to the door.

Install Main Arm

Attaching the closer arm to the closer shaft.

Install PA Shoe and Rod

Attaching PA shoe, rod, and forearm.

Preload and Tighten Arm

Setting initial arm position and securing it.

Adjust Closer Settings

Fine-tuning the closer's operation.

Install Cover and Cap

Finishing steps to cover the closer mechanism.

Closer Adjustment and Features

Closer Valve Adjustment

Details how to adjust door closing speeds and latching.

Closing Speed Adjustment

Adjusting main and latch speeds for proper door closing.

Delay Speed Adjustment

Adjusting delay speed for DA cylinders.

Valve Operation

How to turn valves and recommended limits.

Optional Hold Open Arms

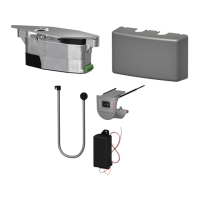
Information on installing and adjusting hold-open features.

Hold Open Arm Handing

Determining the correct orientation for hold-open arms.

Hold Open Arm Installation

Steps for attaching the hold-open arm assembly.

Hold Open Arm Adjustment

Fine-tuning the hold-open function.

Screw Types and Hardware

Details on screws and hardware for installation.

Related product manuals