C
1
Trim, fold, saddlestitch.
4 color process plus overall aqueous varnish
5.5"w x 8.5"h .125"11"w x 8.5"h11.25"w x 8.75"h
810-18700_TagSchool_User_Guide.indd
810-18700 605-11320 N/A N/A
100%100% 10/MAR/08 LP XXX
Whitney-SemiBold, Whitney-Book, Whitney-Bold,
Whitney-Medium, Whitney-SemiBoldItalic, Myriad Roman,
Whitney-MediumItalic, Myriad Pro
[ ] [•] [ ] Other [•] [ ]
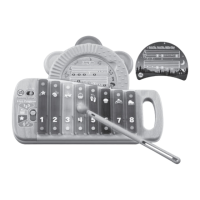
Note: You may want to label each TAG™ School Reader with the device name you
created. Write the name on a piece of masking tape or other easy peel-o label and
ax the label to the TAG School Reader.
4.
Click on Terms of Service to read through the agreement and click the check box
to agree. You can also access the LeapFrog® Privacy Policy by clicking on the link
in this window.
5. Click “Submit” to complete the setup for this TAG School Reader.
6. T
o add additional TAG School Readers, repeat steps 2 through 5 for each
TAG School Reader in your classroom.
Download Audio for Tag School Reader Books
1. Click on the “Download” tab in the LeapFrog School Connect application.
Note: You must have an Internet connection to connect to the Download Center.
2.
Scroll through the page to nd the TAG School book titles in your classroom kit.
3. Choose a title and click “Download Audio” to save the audio le to
your library.
4.
Repeat steps 2 and 3 until all titles in your classroom kit have been downloaded.
Sync Audio Files with Your Tag
™
School Readers
1. Connect a TAG School Reader to the computer using the USB cable provided.
2. Click on the “Sync” tab in the LeapFrog® School Connect application.
3. The audio les you have downloaded to your library appear in the box on
the left-hand side of the page. Move these les to the connected TAG School
Reader by selecting the check boxes next to the desired titles and then clicking
on the “Add” arrow.
N
ote: If a desired title is not in your library, follow the instructions under
“Download Audio for TAG School Reader Books.”
4. T
o remove an audio le, select the check box next to the title’s name in the
“TAG School Reader” list. Then click the “Remove” arrow.
5.
Click the “Sync to Finish” button at the bottom of the page to save the changes
to the connected TAG School Reader.
6. T
o add or remove audio les on other TAG School Readers, disconnect the TAG
School Reader you were just using and connect another TAG School Reader to
the computer using the USB cable. Repeat steps 3 through 5.
TAG_UserGuide_FINAL.indd 4-5 3/10/08 8:50:40 PM