This document is a user manual for the Ledlenser P6R Signature and P7R Signature flashlights, providing comprehensive information on their operation, features, and maintenance.
Function Description:
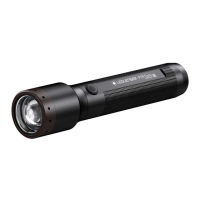
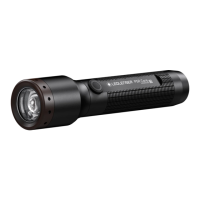
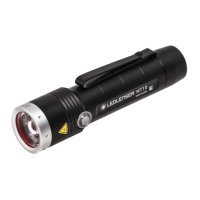
The Ledlenser P6R Signature and P7R Signature are high-performance flashlights designed for various lighting purposes. They offer multiple light functions and brightness levels, including a "Boost Mode" for maximum brightness, "Advanced Focus System" for adjustable beam, and "Backup Mode" for extended low-power operation. The flashlights are equipped with a "Magnetic Charging System" for convenient recharging and a "Transportation Lock" to prevent accidental activation. Users can customize light modes and access additional functions through the intuitive switch interface. The products are designed for use in ambient temperatures between -20°C and +40°C and are not suitable for potentially explosive atmospheres or as toys for small children.
Important Technical Specifications:
- Models: P6R Signature, P7R Signature
- Battery Type (P6R Signature): 18650 Li-ion, 3.7V (Item No. 501001)
- Battery Type (P7R Signature): 21700 Li-ion, 3.7V (Item No. 502262)
- Charging Temperature Range: 10°C to 40°C
- Operating Temperature Range: -20°C to +40°C
- Charging System: USB magnetic charging cable
- Light Modes: Power, Mid Power, Low Power, Red Light, Strobe, SOS, Blink, Dimming (100% to 15%), Flashing, Position
- Special Functions: Boost Function (10 seconds maximum brightness), Advanced Focus System, Backup Mode, Memory Mode, Low Battery Warning, Emergency Mode
Usage Features:
- Scope of Delivery: Each flashlight comes with the specified rechargeable battery, a USB magnetic charging cable, a pouch, a lanyard, and a wall bracket.
- Default Operation: The lamp features a "MODE SWITCH" with four positions, allowing quick access to different light functions. Within the first three seconds of switching on, users can tap the switch to cycle through available functions. If no selection is made within three seconds, or if the last function is selected, the lamp will switch off with the next press.
- Battery Capacity Display: When switched on, the lamp displays the remaining battery capacity: green for fully charged, orange for half full, and red for almost empty.
- Memory Mode: This feature allows the lamp to turn on with the previously selected light function. It can be activated or deactivated in the advanced settings.
- Boost Function: Activated by double-tapping the switch (unless transportation lock is active), this provides maximum brightness for ten seconds before returning to the previous light function.
- Advanced Focus System: By turning the lamp head, users can adjust the light beam from a focused spot for long distances to a wide flood for close-up illumination.
- Backup Mode: When battery capacity is low, the lamp automatically switches to the lowest brightness level, preventing sudden shutdown and ensuring some light remains available. This mode can be activated or deactivated in advanced settings.
- Low Battery Warning: If active, the lamp flashes every 15 minutes when the battery capacity is low.
- Customizing Light Modes: Users can personalize the order and selection of light functions. By holding the switch for five seconds while the light is on, the lamp enters customization mode. Brief presses cycle through functions, and holding the switch for two seconds saves the selected function. Holding for four seconds saves and exits customization.
- Additional Functions (Advanced Settings): By holding the switch for about eight seconds (until it flashes twice), users can access advanced settings to toggle "Memory Mode," "Low Battery Warning," and "Emergency Mode" on or off.
- Emergency Mode: When active, the lamp automatically turns on if disconnected from the power supply while charging, providing light during a power failure or immediate activation when removed from its holder.
- Reset to Factory Settings: The lamp can be reset to its original settings by holding the switch for eight seconds (until it flashes twice), then pressing it again for five seconds (until it flashes four times).
Maintenance Features:
- Battery Replacement: To replace the rechargeable battery, unscrew the end cap. Ensure correct polarity (+/-) when inserting a new, approved battery. Screw the end cap back on, ensuring seals are undamaged for watertightness.
- Magnetic Charging System: The included USB magnetic charging cable is used for charging. Contacts on the lamp or cable should be cleaned with a dry cloth if dirty. The charging cable connects to a standard USB power supply or computer. The charge level indicator lights red during charging and green when complete. A flashing indicator signals an error (e.g., defective or incorrectly inserted battery).
- Wall Bracket: A wall bracket is provided, which can also hold the USB magnetic charging cable, allowing the lamp to be charged while mounted.
- External Charging: Batteries can optionally be removed and charged externally with a suitable charger.
- Transportation Lock: To prevent accidental activation during transport, hold the switch for five seconds until the lamp blinks four times. This locks the lamp.
- Safety Precautions: The lamp generates heat during use; avoid covering it and maintain at least 10 cm distance from illuminated surfaces to prevent heat build-up.
- Product Registration: Users are encouraged to register their product with the enclosed card for an extended warranty, authenticity check, and updates.
- Disposal: Proper disposal of the lamp, batteries, and packaging material is emphasized.
- Further Information: Additional information, tutorials, and accessories are available on the Ledlenser website, accessible via QR code or www.ledlenser.com.