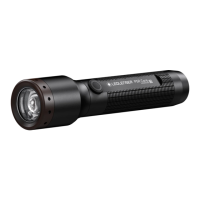
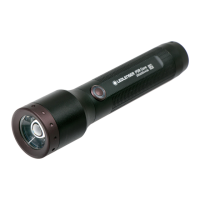
The Ledlenser P6R Work and P7R Work are flashlights designed for various lighting purposes, offering a range of functions and features for optimal use and maintenance. These devices are intended for use in ambient temperatures between -20°C and +40°C. It is important to note that they are not suitable for use in areas with a potentially explosive atmosphere and should be kept away from small children.
Function Description
The flashlights are equipped with multiple light functions and brightness levels, allowing users to select the most appropriate setting for their needs. The default settings can be customized through the switch on the lamp.
- Default Operation: The lamp offers several light functions or brightness levels. Users can select the desired function within the first three seconds after switching the lamp on by tapping the switch once to cycle through options. If the switch is not pressed for more than three seconds, or if the last available light function has been selected, the lamp will switch off the next time the switch is pressed.
- Boost Function: This function provides maximum available brightness for a period of ten seconds. It can be activated by double-tapping the switch, except when the transportation lock is active. After ten seconds, the lamp automatically reverts to the previously selected light function.
- Advanced Focus System: The lamp allows users to adjust the light beam by moving the lamp head forwards or backwards. This enables focusing the light for maximum beam distance or defocusing for even illumination of a close-up area.
- Backup Mode: This mode activates when the remaining battery capacity is low, after the regular runtime has expired. In this mode, the lamp automatically switches to the lowest brightness level, preventing a sudden switch-off and ensuring that some light remains available when the battery is weak. The Backup Mode can be activated or deactivated in the advanced settings. If active, the lamp continues to operate at full brightness until the end of the battery capacity and then switches off immediately.
- Low Battery Warning: When active, the lamp provides a visual signal every 15 minutes by flashing to indicate low battery. This feature can be activated or deactivated in the advanced settings.
- Emergency Mode: When active, the lamp automatically switches on if it is disconnected from the power supply while charging. This means the lamp will turn on automatically in the event of a power failure or immediately when removed from its holder. This function can be activated or deactivated in the advanced settings.
- Memory Mode: If active, the lamp will always turn on with the previously selected light function. If deactivated, the lamp will always start with the same light function. This mode can be activated and deactivated in the advanced settings.
Usage Features
The flashlights are designed with user convenience and safety in mind, incorporating several features to enhance the user experience.
- Transportation Lock: To prevent accidental activation during transport, the lamp can be locked. This ensures that the lamp remains off and conserves battery life. To activate the transportation lock, hold the switch for approximately 5 seconds. The lamp will blink four times to confirm activation.
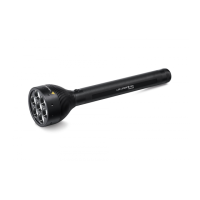
- Charging: The flashlights are charged using the included USB magnetic charging cable. The contacts on the lamp and cable should be clean before connecting. The cable is then connected to the lamp and a standard USB power supply or computer. During charging, a charge level indicator lights up red, changing to green when charging is complete. If an error occurs (e.g., a defective or incorrectly inserted battery), the indicator flashes. A wall bracket is included, allowing the lamp to be placed in a charging station. Rechargeable batteries can only be charged at temperatures between 10°C and 40°C. Optionally, batteries can be removed and charged externally with a suitable charger.
- Customizing Light Modes: The flashlight's preset light functions and brightness levels can be customized. To do this, switch on the lamp and hold down the switch for five seconds (without covering the indicator light). The switch will flash briefly, indicating it's ready for customization. Briefly pressing the switch cycles through available light functions and brightness levels. To save a selected light function, hold the switch down for two seconds; the switch will flash twice to confirm. This process can be repeated up to ten times to save multiple light functions. Alternatively, holding the switch for four seconds saves the selected functions and ends the process (confirmed by three flashes). The lamp will then activate the saved functions in the selected order by tapping the switch within three seconds after turning it on.
- Additional Functions (Advanced Settings): The advanced settings allow users to switch additional functions on or off. To access these, turn on the lamp and hold the switch for about eight seconds. The switch will flash once, then twice. Release the switch after the second blink.
- Memory Mode: A single tap of the switch activates or deactivates Memory Mode. The indicator will blink green twice for ON and red twice for OFF.
- Low Battery Warning: Tapping the switch twice activates or deactivates the Low Battery Warning. The indicator will blink green twice for ON and red twice for OFF.
- Emergency Mode: Tapping the switch three times activates or deactivates Emergency Mode. The indicator will blink green twice for ON and red twice for OFF.
- Backup Mode: Tapping the switch four times activates or deactivates Backup Mode. The indicator will blink green twice for ON and red twice for OFF.
Maintenance Features
Proper maintenance ensures the longevity and optimal performance of the flashlights.
- Battery Replacement: To replace the rechargeable battery, unscrew the end cap of the lamp. The battery can then be removed. When inserting a new battery, it is crucial to pay attention to the correct polarity (+/-), which is marked on the battery and inside the lamp shaft. Only approved batteries should be used. After insertion, screw the end cap back on, ensuring the seals are undamaged to maintain watertightness.
- Cleaning: If the contacts on the lamp or charging cable are dirty or dusty, they should be cleaned with a dry cloth before charging.
- Reset to Factory Settings: The lamp can be reset to its original factory settings. To do this, switch on the lamp and hold down the switch for about eight seconds. The switch will flash once, then twice. Release the switch after the second blink. Then, press the switch again for five seconds until it flashes four times. Release the switch, and the lamp will be reset to factory settings, ready for normal use.