Figure-01 Figure-02
10
3. Scan the QR code at the bottom of the camera (Figure-03), a
device ID should be automatically filled in the device ID input
box (Figure-04) if it scans successfully, then tap Add. If you
got a blank screen, please add this camera on PC (4.4 Local
Web Access Setup).
5. After you choose the , you should be asked to connect
your power supply equipment (Figure-06). Plug in the power
source to power on the camera leaving the network cable
unplugged, wait for 60 seconds to allow the camera getting
ready. The camera is ready once you hear a "tick" sound after
connecting the power for 60 seconds. Then, tap Next to
enter next step.
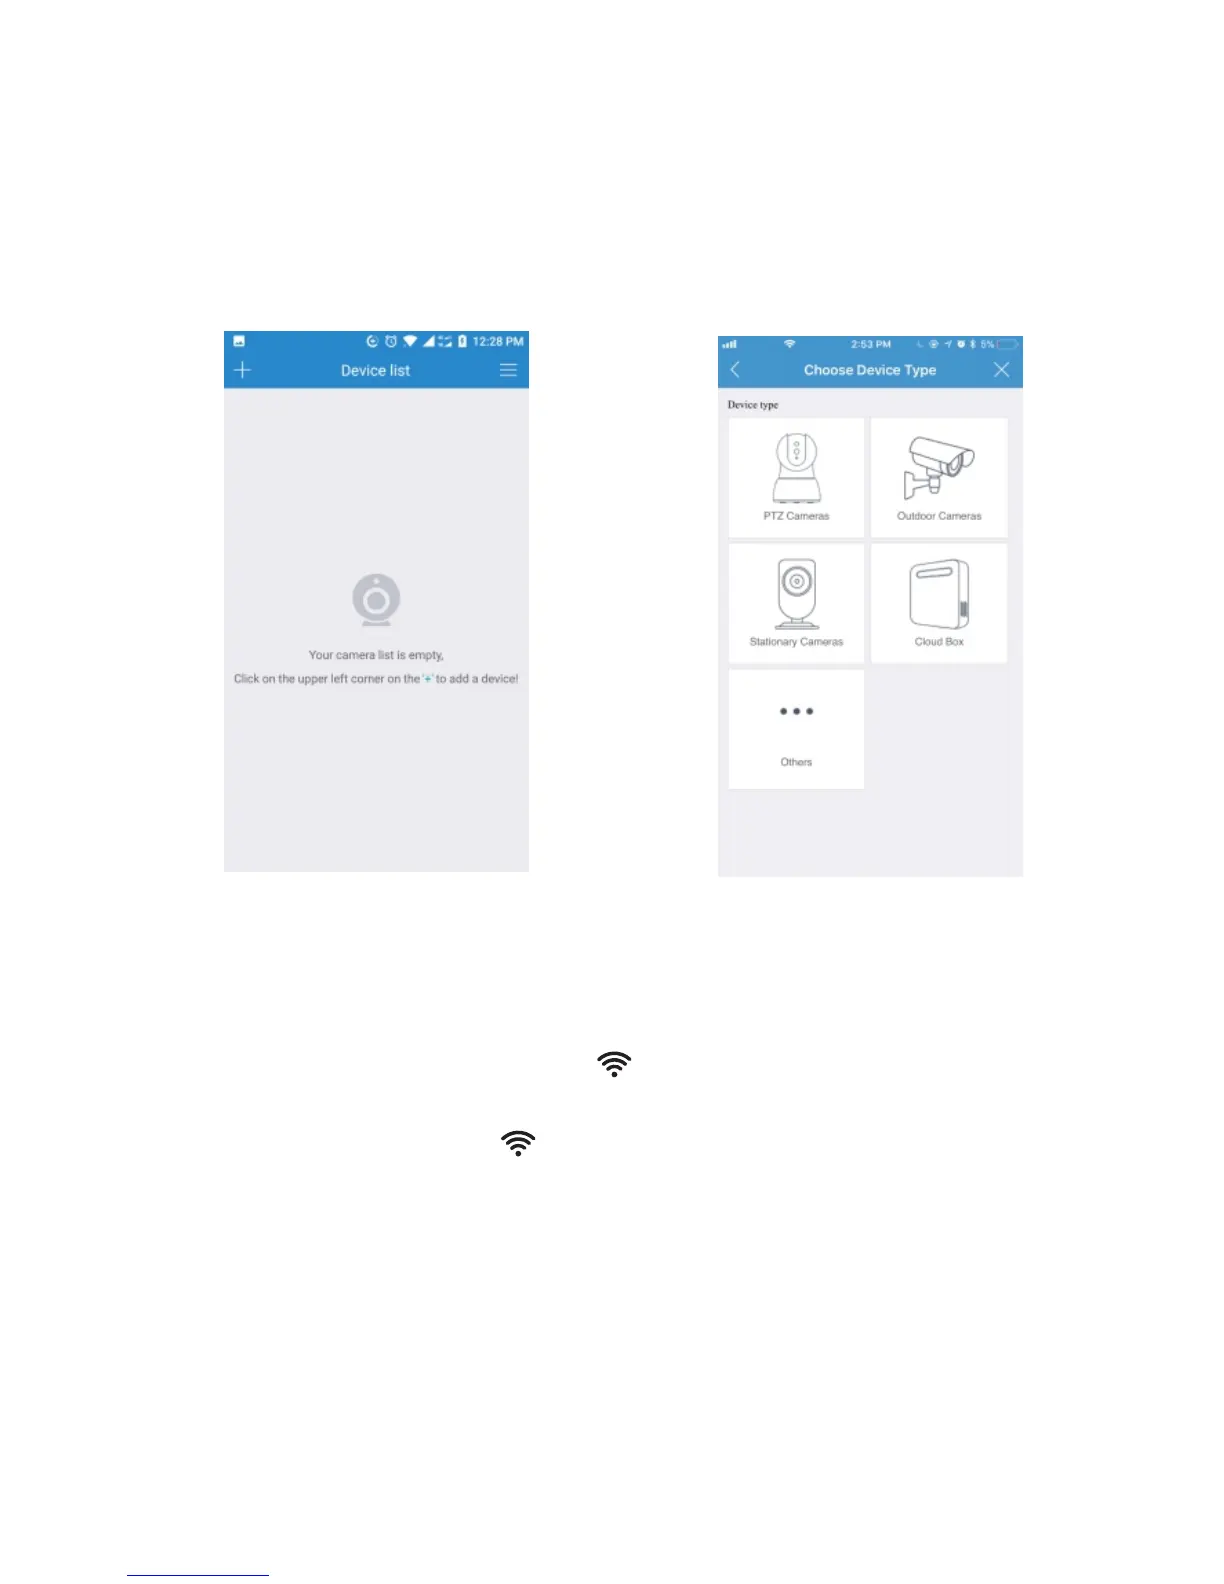
4. Then, it will direct you to the Connection Method interface
(Figure-05). Please choose to add your camera.