Repeat to make two such parts.
Install upright at the front and at the back from the left, the smooth side to the left, by putting the centers
into the two connectors.
26.1. Make a part. Put a long connector hor on the table, wide end to the right. Put a button upright on
the right end. Put a two-clasp wing upright hor, the clasps on the connector, the cuto-off corner to the left
to the back.
26.2. Repeat to make two such parts.
Install one hor at the front, as is, in the middle (to the right of the stacked disks) by putting the connector
on the clasp there.
Repeat symm at the back.
27.1. Make a part. Put a long stick hor on the table, the ring to the left. Put the cone on the left end,
narrow end first. Put a button on the wide end.
27.2. Repeat to make two.
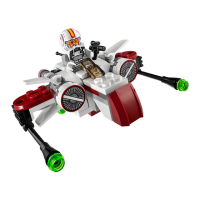
Install one as is at the front edge at the bottom by putting the right side of the stick in the two clasps at the
bottom.
Repeat symm at the back.
Enjoy!
Thank you so much for building this set!
Visit
legofortheblind.com for more accessible instructions!
Abbreviation definitions:
F = flat (Plate.)
FS = flat smooth (tile)
Slide = slope.
Lip = inverted slope.
Ribbed stick = Technic axle.
Connector = Technic pin.
Stubby or Short connector = Technic pin with stud.
Long connector = elongated Technic pin.
Nail = technic axle with end stop.
Fat nut = Technic joiner.
Thin nut = Technic stop.
Elbow = technic joiner 90 dg.
1x1, 2x1, 3x1… means a 1x1, 2x1, 1x3… brick.
Ver = vertically.
Hor = horizontally.
Symm = symmetrically.
LMA = Lay Momentarily Aside.
PP = previous piece.
Sep bag = separate bag.
Braille letters (for placing corner pieces):
D = open corner to the front left.
F = open corner to the front right.
J = open corner to the back left.
H = open corner to the back right.
 Loading...
