11
LEHLE GmbH · Germany · www.lehle.com · support@lehle.com
from the DIR output is always the same
which is fed into the input (1).
If the input signal is unbalanced you will
have an unbalanced direct signal at this
socket. The same will occur with bal-
anced signals.
3. PHASE INVERTER SWITCH
The phase of the input signal from the
ISO output can be inverted if necessary.
This switch can be used to invert the
phase of the input signal from the ISO
output socket by 180°.
Splitting signals to two amps may some-
times cause phase cancellations, result-
ing, for most musicians, in a “thin” sound.
Inverting the phase eliminates this prob-
lem.
Experiment to find out which position you
prefer - as always, your individual taste is
what counts!
4. GROUND LIFT SWITCH
Connect the grounds of the DIR and ISO
output if necessary.
Pressing this switch connects the ground
conductors of the ISO and DIR outputs.
Connecting the ground conductors of the
DIR and ISO outputs can help in some
situations, depending on the units con-
nected and on their power supplies.
Use the ground lift switch to find out for
yourself the position in which noise is
minimised.
5. ISO OUTPUT
Connect your amp or the audio input of a
DAW or a mixer here.
The ISO output has an input signal which
is isolated by means of the LEHLE TRANS-
FORMER HZ.
A balanced or an unbalanced signal is
possible, irrespective of the type of signal
fed from the input.
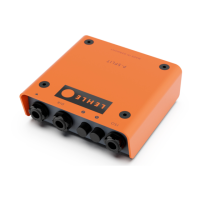
6. BASE AND FIXING
If required, mount the P-SPLIT III to a
pedalboard using the mounting kit.
The P-SPLIT III can be mounted to a plate
such as a pedalboard using the two holes
in the bottom of the pedal.
You can find the optional LEHLE Mount-
ing Kit V3 (order number 100981) online
at www.lehle-components.com.
To mount, undo the four housing screws
by using a 2.5 mm Allen Key and detach
the cover.
Then fix the device base to a base plate
using the two screws, the washers and the
spacers of the Mounting Kit.
Attach the cover and tighten the four
housing screws - done!
ISO