Do you have a question about the Leica iNEX and is the answer not in the manual?
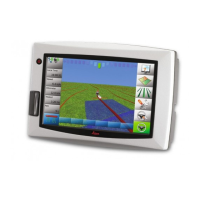
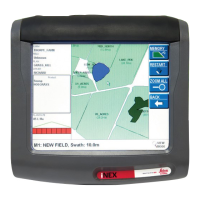
Details the Leica iNEX as a GPS-based guidance system for agriculture with robust hardware.
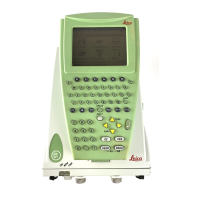
Identifies and describes the physical components of the iNEX display and vehicle cable.
Instructions on how to power on the iNEX system using the power button or vehicle ignition.
Explains the procedures for safely shutting down the iNEX system via power button or ignition.
Details the different areas of the main iNEX display screen and their functions.
Describes the menu system structure for operating and configuring the iNEX.
Guides on defining vehicle and equipment measurements for accurate treatment recording.
Covers initial setup and operation for treating a field, including GPS status and guidance.
Explains various guidance patterns like Parallel, A+ Heading, Adaptive, and Pivot.
Describes how to customize and assign guidance types to on-screen buttons.
Provides step-by-step instructions for using different guidance modes.
Details how to set guide overlap, offset, and adaptive direction.
Explains how to save, load, rename, delete, and transfer guidance lines.
Describes the temporary field memory and how to suspend fields for later completion.
Covers archiving, viewing, un-archiving, and deleting field data.
Details how to create and manage client and farm records for data organization.
Explains how to set the current job's client and farm before starting operations.
Describes the AutoFIELD feature for automatic field recognition and data management.
Covers recording applied products, creating new products, and managing batches.
Instructions for entering weather data such as wind, temperature, and humidity.
Explains how to place flags on the map to mark points of interest in the field.
Details setting up driver profiles, security levels, and login procedures.
Procedure for activating new features by entering unlock codes (passwords).
Configuring the system to work with different GPS receivers and connections.
Steps to change the system's operating language, even if the current language is unknown.
Customizing display modes (Heads Up/North Up), zoom, night mode, and map grid.
Assigning shortcut functions to the physical and remote input buttons.
Adjusting the system's volume and enabling/disabling alarms and warnings.
Steps to enable AutoSTEER, select a steer controller, and turn the system ON.
Explains AutoSTEER status indicators, engaging, disengaging, and required conditions.
Process for connecting to the Virtual Wrench service for support or upgrades.
How to request technical support remotely via the Virtual Wrench service.
Guide to checking for and installing software updates remotely.
Enabling and configuring the AutoSPRAY feature on the iNEX system.
Details on calibrating AutoSPRAY, including latency, overlap, and section translation.
Describes normal operation, switching to manual control, and using override functions.
Steps to set up FieldNET, including Group ID and radio configuration.
Explains connecting to other vehicles, link types, and understanding status indicators.
Procedure to start the iNEX in launcher mode for maintenance tasks.
Instructions for upgrading the iNEX software via USB or remote download.
How to restore the iNEX to a previous software version.
Steps to recalibrate the touch sensor if it becomes inaccurate.
Methods for recovering the system, including forced shutdown and resets.
General safety guidelines, warnings, and precautions for installation and operation.
Defines the permitted and adverse uses of the iNEX system.
Specifies environmental conditions and dangers related to the iNEX system's operation.
Outlines the duties of product manufacturers, accessory makers, and persons in charge.
Identifies potential hazards, precautions, and risks associated with using the product.
Explains electromagnetic compatibility and precautions for using the iNEX with accessories.
Provides examples and methods for measuring various vehicles and implements.
Instructions for changing the FieldNET radio group ID to resolve interference issues.
Specifies required messages and baud rates for NMEA-0183 (Serial) and NMEA-2000 (CANbus).
Details the pin assignments for Port A, Port B, CANbus, and Power Input.