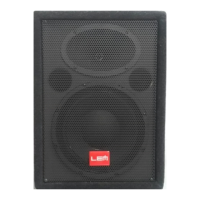
7
hurricane active
5. Installation and connections
1. Installation
All the HURRICANE ACTIVE series models are fi tted
with an adapter for the installation on a standard
loudspeaker stand. The two sub-woofer systems have
an adapter on the top panel for the installation of a
satellite using a telescopic pole (LEM SC-31)
2. Connections
The inputs of the HURRICANE ACTIVE loudspeaker
systems can be used with line signals coming from
devices with high-level outputs (see fi g. 2). For the
connection, use BALANCED signal cables with XLR or
JACK connector.
The input level of the incoming signal can be set using
the VOL control. If you are using devices with a too high
output level, you can reduce the input gain turning the
control counterclockwise.
If you need to send the same signal to a second
loudspeaker system you can use the XLR-M LINK
connector (fi g. 3).
3. SUB + SATELLITE systems (see fi g. 4)
In the following table you can fi nd the suggested sub-
woofer + satellite setups for the HURRICANE ACTIVE
loudspeaker systems. In the fi g. no. 4 you can fi nd also
the connection diagram for the use of the sub-woofers
in single or double confi guration.
a) 1xH350SA + 2xH150A: total power
650W (single confi guration)
b) 2xH350SA + 2xH150A: total power
1000W (double confi guration)
c) 2xH350SA + 2xH200A: total power
1100W (double confi guration)
d) 1xH400SA + 2xH200A: total power
800W (single confi guration)
e) 2xH400SA + 2xH200A: total power
1200W (double confi guration)
f) 2xH400SA + 2xH300A: total power
1600W (double confi guration)
6. Connection panel (fi g. 3)
1. XLR-F + JACK sockets connected in parallel for the
signal input and linking.
2. XLR-F + JACK sockets connected in parallel for
the signal input and linking (only H350SA and
H400SA).
3. XLR-M + JACK sockets connected in parallel for
the connection of the satellites (only H350SA and
H400SA).
4. Control for selecting the crossover frequency from
80Hz to 320Hz (only H350SA and H400SA).
5. SIGN/COMP LED (only H350SA and H400SA): show
the presence of a signal with minimum level -26dB
(green color) or the built-in compressor operating (red
color).
6. Control of the signal level sent to the built-in
amplifi er.
7. Control for separating the electrical earth from that of
the chassis.
8. ON/OFF switch with LED indicator.
9. Power supply socket.