1.0 Receiver overview
1) Full-Range telemetry and receiver with diversity antenna capable of transmitting or receiving
signal via both antennas for diversity scheme with maximum coverage.
2) Receiver sensitivity maximized for retrieving data with very weak RF signal by the newly
designed LNA stage. Majority of users should experience very noticeable range improvement
over pervious succession of Lemon Rx receiver or ANY brands of DSM2, DSMX or DSMX
compatible receivers for the same class.
3) Included sensors / interface: Receiver voltage, Battery voltage, Temperature (Internal
automatically selected when external temperature probe is not used), RSSI out (3V to 0V)
4) Optional sensors: Current sensing with up to 60A available for purchase in Lemon Rx website
under accessories page.
5) True RSSI (0 to 100) displayed on transmitter under flight log page in parameter "A".
(*Approximately 7dBm / count after the LNA stage.)
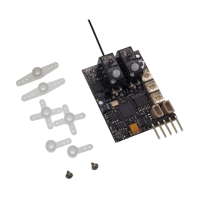
6) Extended antennas for many type of applications (Receiving element is the last 32mm of the
antenna wire with semi-transparent white PVC shield)
7) For use with channel 7 (AUX2), servo can be connected after binding or a Y-cable can be used
to connect to servo and bind plug when binding is required.
8) See label for PPM connection if the receiver is set as PPM mode to work with 3
rd
party flight
controller.
PPM-J output format is in the following sequence with indication of solid blue LED:
Throttle, Aileron, Elevator, Rudder, Gear, Aux1, Aux2
PPM-F output format is in the following sequence with indication of flashing blue LED:
Aileron, Elevator, Throttle, Rudder, Gear, Aux1, Aux2
*This is not guaranteed but may be used as approximate figure as being the receiver signal
strength in terms of dBm