5
REMOVE OLD FILTER AND DISCARDREMOVE OLD FILTER AND DISCARD
REMOVE OLD FILTER AND DISCARDREMOVE OLD FILTER AND DISCARD
REMOVE OLD FILTER AND DISCARD
(Figure 11)(Figure 11)
(Figure 11)(Figure 11)
(Figure 11)
NOTE: This filter may be mounted in the air handler
cabinet.
CLEAN BLOWER COMPARTMENTCLEAN BLOWER COMPARTMENT
CLEAN BLOWER COMPARTMENTCLEAN BLOWER COMPARTMENT
CLEAN BLOWER COMPARTMENT
NOTE: The air filter cannot remove dirt from blower and
ducts.
INSTALLATIONINSTALLATION
INSTALLATIONINSTALLATION
INSTALLATION
The following is a typical installation of the air cleaner on
an upflow air handler (Figure 7).
1. Place the air cleaner cabinet on the floor. Stand it
upright with the door facing you (Figure 2). If a
horizontal installation is being planned, lay the cabinet
on its side, this will help you to visualize the relative
location of all parts.
2. Unscrew the knob, remove the door (by grasping top
and pulling door away from cabinet) and set it aside.
Remove filter. Set in a safe location until the cabinet
is installed.
3. Set the cabinet next to the air handler (if possible) to
match the opening in the compartment.
If the air handler opening cannot be enlarged, a
transition fitting should be used. (Figure 3).
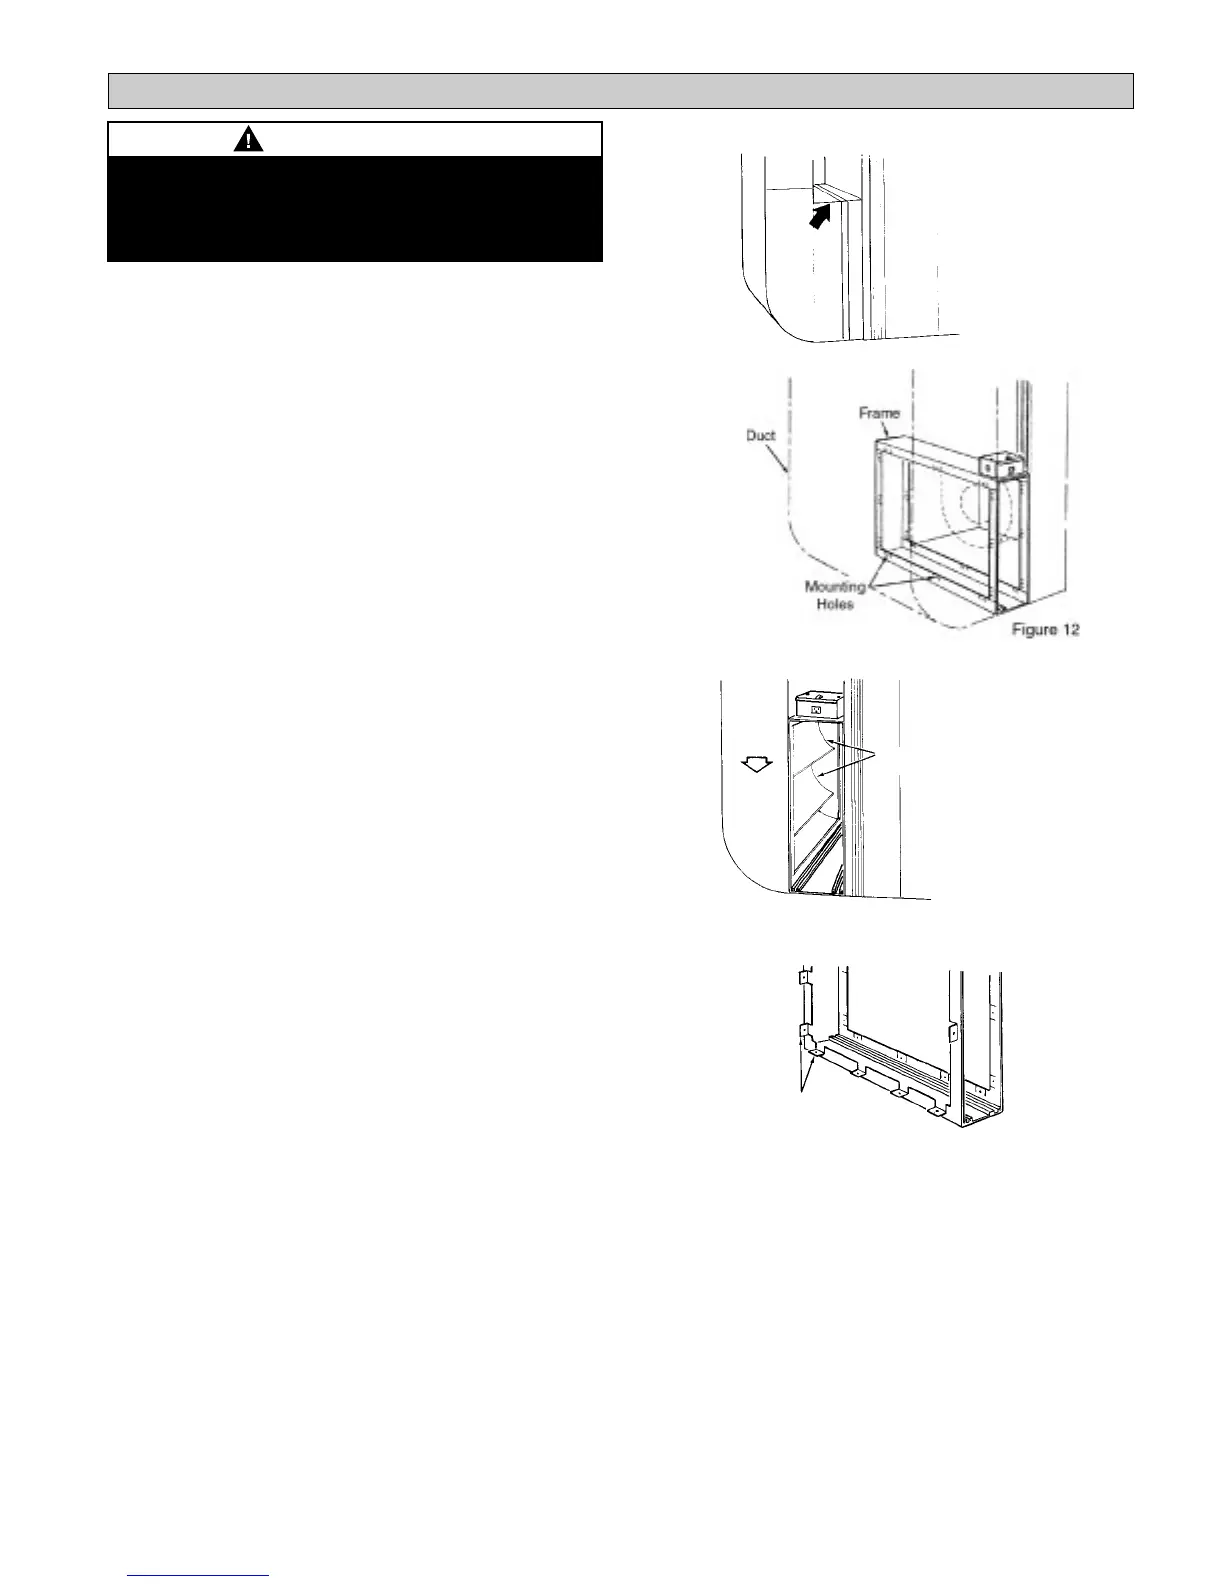
The cabinet can be attached directly (Figure 12), or a
starting collar can first be fitted to the furnace inlet. A
butt or slip joint can be used.
Securely attach the cabinet to air handler inlet, using
at least two of the mounting holes on each side of the
cabinet.
4. Using butt joint, attach duct (normally an elbow) to the
upstream side of air filter cabinet. (Note the use of the
sheet metal turning vanes inside the elbow to improve
air distribution.) (Figure 13)
NOTE: NOTE:
NOTE: NOTE:
NOTE: An optional method of attaching duct to the air
cleaner cabinet is to modify the cabinet (Figure 14) by
bending the tabs outward at a 90° angle and attaching duct
to tabs.
High Humidity EnvironmentsHigh Humidity Environments
High Humidity EnvironmentsHigh Humidity Environments
High Humidity Environments: Wrapping cabinet with 2”
foil faced insulation (foil on the outside) around the case
(excluding the insulated door) will prevent condensation
on the sides of the unit.
Transition FittingsTransition Fittings
Transition FittingsTransition Fittings
Transition Fittings
If the air duct does not fit the cabinet opening, a transition
fitting should be used. Gradual transitions are preferred
for greatest efficiency. Not more than four inches per
linear foot (approximately 20° angle) should be allowed
(Figure 3).
5. Connect the vertical duct section to the elbow. Wedge
a wood block between floor and elbow for support
(Figure 15).
6. Seal all joints in the return air system downstream
from the air filter with duct tape to prevent dust from
entering the air stream. Tape is usually applied on the
outside of ducts, but may also be applied on the
inside, or both.
7. With the air filter compartment installed, re-install
3” or 5” filter and door. (Figure 2)
NOTENOTE
NOTENOTE
NOTE: Please remove the plastic bag from the filter
media prior to installing the filter media into the air
cleaner cabinet. Proper disposal procedure of
plastic materials should be followed.
Figure 11
Air Flow
Turning
Vanes
Figure 13
Optional method
(Bend tabs outward at 90˚ angle)
Figure 14
InstallationInstallation
InstallationInstallation
Installation
Risk of property damage, injury or death.Risk of property damage, injury or death.
Risk of property damage, injury or death.Risk of property damage, injury or death.
Risk of property damage, injury or death.
Installation, adjustment, alteration, service and main-Installation, adjustment, alteration, service and main-
Installation, adjustment, alteration, service and main-Installation, adjustment, alteration, service and main-
Installation, adjustment, alteration, service and main-
tenance must be performed by a qualified servicetenance must be performed by a qualified service
tenance must be performed by a qualified servicetenance must be performed by a qualified service
tenance must be performed by a qualified service
technician.technician.
technician.technician.
technician.
WARNINGWARNING
WARNINGWARNING
WARNING