Do you have a question about the Lennox CBX32MV-018 and is the answer not in the manual?
This document provides comprehensive instructions and guidance for the setup, operation, and maintenance of a Lennox air handler, focusing on its 7-segment display and configuration options. It serves as a vital resource for service personnel, ensuring proper installation and troubleshooting.
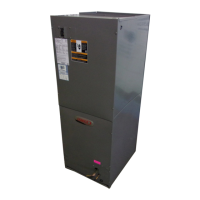
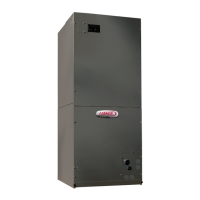
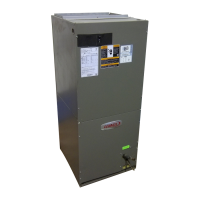
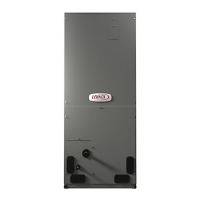
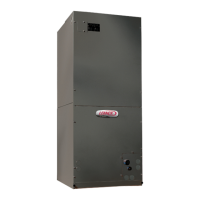
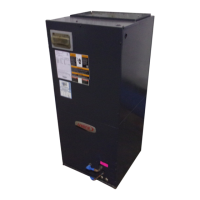
The Lennox air handler is a key component of a heating, ventilation, and air conditioning (HVAC) system, responsible for circulating conditioned air throughout a building. Its control system, accessible via a 7-segment display, allows for precise configuration and monitoring of various operational parameters. The device supports multiple modes of operation, including cooling, heating (both electric and heat pump), dehumidification, and continuous fan operation.
The control system features an "Error Code Recall Mode" which allows service personnel to diagnose issues by displaying up to 10 stored error codes. This mode is activated by pressing and holding a button until a solid "E" appears on the 7-segment display. If "E000" is displayed, it indicates no stored errors. To exit this mode, the button is held until three horizontal bars appear. To clear stored error codes, the button is held while the three horizontal bars are displayed, then released when a solid "c" appears. A quick press and hold for one second will display "0000" and exit error recall mode.
The 7-segment display also provides real-time status updates through various codes. During "Power-Up," the display shows a unit size code (number or letter) representing the air handler's model size and capacity. If three horizontal bars are displayed, the AHC (Air Handler Control) does not recognize the size and capacity. In "Idle mode," the decimal point blinks at 1 Hertz (0.5 seconds ON, 0.5 seconds OFF), indicating the system is energized but without a demand.
Operational modes are indicated by specific display patterns. For "Cubic feet per minute (CFM) setting for indoor blower," the display shows "1 second ON, 0.5 second OFF" followed by the current CFM setting. "Cooling stage" displays "1 second ON, 0.5 second OFF" followed by "1 or 2," then a pause, then the CFM setting, another pause, and then repeats the codes. "Dehumidification mode" shows "1 second ON" followed by a pause, then the CFM setting, another pause, and then repeats the codes. "Defrost Mode" is indicated by "d F." "Heat Stage" displays "1 second ON, 0.5 second OFF" followed by "1 or 2," then a pause, then the CFM setting, another pause, and then repeats the codes, indicating electric heat availability in 1 to 5 stages. "Stage heat pump" shows "h" followed by "h1" or "h2" to indicate active heat pump stages. "Discharge air sensor temperature" is indicated by "U," requiring the discharge air sensor to be installed, properly configured, and the indoor blower to be operating.
The "Indoor Blower Test" is initiated by releasing the push button. This cycles the indoor blower on for 10 seconds at 70% of maximum air for the selected capacity size unit. The control automatically exits Field Test Mode after this test.
The air handler's control system is designed for flexible configuration through a series of jumpers and links on the control board. These allow customization of blower speed, heating and cooling modes, and other operational parameters.
The control system provides detailed error codes to assist in troubleshooting:
The manual emphasizes the importance of proper configuration and provides guidance for troubleshooting common issues. For instance, if the air handler's blower motor does not start (E292), service personnel should check for seized bearings, a stuck wheel, or obstructions. If the indoor blower motor is overheating (E295), motor bearings and amps should be checked, and the motor replaced if necessary.
For discharge air sensor problems (E310), the outdoor sensor resistance should be compared to temperature/resistance charts in the installation instructions, and the sensor replaced if needed. Similarly, for outdoor sensor issues (E180), the outdoor sensor resistance should be compared to charts in the unit installation instructions.
Communication errors (E105, E124, E201) require checking wiring connections, ohm wires, and cycle power. Power-related issues (E114, E115, E409) necessitate checking voltage and line power frequency.
Corrupted control parameters (E131) or software (E132) indicate a need to replace the control board. Missing configuration jumpers (E130) or mismatched unit size codes (E202, E203) require reconfiguring the control or selecting the correct unit size code.
For electric heat failures (E351-E355), service personnel should check if pilot relay contacts closed or if the relay coil in the electric heat section energized. The air handler will operate on the lowest available electric heat stage until the issue is resolved.
The manual also highlights the importance of carefully cutting on-board links (solder traces) to prevent damage to the control board. It advises consulting unit installation instructions or information manuals for detailed procedures on clearing alarms and other maintenance tasks.
| Model | CBX32MV-018 |
|---|---|
| Type | Air Handler |
| Cooling Capacity | 1.5 Tons |
| Refrigerant | R-410A |
| Voltage | 208/230V |
| Phase | 1 |
| Width | 21 inches |
| Maximum External Static Pressure | 0.8 in. w.g. |