Do you have a question about the Lennox CHX35 Series and is the answer not in the manual?
Details specifications for CHX35 models 18A through 30B, including line sizes, coil dimensions, and shipping data.
Provides specifications for CHX35 models 36A through 42C, covering line connections, coil dimensions, and shipping details.
Instructions for positioning the coil with a 1/2" slope for left/right discharge and securing it to the furnace.
Guidance for installing the coil with right-hand discharge, using a field-provided spacer for clearance.
Table and guidance for selecting appropriate refrigerant line set sizes for CHX35 models.
Procedure for connecting the suction line to the indoor coil, including brazing guidelines and precautions.
Instructions for connecting the main condensate drain line to a suitable outlet, avoiding closed systems.
Guidance on connecting the overflow drain line or plugging it, with best practices for routing.
Detailed steps for cleaning the aluminum coil using mild cleaners and water, with specific pH and pressure recommendations.
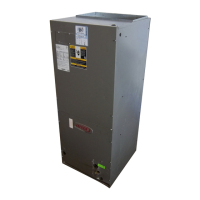
This document provides installation instructions for CHX35 Series Indoor Coils, which are designed for use with air conditioners and heat pumps. These coils are supplied with a factory-installed HFC-410A check/expansion valve. The manual emphasizes the importance of proper installation, adjustment, alteration, service, or maintenance to prevent property damage, personal injury, or loss of life. It explicitly states that installation and service must be performed by a licensed professional HVAC installer or equivalent, a service agency, or the gas supplier.
A critical environmental and safety note highlights that the Clean Air Act of 1990 bans the intentional venting of refrigerants (CFCs, HCFCs, and HFCs) as of July 1, 1992. Consequently, approved methods of recovery, recycling, or reclaiming must be followed, with fines and/or incarceration potentially levied for noncompliance. The manual also includes a caution regarding sharp sheet metal edges, advising users to take care, wear gloves, and protective clothing when handling the equipment to prevent personal injury.
The CHX35 coils are shipped from the factory pressurized with dry air, holding a charge of 9 ± 2 psi. Before installation, it is crucial to pierce a hole in the rubber plug sealing the vapor line to relieve this pressure. If no pressure is released upon piercing, the coil should be checked for leaks before proceeding with installation. The manual stresses the importance of recovering all refrigerant to relieve pressure before opening the system, citing a risk of explosion or fire that could cause injury or death.
Installation involves positioning the coil adjacent to the furnace cabinet. For left-hand and right-hand discharge configurations, the coil must have a 1/2" slope from the rear of the cabinet to the drain. Six field-provided #8 X 1" screws are used to secure the coil casing to the furnace by aligning clearance holes. For right-hand air discharge with a field-provided spacer, a spacer (approximately 6 inches minimum) must be inserted between the furnace and the coil to allow room for proper installation. The coil casing, spacer, and furnace are then secured together with field-provided screws.
The manual provides specific guidance for connecting the coil directly with a condensing furnace, noting that the coil must be level from the return end to the supply end. The front (access side) of the furnace may be pitched downward up to 1 inch to accommodate a 12-inch pitched coil. The supply duct must be secured to the coil cabinet. For leak testing, evacuating, and charging procedures, users are directed to refer to the instructions provided with the condensing unit, with an emphasis on checking the entire system for leaks before charging.
Duct sealing is also covered, requiring that the duct be secured and all joints properly sealed to the coil cabinet flanges. A warning highlights the necessity of an airtight seal between the bottom of the air handler and the return air plenum, recommending fiberglass sealing strips, caulking, or equivalent methods. This is crucial to prevent return air from being drawn from rooms containing gas-fueled appliances (like water heaters) or carbon monoxide-producing devices (like wood fireplaces).
The manual includes an important note on duct system sizing, stating that it should be properly sized and installed according to ASHRAE Standard Manual D. Both supply and return air duct systems must be designed for the specific CFM and static requirements of the job, and the blower performance chart in the unit installation instructions should be consulted to verify that the blower meets application requirements.
Condensate drain connections are detailed, with an important reminder to check drain hole(s) after removing plugs to ensure they are fully open and free of debris. It's also important to verify that no debris has fallen into the drain pan during installation. The main drain should be connected and routed downward to a drain line or sump, but not to a closed waste system. For overflow drains, it is recommended to connect them to an overflow drain line for all units; if not connected, the overflow drain must be plugged with the provided cap. Best practices for condensate removal include ensuring main and overflow drain lines are not smaller than the drain connections at the drain pan, routing overflow drain lines to an area where homeowners will notice drainage, and installing a vent and trap.
Blower speed selection is crucial for optimal performance. The manual instructs users to select a blower motor speed tap that provides 400 ± 50 CFM per 12,000 Btuh of cooling capacity (wet coil). A static pressure reading must be taken from the air entry side of the coil to the air exit side to ensure accuracy and confirm the pressure drop falls within the proper range. Test holes (5/16") are drilled in the coil case and supply air duct for this purpose. The zero end of a draft gauge scale is connected to the furnace end of the coil, with hoses extending 1/4" inside the duct or end seal, and sealed with Permagum. After turning on electrical power and initiating a cooling demand, the draft gauge reading is observed. If the reading is below the required air volume, the blower speed should be increased; if above, it should be decreased, referring to the furnace wiring diagram for settings. Once the required readings are obtained, the draft gauge lines are removed, and snaphole plugs are inserted into the test holes.
Maintenance instructions highlight that the unit is equipped with an aluminum coil, which can be damaged by exposure to solutions with a pH below 5 or above 9. Cleaning should be done with potable water at a moderate pressure (less than 50 psi). If water alone is insufficient, Lennox recommends using a coil cleaner with a pH in the range of 5 to 9, followed by thorough rinsing. A trained technician or service agency should perform maintenance and service. Indoor coils should be inspected at the beginning of each heating or cooling season to determine if cleaning is needed.
The cleaning process involves removing the coil from the cabinet or plenum, vacuuming or brushing off matted and surface debris from the fins using non-destructive attachments. If oil deposits are present, a mild coil cleaner (pH 5-9) can be sprayed on the coil for no more than 10 minutes to soften deposits, then thoroughly flushed with potable water. The coil should be sprayed at a vertical angle of 30 to 45 degrees with a constant stream of water at moderate pressure, ideally with a pressure washer with a fan nozzle. Spraying from a horizontal direction is not recommended. The spray should be directed to wash debris out of the coil, and hot water is generally not necessary for residential units. Attempting to back flush from the inside of the coil or blowing water through it is discouraged as it may be difficult to flush the entire surface and reduces the flushing action. After cleaning, the coil is replaced into the cabinet or plenum, ensuring proper routing and securing of refrigerant tubing. An important caution advises ensuring that distributor lines are not rubbing together or kinked, and all tubes have enough clearance from other metal parts. Wire ties should be used to secure tubes to prevent movement that could cause refrigerant tubing failure.
| Series | CHX35 |
|---|---|
| SEER Rating | Up to 16 |
| Refrigerant | R-410A |
| Compressor Type | Scroll |
| Voltage (VAC) | 208/230 |
| Phase | 1 |
| Stages | Single |