Page 23
XC15 SERIES
INDOOR UNIT
1. Clean or change filters.
2. Adjust blower speed for cooling. Measure the pressure
drop over the coil to determine the correct blower CFM.
Refer to the unit information service manual for pressure
drop tables and procedure.
3. Check blower for accumulation of dirt or debris.
4. Check all wiring for loose connections
5. Check for correct voltage at unit (blower operating).
6. Check amp−draw on blower motor:
UNIT NAMEPLATE: _________ ACTUAL: __________
Sound Reduction (SR1) Cover
ASSEMBLY PROCEDURE
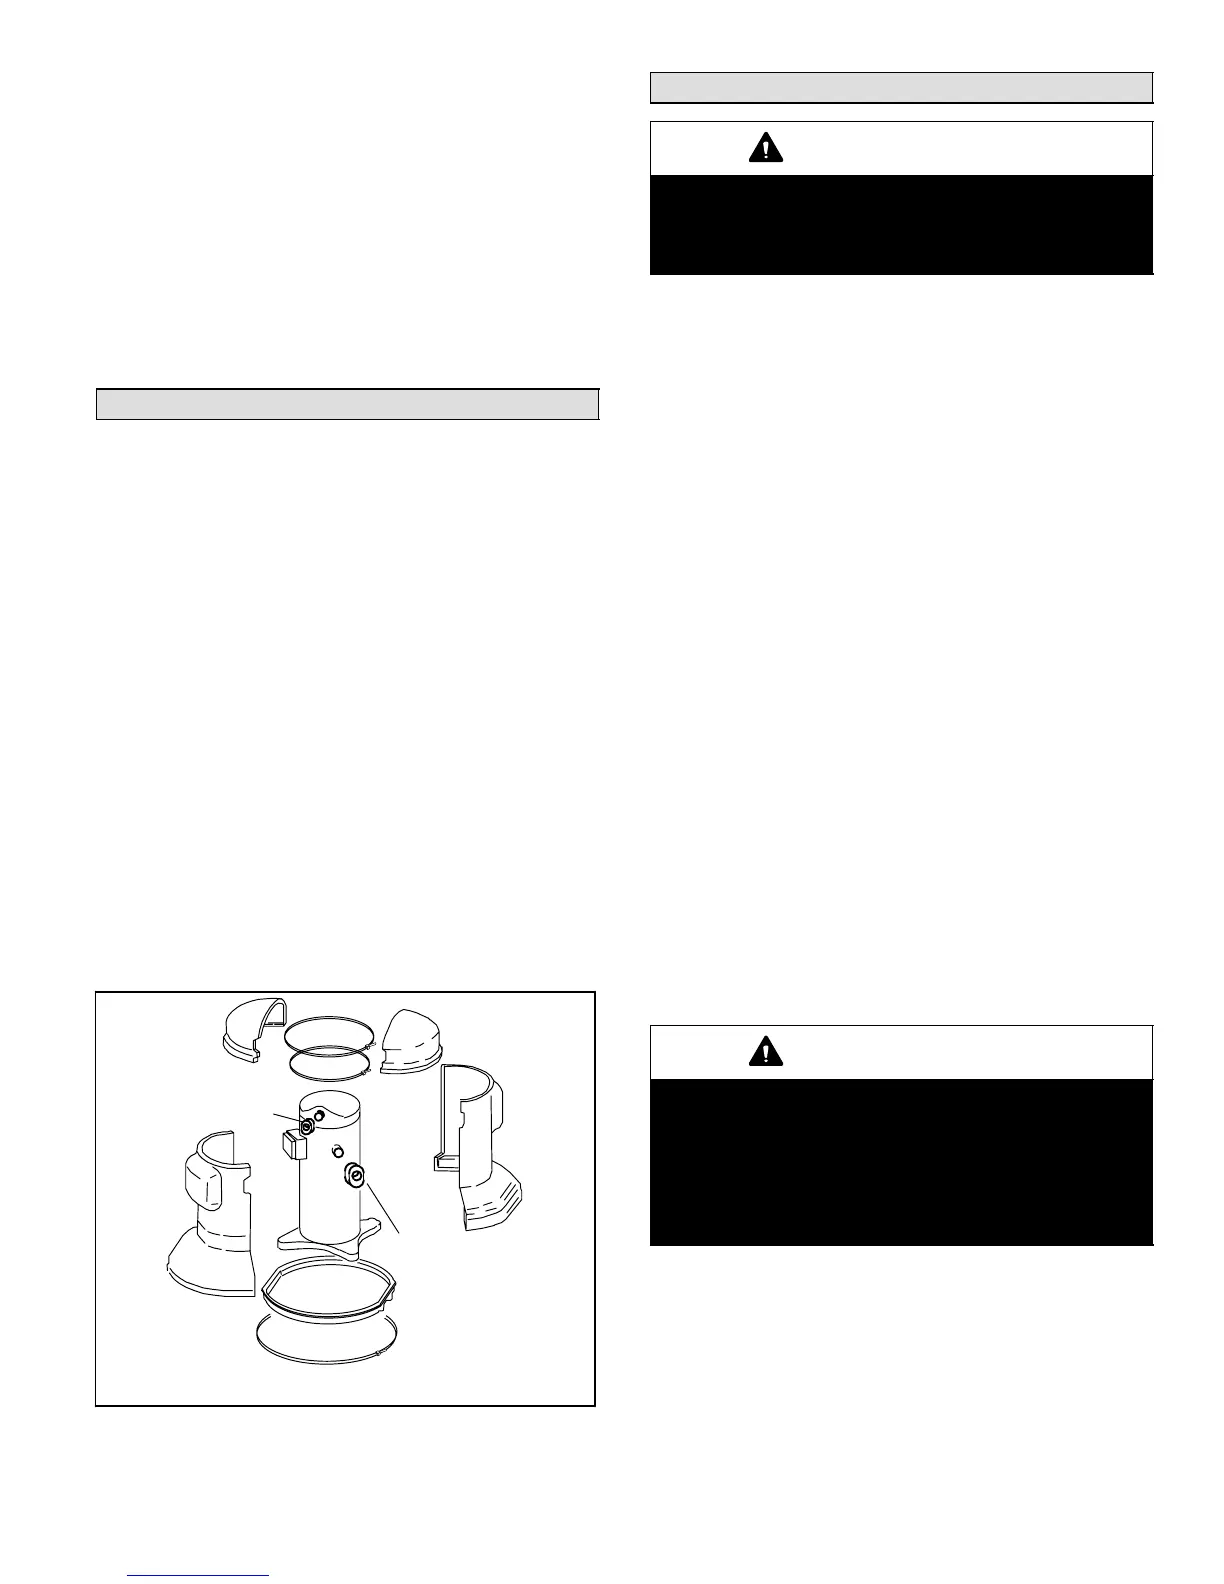
Figure 38 identifies the sound reduction parts. Assembly
procedures are as follows:
1. Put SR1 base on unit base pan.
2. Install compressor on base.
3. Cover SR1 base with wet rags to protect against any
brazing material.
4. Braze suction tube.
5. Braze discharge tube.
6. Cool connections to ambient temperature.
7. Perform leak check.
8. Install suction grommet.
9. Install SR1 left and right side covers.
10. Fasten 60" bottom cable tie.
11. Install discharge grommet.
12. Install top caps.
13. Fasten 36" top cable tie.
14. Fasten 36" middle cable tie.
MIDDLE CABLE
TIE
BASE
BOTTOM CABLE
TIE
SUCTION
GROMMET
LEFT
SIDE
COVER
RIGHT
SIDE
COVER
DISCHARGE
GROMMET
LEFT TOP CAP
RIGHT TOP CAP
TOP CABLE TIE
Figure 38. Sound Reduction Cover Parts
Homeowner Information
IMPORTANT
Turn off electrical power to the unit at the
disconnect switch before performing any
maintenance. The unit may have multiple power
supplies.
MAINTENANCE
In order to ensure peak performance, your system must be
properly maintained. Clogged filters and blocked airflow
prevent your unit from operating at its most efficient level.
1. Air FilterAsk your Lennox dealer to show you where
your indoor unit’s filter is located. It will be either at the
indoor unit (installed internal or external to the cabinet)
or behind a return air grille in the wall or ceiling. Check
the filter monthly and clean or replace it as needed.
2. Disposable FilterDisposable filters should be
replaced with a filter of the same type and size.
NOTE − If you are unsure about the filter required for your
system, call your Lennox dealer for assistance.
3. Reusable FilterMany indoor units are equipped
with reusable foam filters. Clean foam filters with a
mild soap and water solution; rinse thoroughly; allow
filter to dry completely before returning it to the unit or
grille.
NOTE − The filter and all access panels must be in place
any time the unit is in operation.
4. Electronic Air CleanerSome systems are
equipped with an electronic air cleaner, designed to
remove airborne particles from the air passing through
the cleaner. If your system is so equipped, ask your
dealer for maintenance instructions.
5. Indoor UnitThe indoor unit’s evaporator coil is
equipped with a drain pan to collect condensate
formed as your system removes humidity from the
inside air. Have your dealer show you the location of
the drain line and how to check for obstructions. (This
would also apply to an auxiliary drain, if installed.)
IMPORTANT
Sprinklers and soaker hoses should not be installed
where they could cause prolonged exposure to the
outdoor unit by treated water. Prolonged exposure
of the unit to treated water (i.e., sprinkler systems,
soakers, waste water, etc.) will corrode the surface
of steel and aluminum parts and diminish
performance and longevity of the unit.
6. Outdoor UnitMake sure no obstructions restrict
airflow to the outdoor unit. Leaves, trash or shrubs
crowding the unit cause the outdoor unit to work harder
and use more energy. Keep shrubbery trimmed away
from the unit and periodically check for debris which
collects around the unit. When removing debris from
around the unit, be aware of metal edges on parts and
screws. Although special care has been taken to keep
exposed edges to a minimum, physical contact with
 Loading...