Page 47
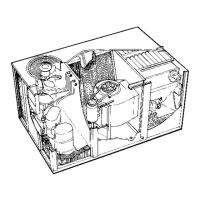
FIGURE 44
BLOWER SPEED ADJUSTMENT
BLOWER PULLEY
MOTOR PULLEY
SET SCREW
KEY
BLOWER
TO INCREASE CFM
TURN PULLEY CLOCKWISE
TO DECREASE CFM
TURN PULLEY
COUNTERCLOCKWISE
TO INCREASE BELT TENSION
1 - Loosen 2 locking bolts.
2 - Pull motor mounting plate.
3 - Tighten motor mounting
plate so plate is vertical.
MOTOR
MOUNTING PLATE
MEASURE RPM HERE
Adjusting Unit CFM:
The CFM can be changed by using the following proce
dure:
1- Remove the blower belt.
2- Loosen the set screws on motor pulley and remove
key as shown in figure 44.
3- Turn pulley clockwise to increase CFM and counter
clockwise to decrease CFM. One half turn changes
blower speed approximately 20 RPM.
NOTE-The pulley is factory set at three turns open.
4- Replace the key and tighten the set screw. Replace
and tighten the blower belt.
IX-MAINTENANCE
CAUTION
Electrical shock hazard. Turn off power to unit be
fore performing any maintenance, cleaning or
service operation on the unit.
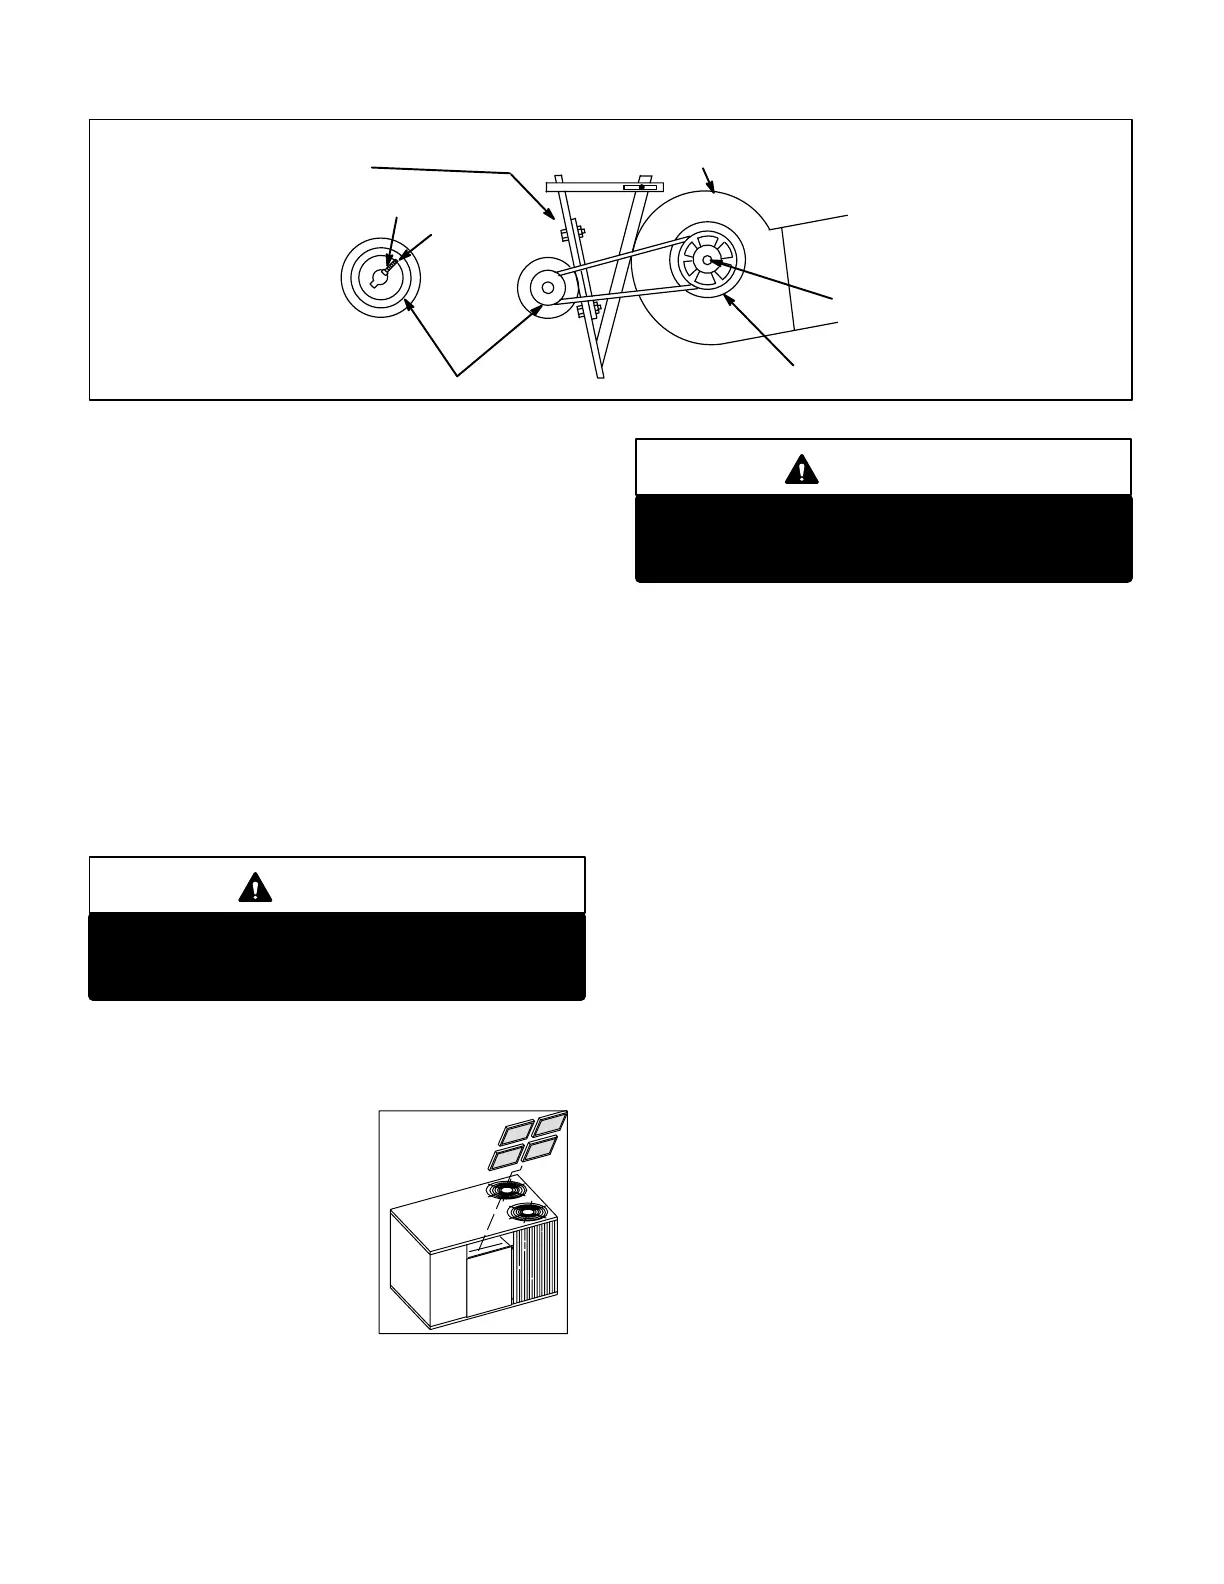
A-Filters (Figure 45)
GCS16 unit is equipped with four pleated 2" throw-away
type filters. Permanent 1" foam filters are acceptable re
placements. Filters should
be checked monthly (or more
frequently in severe use) and
cleaned or replaced regular
ly. If permanent foam filters
are used as a replacement,
they should be checked and
cleaned periodically with
warm water and a mild deter
gent. Take note of the AIR
FLOW DIRECTION" mark
ing on the filter frame when re-installing.
NOTE-Filters must be U.L.C. certified or equivalent for
use in Canada.
CAUTION
Be careful when servicing unit to avoid accidental
contact with sharp metallic edges which may
cause personal injury.
B-Lubrication
All motors used in GCS16 units are prelubricated; no fur
ther lubrication is required.
C-Supply Air Blower Wheel
Annually inspect supply air blower wheel for accumulated
dirt or dust. Turn off power before attempting to remove ac
cess panel or to clean blower wheel.
D-Evaporator Coil
Inspect and clean coil at beginning of each season. Clean
using mild detergent or commercial coil cleanser. Check
condensate drain pan and line, if necessary. Flush coil and
condensate drain with water taking care not to get insula
tion, filters, return air ducts wet. Check connecting lines and
coil for evidence of oil leaks.
E-Condenser Coil
Clean condenser coil annually with detergent or commer
cial coil cleaner and inspect monthly during the cooling
season. Check connecting lines and coil for evidence of oil
leaks.
Condenser coils are made of individual coil slabs. Dirt and
debris may become trapped between the slabs. To clean
between slabs, carefully separate slabs and wash thor
oughly.
NOTE-If owner complains of insufficient cooling, refrig
erant charge should be checked. Refer to Charging
section in this manual.
F-Electrical
1- Check all wiring for loose connections.
2- Check for correct voltage at unit (unit operating).
3- Check amp-draw on both condenser fan motor and
blower motor.
Fan Motor Rating Plate ____ Actual ________
Indoor Blower Motor Rating Plate____ Actual____
GCS16-1853
AIR FILTERS
FIGURE 45
 Loading...