Page 5
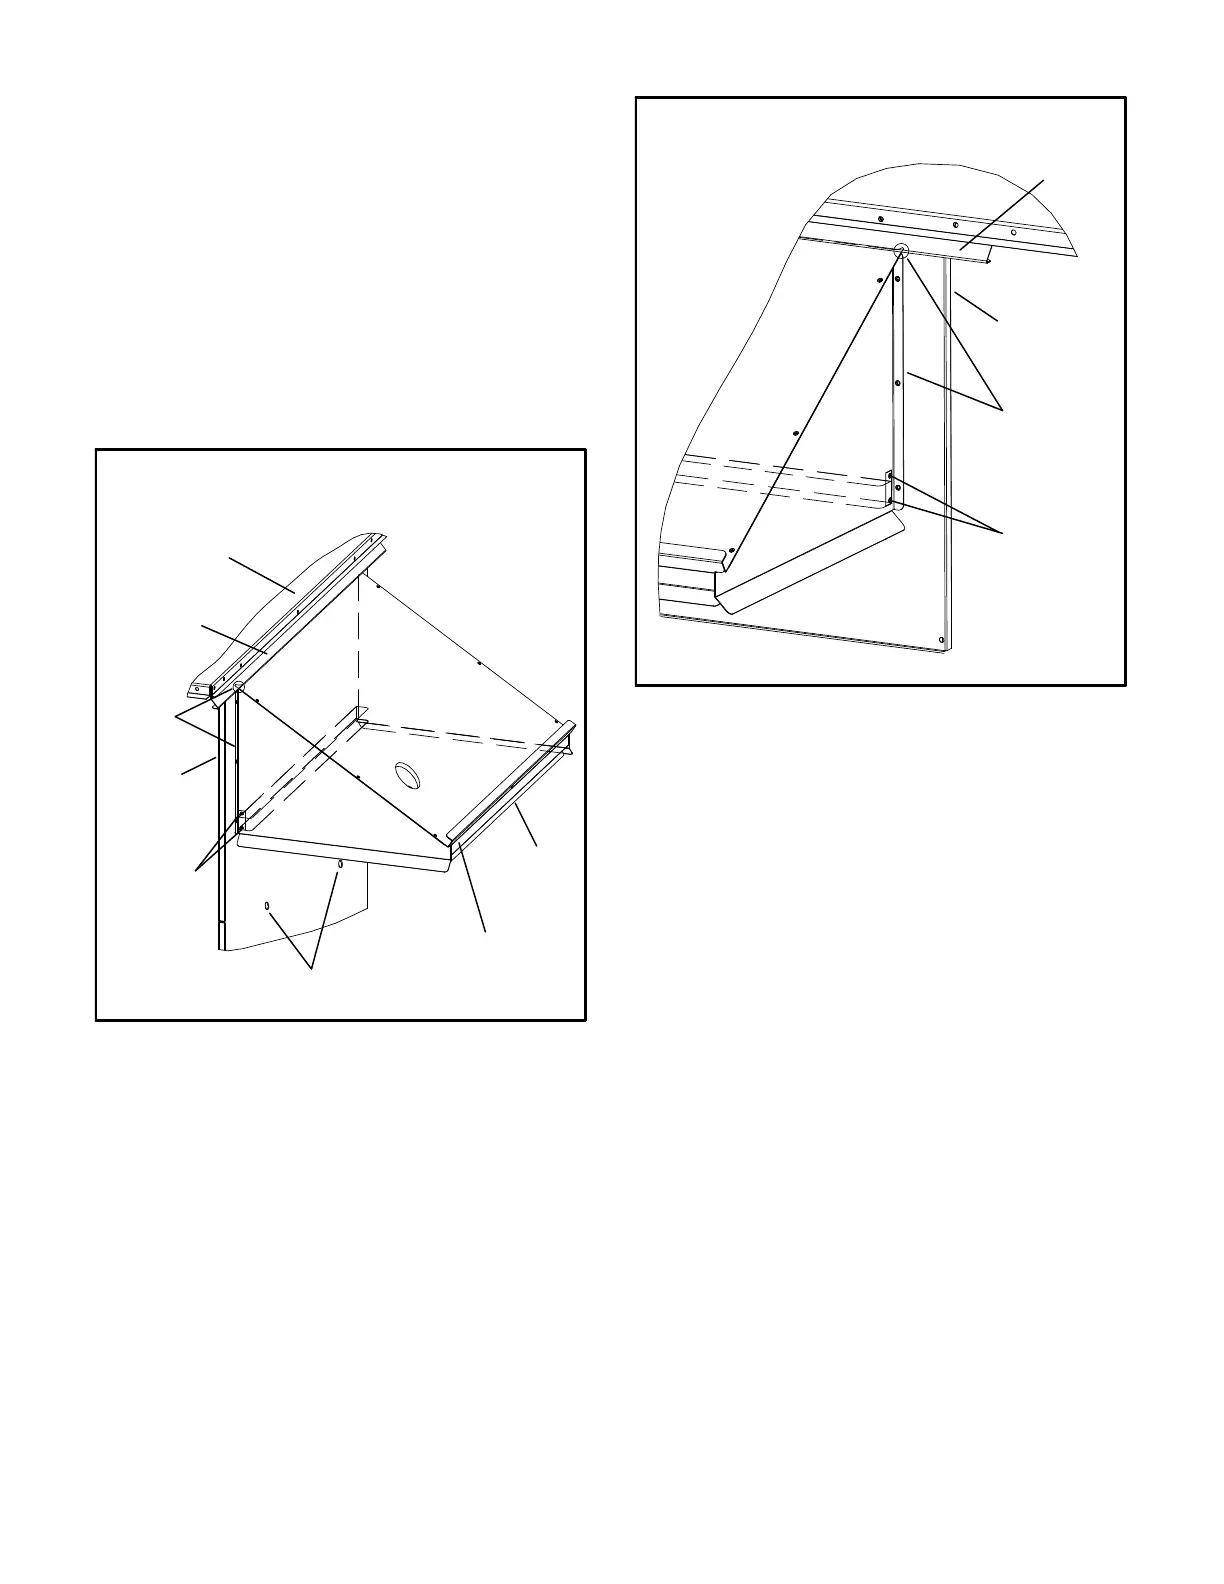
9- Slide filter into the slot on the bottom filter bracket.
Make sure arrows on filter match airflow direction.
Secure the hood top filter bracket to the hood top
using the thread forming screw provided. See
figure 11.
10- Tighten hood pivot bracket screws.
11- Seal the locations shown in figures 11 and 12 with
caulk.
12- LGH/LCH/KG/KC/KH Only -
Locate the two retained screws removed from the
hood top in figure 3. Install screws into the two open
holes on the unit end panel below the assembled
hood. See figure 10.
FIGURE 11
OUTDOOR AIR HOOD
LGH/LCH/KG/KC/KH SHOWN
LEFT
HOOD SIDE
INSERT
THREAD
FORMING
SCREW
HOLES FOR
BOTTOM
FILTER
BRACKET
HOOD TOP
FILTER
BRACKET
DAMPER
ASSEMBLY
SEAL
WITH
CAULK
HOOD
PIVOT
BRACKET
UNIT TOP
PANEL
HOOD
TOP
INSTALL RETAINED SCREWS
IN OPEN HOLES ON LGH/
LCH/KG/KC/KH UNITS
FIGURE 12
OUTDOOR AIR HOOD
LGH/LCH/KG/KC/KH SHOWN
HOLES FOR
BOTTOM
FILTER
BRACKET
SEAL WITH
CAULK
DAMPER
ASSEMBLY
HOOD
TOP
HOOD PIVOT
BRACKET
RIGHT
HOOD
SIDE
 Loading...