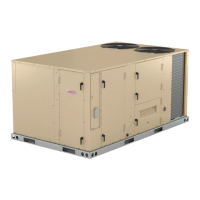
Page 21
C-Blower Compartment
The blower compartment is located between the evapora
tor coil and the condenser coil section. The blower assem
bly is secured to a sliding frame which allows the blower
motor assembly to be pulled out of the unit.
Units are equipped with variable speed, direct drive blow
ers. The supply CFM can be adjusted by changing the per
centage of motor output using the Unit Controller settings.
Measure the intake air CFM and adjust the RPM% to get
design-specified supply air CFM.
1-Blower Wheels
Units are be equipped with a backward inclined blower
wheel. See “SPECIFICATIONS” at the front this manual for
more detail.
2-Indoor Blower Motor B3
Units are equipped with a direct drive blower assembly with
a three-phase, variable speed, direct drive blower motor.
All motor specifications are listed in the SPECIFICATIONS
(table of contents) in the front of this manual. Units may be
equipped with motors manufactured by various manufac
turers, therefore electrical FLA and LRA specifications will
vary. See unit rating plate for information specific to your
unit.
IMPORTANT
Compressor two is the only component that must be
checked to ensure proper phasing. Follow “COOLING
START-UP” section of installation instructions to ensure
proper compressor and blower operation.
The Unit Controller checks the incoming power during
start-up. If the voltage or phase is incorrect, the Unit Con
troller will display an alarm and the unit will not start.
A-Blower Operation
Refer to the Unit Controller Setup Guide to energize blower.
Use the mobile service app menu; see SERVICE > TEST.
In thermostat control mode, the Unit Controller will stage
the blower between low and high speed. In zone sensor
control mode, the Unit Controller will vary (VAV) the blower
between low and high speed.
WARNING
1-Make sure that unit is installed in accordance with the
installation instructions and applicable codes.
2-Inspect all electrical wiring, both field‐ and factory‐
installed, for loose connections. Tighten as required.
3-Check to ensure that refrigerant lines do not rub against
the cabinet or against other refrigerant lines.
4-Check voltage at disconnect switch. Voltage must be
within range listed on nameplate. If not, consult power
company and have voltage condition corrected before
starting unit.
5-Make sure filters are new and in place before start‐up.
Initiate blower only (G) demand at thermostat according to
instructions provided with thermostat. Unit will cycle on
thermostat demand. The following steps apply to applica
tions using a typical electro-mechanical thermostat.
1- Blower operation is manually set at the thermostat sub
base fan switch. With fan switch in ON position, blow
ers will operate continuously.
2- With fan switch in AUTO position, the blowers will cycle
with demand. Blowers and entire unit will be off when
system switch is in OFF position.
NOTE - Blower operation mode can also be initiated by the
mobile service app.
Direct-drive motor may not immediately stop when power is
interrupted to the Unit Controller. Disconnect unit power
before opening the blower compartment. The Controller's
digital inputs must be used to shut down the blower. See
Unit Controller manual for operation sequences.
B-Blower Access
The blower assembly is secured to a sliding frame which al
lows the blower assembly to be pulled out of the unit. See
figure 10.
1- Loosen the reusable wire tie which secures the con
trols and high voltage blower wiring to the blower hous
ing. Disconnect the pressure sensor low voltage wire
harness.
2- Remove and retain screws on either side (and on the
front for direct drive) of sliding frame. Use the metal
handle to pull frame toward outside of unit.
3- Slide frame back into original position when finished
servicing. Reattach the blower wiring in the previous lo
cation using the wire tie. Reconnect pressure sensor
low voltage wire harness.
4- Replace retained screws.
 Loading...