Page 4
505,276M 10/09
NOTICE
This appliance is intended for return air duct instal-
lation only.
Improper installation may damage PureAirt sys-
tem, HVAC system, or other equipment and may
also void warranty.
Remove Protective Wrapping
The metal insert is shipped in a protective vacuum packag-
ing. Packaging must be removed prior to installation. Take
care to prevent damage to metal insert when removing
packaging.
NOTICE
Unpacking required.
Remove all protective packing material from the
UVA lamps and the titanium dioxide metal insert.
Packing material should be disposed of properly.
Use cotton gloves or a cotton cloth to protect the lamps and
your hands during unpacking and installation. Install
lamps as follows:
1. Remove the PCO access door.
2. Slide out the control box assembly.
3. Remove protective cardboard sleeves from lamp/re-
flector assembly.
4. Ensure lamp is properly inserted in the lamp socket.
5. If necessary, reseat lamp by gently engaging the pins
in the socket and pivoting the lamp to engage the two
securing clips mounted on the reflector.
6. Gently pull on lamp to ensure that lamp securing clips
are engaged.
7. Repeat steps 3 through 6 to check installation for sec-
ond lamp.
8. Slide vacuum−packaged metal insert out of cabinet.
Carefully remove insert from packaging.
9. Keep metal insert and filter in a safe place to ensure
these components remain clean until the cabinet
installation is completed.
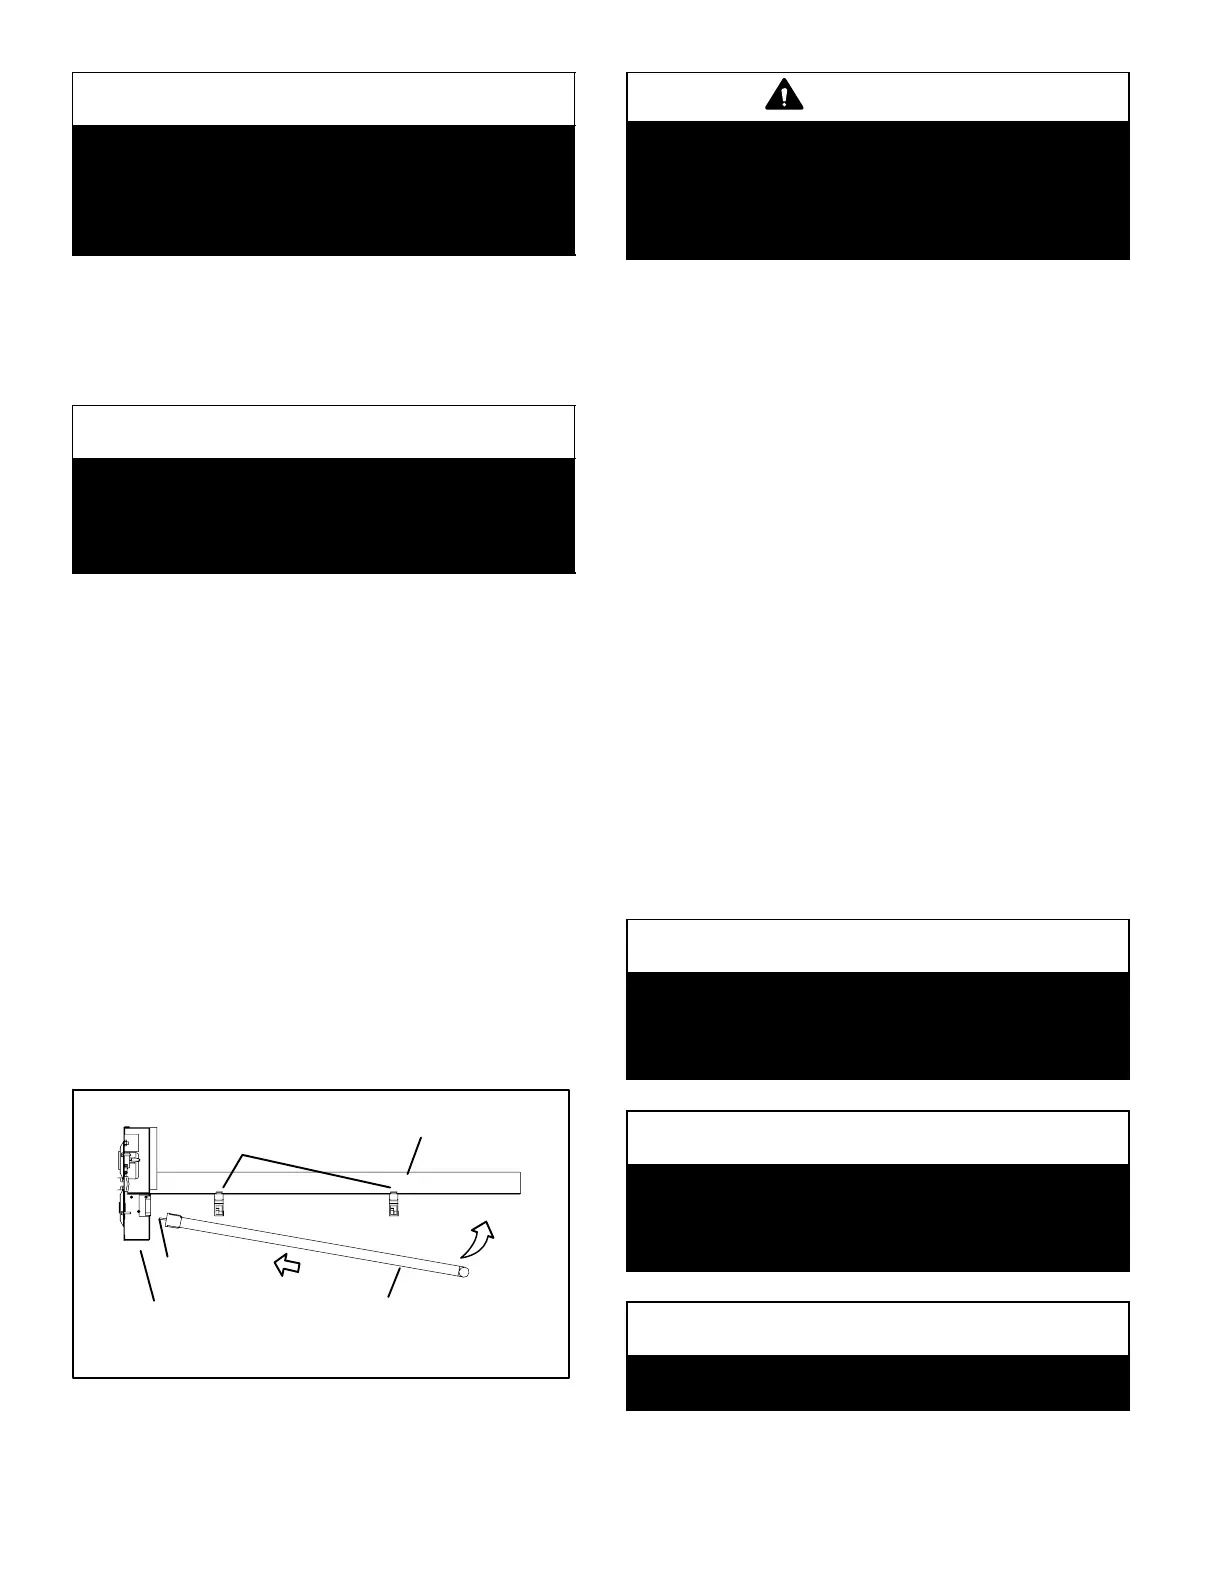
Reflector
Lamp Socket Lamp
Lamp
Securing
Clips
Slide lamp pins into lamp socket and pivot
lamp inward onto lamp securing clips.
Pins
Figure 5. Lamp Installation (Top View)
CAUTION
Lamps contain mercury.
Ingestion of or contact with mercury or mercury va-
por is hazardous to your health.
Take care when handling lamps. If lamp is broken,
avoid contact with mercury.
Installing PCO Cabinet
The PCO cabinet may either be installed on a level installa-
tion deck or platform adjacent to the air handler or it may be
suspended from the rafters using metal strapping. If straps
are used, take care when attaching straps to the PCO cabi-
net. Ensure fasteners do not interfere with internal compo-
nents of the PCO cabinet. Filter, metal insert and control
box must be able to slide freely into the cabinet.
1. Oil on metal surfaces may cause odors. Use mild soap
and water solution to wash all new duct and transition
surfaces.
2. Use the air flow directional label on the inside of the
PCO cabinet to orient the PCO unit. Properly position
the PCO cabinet next to the return air opening of the
air handling unit. Use sheet metal screws (1" maxi-
mum length), rivets or other appropriate fasteners to
secure PCO cabinet to the return air side of the air han-
dling unit.
3. Use sheet metal screws (1" maximum length) to fasten
the return air duct to the other side of the PCO cabinet.
4. Use aluminum foil tape or water−based mastic to seal
all joints between the PCO cabinet, air handler and
duct.
5. In high humidity applications, wrap PCO cabinet with
2" foil−faced insulation (foil on the outside) to prevent
condensation.
NOTICE
Oil on metal ducts may cause odors.
Use a mild soap and water solution to remove oils
from transitions and duct surfaces prior to installa-
tion.
NOTICE
Do not use any form of silicone sealant.
Use of silicone−based products will reduce the ef-
fectiveness of or damage the titanium dioxide coat-
ings on the metal insert.
NOTICE
Route power cord away from traffic areas where the
cord may become a safety hazard.
 Loading...