EasyManua.ls Logo

Lenovo P27h-20 - User Manual

Lenovo P27h-20
8 pages
Print Icon
To Next Page IconTo Next Page
Loading...
P27h-20 Simplified service manual for dismantling
Model Name: Lenovo P27h-20
Question and Answer IconNeed help?

Do you have a question about the Lenovo P27h-20 and is the answer not in the manual?

Summary

Precautionary Measures

Prepare Working Platform

Prepare soft cloth and sponge as working platform to place LCD monitor horizontally.

Handle LCD Panel with Care

Hold LCD by the side carefully and DON'T touch or press panel directly.

Appropriate Tools for Disassembly

Phillips Screwdriver (#2)

Phillips screwdriver (#2) is required for disassembly and re-assembly.

C;D Disassembly Tool

A C/D disassembly tool is needed for releasing rear cover hooks.

Gloves or Soft Cloth

Gloves or soft cloth are used for safe handling of components.

Disassembly Procedure - Initial Steps

Position Monitor and Release Stand

Place monitor on a flat surface and release the stand using the button.

Remove Initial Screws

Remove four screws from the monitor casing using a Phillips screwdriver.

Disassembly Procedure - Cover and Cable Removal

Release Rear Cover Hooks

Use a disassembly tool to release rear cover hooks from bottom holes.

Remove Tapes and Foil

Carefully remove all internal tapes and foil from the components.

Remove Casing Screws

Remove all screws securing the main casing using a Phillips screwdriver.

Disconnect Internal Cables

Unplug keypad, light bar, LVDS, and speaker cables from the motherboard.

Disassembly Procedure - PCB Removal

Remove Mylar Sheet and Tape

Take out the mylar sheet from the main chassis and remove associated tape.

Remove PCB Screws

Remove all screws from the PCB using a Phillips screwdriver.

Remove PCB, Mylar, and Gasket

Take out the PCB and peel off the bottom mylar and gasket.

Disassembly Procedure - Front Bezel Removal

Remove Front Bezel

Carefully detach the front bezel from the LCD panel assembly.

Overview

This document outlines the simplified service manual for dismantling the Lenovo P27h-20 monitor, providing essential information for technicians and users performing maintenance or repair. The primary function of this manual is to guide the user through the safe and effective disassembly of the monitor, ensuring that components can be accessed, replaced, or repaired without causing damage to the device or injury to the user.

Function Description

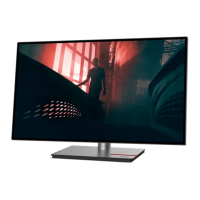
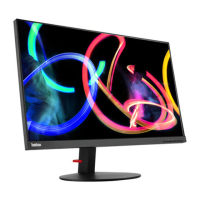
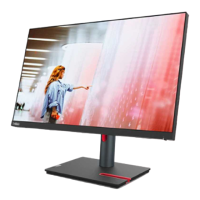
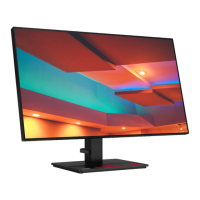
The Lenovo P27h-20 is a display monitor designed for various computing tasks, ranging from general office work to more demanding applications. Its core function is to provide a visual interface for computers, displaying images, text, and videos with clarity and precision. The monitor is built with multiple internal components, including an LCD panel, printed circuit boards (PCBs), a power supply unit, and various cables and connectors, all housed within a protective casing. The manual focuses on the process of accessing these internal components for service.

Usage Features

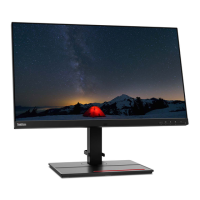
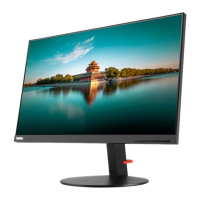
While this manual primarily details maintenance, understanding the monitor's usage context is helpful. The P27h-20 typically features a stand that allows for ergonomic adjustments, such as tilt, swivel, pivot, and height adjustment, to optimize viewing comfort. It connects to a computer via standard video input ports, such as HDMI or DisplayPort, and may include additional features like USB hubs for peripheral connectivity. The monitor is designed for stable operation on a flat surface, and its robust construction ensures durability during regular use. The stand is designed for easy attachment and detachment, a key feature highlighted in the disassembly process.

Maintenance Features

The maintenance features of the Lenovo P27h-20 are central to this manual. The document emphasizes a systematic approach to disassembly, starting with crucial precautions to prevent damage and ensure safety.

  1. Precautionary Measures: Before any disassembly, the manual stresses the importance of removing all power connectors and ensuring the monitor is in an "off" status. This is a fundamental safety step to prevent electrical shock or damage to sensitive electronic components. Furthermore, it advises preparing a soft cloth and sponge as a working platform to protect the LCD panel from scratches or impact during the process. Users are explicitly warned to handle the LCD panel by its sides and avoid direct contact or pressure on the screen itself, as this can cause irreversible damage.

  2. Appropriate Tools: The manual specifies the necessary tools for disassembly and re-assembly, ensuring that technicians use the correct equipment to avoid stripping screws or damaging components. The primary tools identified are:

    • Phillips screwdriver (#2): This is a standard tool for removing most screws found in electronic devices. The specific size (#2) is crucial for a proper fit.
    • C/D disassembly tool: This specialized tool is designed to help release plastic hooks and clips without marring the casing, particularly useful for separating the rear cover from the monitor's frame.
    • Gloves or soft cloth: These are recommended for handling components, especially the LCD panel, to prevent fingerprints, smudges, and static discharge, which can be harmful to sensitive electronics.
  3. Disassembly SOP (Standard Operating Procedure): The manual provides a step-by-step guide for dismantling the monitor, making the process clear and replicable.

    • Initial Setup: The first step involves placing the monitor on a flat surface, preferably on an EPE (Expanded Polyethylene) foam or similar soft material, to protect the screen and the monitor's casing during the initial stages.
    • Stand Removal: The stand is designed for quick release, typically by pushing a button, which simplifies the process of separating the monitor from its base. This is often the first step in accessing the rear panel.
    • Rear Cover Removal: After the stand is removed, the manual instructs the user to remove four screws securing the rear cover using the Phillips screwdriver. Following this, the C/D disassembly tool is used to carefully release the hooks holding the rear cover in place, starting from a designated disassembly hole at the bottom. This method prevents damage to the plastic clips.
    • Internal Component Access: Once the rear cover is off, the internal layout of the monitor becomes visible. The manual then guides the user to remove all tapes and foil that might be securing cables or providing insulation. This is followed by the removal of all remaining screws that hold various internal components in place.
    • Cable Disconnection: Critical cables, such as the keypad line, light bar line, LVDS (Low-Voltage Differential Signaling) cable (which connects the main board to the LCD panel), and speaker cables, must be carefully unplugged. These connections are often delicate and require gentle handling to avoid damage to the connectors or cables themselves.
    • Mylar Sheet and PCB Removal: The mylar sheet, often used for insulation or light reflection, is then removed from the main chassis, along with any remaining tape. Subsequently, all screws securing the printed circuit boards (PCBs) are removed, allowing the PCBs to be taken out. This step also involves peeling off any bottom mylar and gaskets that might be present under the PCBs.
    • Front Bezel Removal: The final step detailed in the provided pages is the removal of the front bezel. This component frames the LCD panel and is typically held in place by clips or a combination of clips and screws, which are accessed after the rear cover and internal components have been partially removed.

This detailed, step-by-step approach ensures that maintenance can be performed efficiently and safely, allowing for component replacement, troubleshooting, or recycling of parts. The emphasis on specific tools and careful handling underscores the precision required for servicing modern electronic displays.

Lenovo P27h-20 Specifications

General IconGeneral
Screen Size27 inches
Resolution2560 x 1440
Panel TypeIPS
Aspect Ratio16:9
Refresh Rate60 Hz
Brightness350 cd/m²
Contrast Ratio1000:1
Color Gamut99% sRGB
Viewing Angle178°/178°
VESA Mount100 x 100 mm
Response Time4 ms (Extreme mode)
PortsHDMI, DisplayPort, USB-C
USB Ports4
Stand AdjustmentsTilt, Height, Pivot, Swivel

Related product manuals