Replacingthesystemfanassembly
Attention:
Donotopenyourcomputerorattemptanyrepairbeforereadingandunderstandingthe“Importantsafetyinformation”
intheThinkCentreUserGuide.ToobtainacopyoftheThinkCentreUserGuide,goto:
http://www.lenovo.com/ThinkCentreUserGuides
Thissectionprovidesinstructionsonhowtoreplacethesystemfanassembly.
Toreplacethesystemfanassembly,dothefollowing:
1.Turnoffthecomputeranddisconnectallpowercordsfromelectricaloutlets.
2.Removethecomputercover.See“Removingthecomputercover”onpage112.
3.Removethefrontbezel.See“Removingandreinstallingthefrontbezel”onpage113.
4.Pivotthedrivebayassemblyupwardtogainaccesstothesystemfanassembly.See“Accessingthe
systemboardcomponentsanddrives”onpage114.
5.Removetheharddiskdriveforeasieraccesstothesystemfanassembly.See“Replacingthehard
diskdrive”onpage120.
6.Removetheheatsinkfanduct.See“Replacingtheheatsinkandfanassembly”onpage130.
7.Notethecableroutinganddisconnectthesystemfanassemblycablefromthepowerfanconnectoron
thesystemboard.See“Locatingpartsonthesystemboard”onpage109.
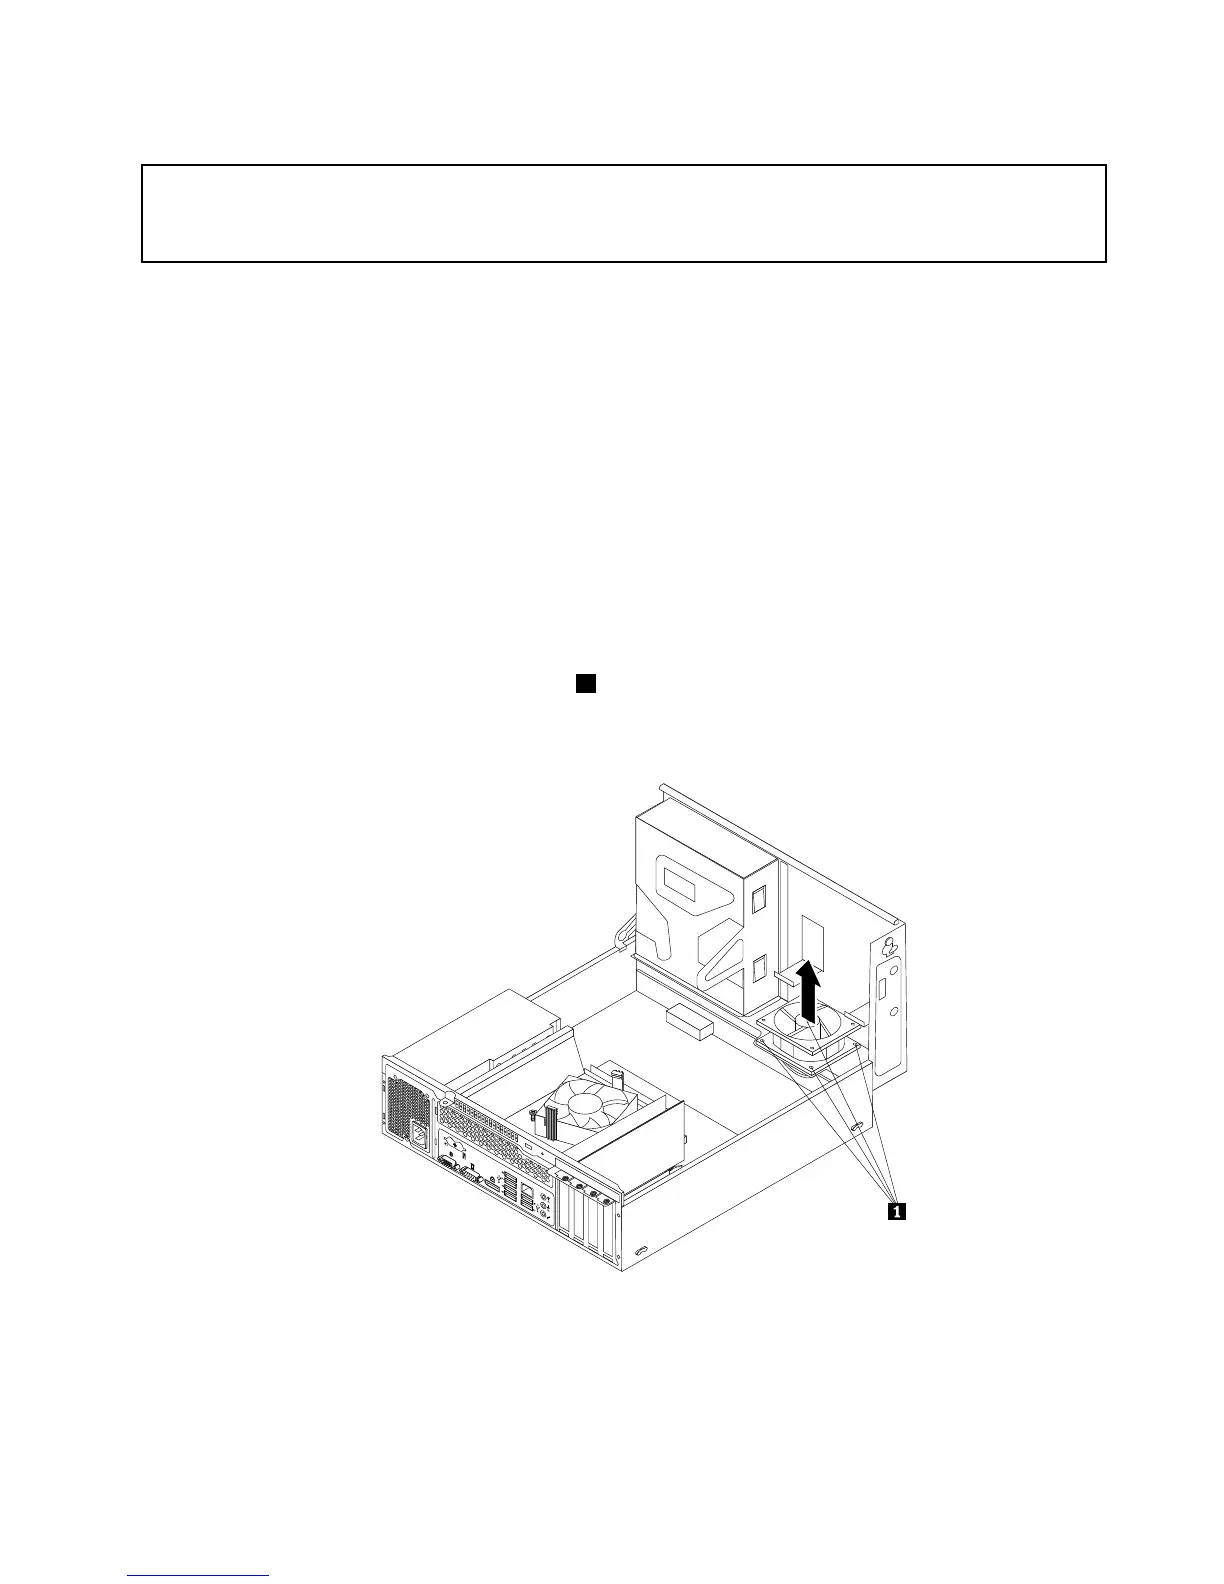
8.Thesystemfanassemblyisattachedtothechassisbyfourrubbermounts.Removethesystemfan
assemblybycuttingthefourrubbermounts
1andliftingthesystemfanassemblyoutofthechassis.
Note:Thenewsystemfanassemblywillhavefournewrubbermountsattached.
Figure74.Removingthesystemfanassembly
Chapter9.ReplacingFRUs(MachineTypes:1857,1893,and1895)139
 Loading...


