Do you have a question about the Lenovo ThinkCentre M920z and is the answer not in the manual?
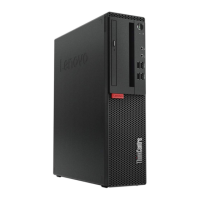
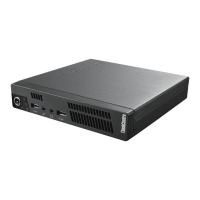
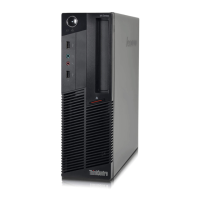
Overview of the front panel components and connectors of the computer.
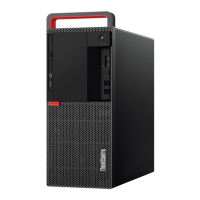
Overview of the rear panel components and connectors of the computer.
Identification and description of components on the system board.
Location and purpose of the machine type and model label for identification.
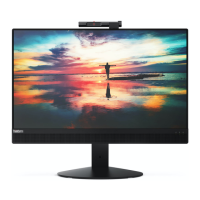
Instructions for adjusting the position of the integrated camera and microphone module.
Instructions for adjusting the computer stand for optimal viewing angles.
Important precautions and notes to consider before starting hardware replacement.
Precautions to prevent damage from static electricity when handling components.
Understanding Field Replaceable Units (FRUs) and Customer Replaceable Units (CRUs).
Guidance on finding and identifying FRUs and CRUs for replacement.
Procedure for removing and installing the computer stand.
Procedure for safely removing the computer's outer cover.
Steps to remove and replace the computer's storage drive.
Instructions for removing and installing the optical drive.
Procedure for replacing the cables connected to optical and storage drives.
Steps to remove and replace the side input/output bezel.
Instructions for removing and installing the system board shield.
Procedure for removing and installing the VESA mount bracket.
Steps to safely remove and replace the computer's power supply unit.
Instructions for replacing the cover presence switch component.
Procedure for removing and installing the system cooling fan.
Steps for removing and installing the heat sink, cautioning about its heat.
Detailed steps for replacing the computer's microprocessor.
Instructions for removing and installing the serial connector module.
Procedure for replacing the M.2 solid-state drive (Type 1 and Type 2).
Steps for removing and installing memory modules (DIMMs).
Procedure for replacing the computer's coin-cell battery.
Instructions for removing and installing the card reader component.
Detailed steps for removing and installing the computer's main system board.
Procedure for replacing the integrated camera and microphone module.
Steps for removing and installing the computer's back frame.
Instructions for removing and installing the internal speaker components.
Procedure for removing and installing the Wi-Fi antennas.
Steps for removing and installing the computer's LCD panel.
Final steps to reassemble the computer and reconnect cables after part replacement.
| Operating System | Windows 10 Pro |
|---|---|
| Processor | Intel Core i7-8700 |
| RAM | Up to 32 GB DDR4 |
| Storage | Up to 2 TB HDD or 1 TB SSD |
| Display | 23.8-inch Full HD (1920 x 1080) IPS |
| Graphics | Integrated Intel UHD Graphics 630 |
| Ports | USB 3.1, HDMI, DisplayPort, Ethernet |
| Wireless | Wi-Fi 802.11ac, Bluetooth 4.2 |
| Webcam | 720p |