Do you have a question about the Lenovo ThinkCentre M920q 10RR and is the answer not in the manual?
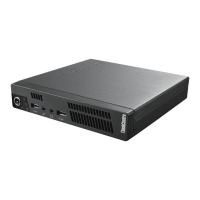
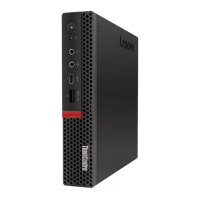
Identifies and describes the components visible on the front of the computer.
Identifies and describes the components visible on the rear of the computer.
Details the layout and components of the computer's system board.
Explains the location and importance of the machine type and model label.
Lists the available power supply options for the computer.
Details the types of storage drives supported by the computer.
Describes the video output capabilities and supported connectors.
Outlines the audio input and output capabilities.
Lists the various input and output ports available on the computer.
Details the expansion slots and options available for the system.
Specifies the integrated network connectivity options.
Provides the physical measurements of the computer.
States the weight of the computer without the package.
Instructions on how to secure the computer using a cable lock.
Guidance on integrating the computer with a Tiny-in-One monitor.
Essential preliminary steps and precautions before replacing any hardware.
Precautions to prevent damage from static electricity when handling components.
Explanation of Field Replaceable Units (FRUs) and Customer Replaceable Units (CRUs).
Key recommendations and warnings to follow before replacing FRUs.
Information on how to identify and find FRUs and CRUs.
Step-by-step guide for replacing the computer's keyboard.
Instructions for replacing the computer's mouse.
Procedure for replacing the computer's power adapter.
Instructions for removing and installing the vertical stand.
Step-by-step instructions for safely removing the computer's outer cover.
Procedure for replacing the VESA mount bracket.
Guide for removing and installing the computer's storage drive.
Instructions for replacing the cable connected to the storage drive.
Procedure for replacing PCI Express cards and their adapters.
Steps to remove and install the internal speaker.
Instructions for replacing the advanced speaker.
Procedure for removing and installing the system fan.
Guide for removing and installing the computer's heat sink assembly.
Instructions for replacing the coin-cell battery.
Detailed steps for replacing the computer's microprocessor (CPU).
Procedure for removing and installing the Wi-Fi card.
Instructions for replacing the computer's Wi-Fi antennas.
Procedure for replacing the antenna bracket.
Steps for removing and reinstalling the computer's bottom cover.
Guide for removing and installing memory modules (RAM).
Procedure for removing and installing the M.2 SSD.
Instructions for replacing the main system board and chassis.
Final steps to ensure the computer is properly reassembled after repairs.
| Memory | Up to 64GB DDR4 2666MHz |
|---|---|
| Operating System | Windows 10 Pro |
| Form Factor | Tiny |
| Chipset | Intel Q370 |
| Storage | Up to 1TB HDD |
| Graphics | Intel UHD Graphics 630 |
| Ports (Front) | 2 x USB 3.1 Gen 1, Headphone/Microphone combo jack |
| Ports (Rear) | 1 x DisplayPort, 1 x HDMI, 1 x RJ-45 |
| Wireless | Wi-Fi 802.11ac, Bluetooth 5.0 |
| Power Supply | 65W |
| Weight | 1.32 kg (2.91 lbs) |