3. When the bottle support is removed, you will be able to see inside the stainless steel cooling
tank.
4. Follow the instructions which come with the filter for correct installation of the filter into the
bottle.
5. Place the filter bottle on top of the water cooler and fill with water.
Note: Filter bottles generally have a slower flow rate compared to spring water bottles. It will take
longer to fill the cooling tank. Allow the cold tank to fill for 30 minutes before following the next
steps.
6. Insert the power plug into the wall socket and turn the power switch on the rear of the unit
to the on position.
7. At the front of the unit, there are 3 indicator lights.
The power on light will continually illuminate while the unit is turned on.
The cooling light will illuminate while the compressor is running and cooling the water.
When cooling is finished the cooling light will turn off and the cold light will illuminate until
cooling is required again.
8. When the unit is on for the first time, allow the unit to cool the water for 1 – 2 hours before
dispensing cold water.
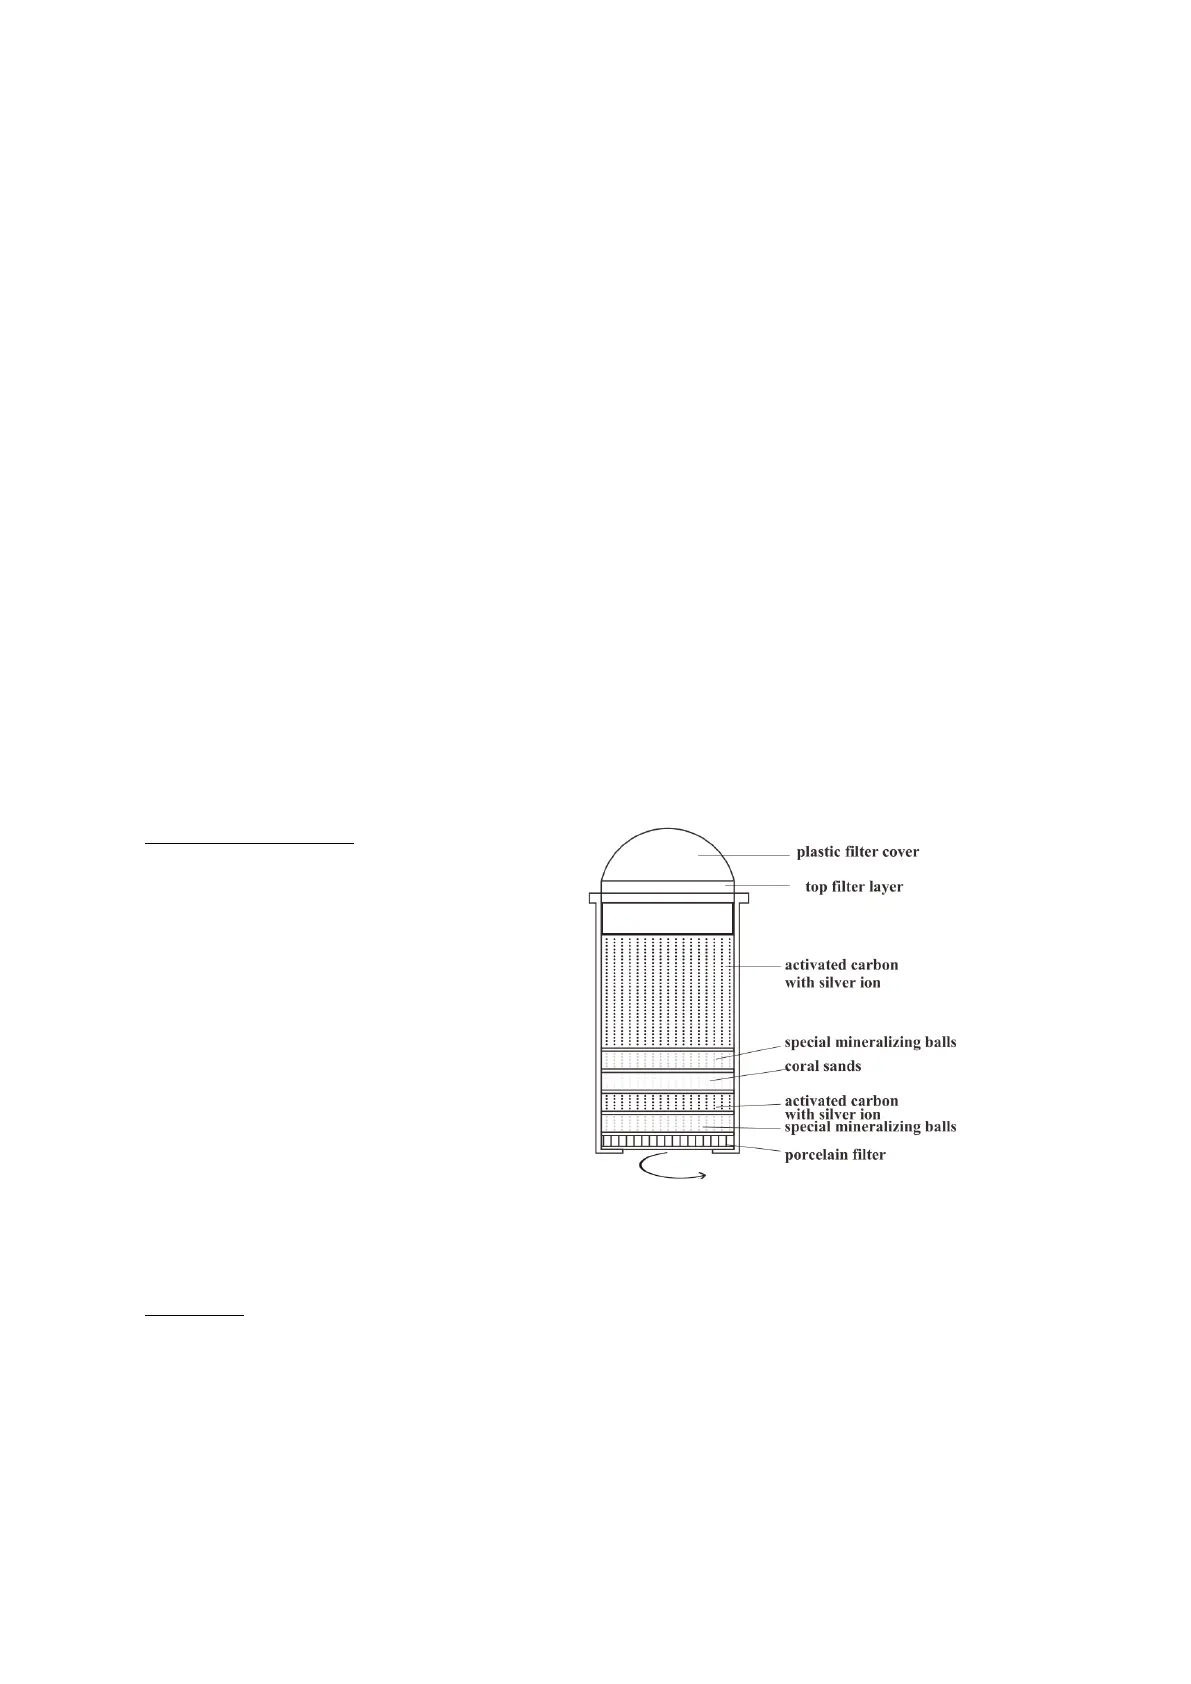
FILTER MAINTENANCE:
1. Unscrew the top lid (plastic filter cover).
2. Remove the top filter layer.
3. Wash or replace the filter cloth.
4. The filter element itself can be
unscrewed anti-clockwise.
CLEANING:
Before cleaning the unit, turn the power off and unplug the unit to avoid electric shock.
Hand wash all components:
Remove the bottle support and spike.
Remove the plastic dividing plate from the inside of the tank.
 Loading...