Page 3
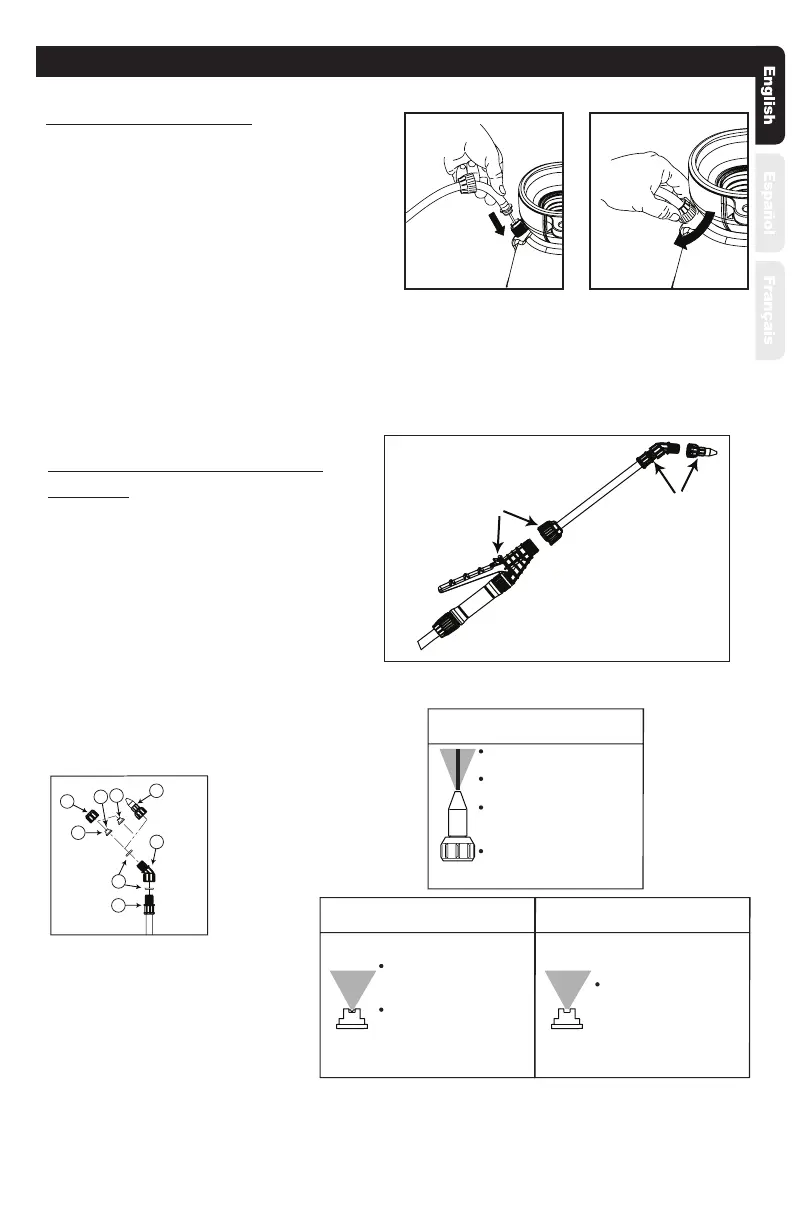
ASSEMBLE EXTENSION, SHUT-OFF
& NOZZLE
1. Install the extension onto the shut-o
assembly and tighten the nut securely.
(See Figure C)
2. Install selected nozzle onto the end of the
extension and tighten securely. (See Figure D)
ASSEMBLY INSTRUCTIONS
ASSEMBLE HOSE TO TANK
IMPORTANT: do not attempt to heat or alter hose,
hose nut, or barb prior to assembly.
1. Align hose barb tabs, push hose barb into tank
until it stops (See Figure A).
2. Slide hose nut into place and turn clockwise to
tighten. (See Figure B).
NOTE: Do not use tools to tighten hose nut.
SELECT NOZZLE FROM CHART BELOW
A. Cap Nut
B. Adjustable Cone Nozzle
C. Red High-Volume Fan Nozzle
D. Yellow Low-Volume Fan Nozzle
E. Flat Seal
F. Adapter
G. Extension
B
A
F
C
E
G
D
Figure A
Figure B
Spot spraying in or around
ower beds, trees and shrubs.
Edging along fences, driveways,
and walkways.
Killing brush such as poison
ivy, poison oak, kudzu and wild
blackberry.
Preparing garden beds fo
planng of ornamentals and
vegetables.
Lawn replacement. Kill lawn
and weeds before planng a
new lawn.
Preparing large areas for
planng of ornamental and
vegetable gardens.
For precision spraying in
conned areas such as
gardens and ower beds.
ADJUSTABLE CONE USES:
RED HIGH VOLUME FAN
NOZZLE USES:
YELLOW LOW VOLUME
FAN NOZZLE USES:
Figure D
Figure C
C