
C
campbellmarilynSep 16, 2025
What does 'OVER [P] NO.' mean on my Letatwin MAX LM-550A/PC CE Printer?
- MMrs. Deborah RoseSep 16, 2025
Only 5 pitch length settings can be set in a document.
What does 'OVER [P] NO.' mean on my Letatwin MAX LM-550A/PC CE Printer?
Only 5 pitch length settings can be set in a document.
What to do if my Letatwin Printer is printing poorly on tape?
If you're experiencing poor printing quality on tape, consider these potential solutions: * Check the position of the M roller lever. * Ensure the tape and ink ribbon are properly set. * Verify the tape width setting is correct. * Make sure there's no dirt or stains on the tape. * If the ambient temperature is below 15°C or above 35°C, try adjusting the “PRINTING DENSITY” in the OPTION menu. * Ensure the feeding roller is clean and no tape or tube waste is caught in the exit. * Adjust the “CUTTING POSITION” in the OPTION menu.
Why is half cutting not working on my Letatwin MAX LM-550A/PC CE Printer?
If the half cutting function isn't working correctly, check the following: * Ensure the half cutter is properly set and the “Half cutting depth adjustment lever” is in the correct (TUBE) position. * If the cutter has been used for more than 5,000 cuttings, replace it. * Make sure you are using the exclusive half cutter LM-HC340 (yellow color). * Check for any tape or tube waste caught in the exit.
How to fix 'OVER PRINTING LENGTH' error on Letatwin Printer?
To resolve the 'OVER PRINTING LENGTH' error, try the following: * Reduce the character space, character width, margin, or number of characters. * Change the character size to a smaller size. * Alternatively, change the print length to a longer length.
What does 'P/LENGTH IS SAME AS LEFT [P]' mean on my Letatwin MAX LM-550A/PC CE Printer?
If pitch length is same as the preceding pitch length, pitch length does not need to be newly set.
What does 'NO EVEN NUMBER WITHIN THE RANGE' mean on my Letatwin MAX LM-550A/PC CE Printer?
Reset the start and end values or select [ALL].
How to fix 'ERROR IN HALF CUT OPERATION' on Letatwin MAX LM-550A/PC CE?
To resolve an 'ERROR IN HALF CUT OPERATION', feed the printed material or replace the half cutter unit.
Why can I 'SET ONLY ONE [N]' on my Letatwin MAX LM-550A/PC CE?
In [NORMAL PRINT MODE], only one sequential number can be set in a file.
What to do if Letatwin MAX LM-550A/PC CE displays 'OVER THE NUMBER OF COPIES'?
If your printer displays 'OVER THE NUMBER OF COPIES', simply reduce the number of copies you are trying to print.
How to troubleshoot 'OVER PITCH LENGTH' error on Letatwin MAX LM-550A/PC CE Printer?
To address the 'OVER PITCH LENGTH' error: * Change the “PITCH LENGTH”. * Reduce the character space, character width, or number of characters. * Change the character size to a smaller size.
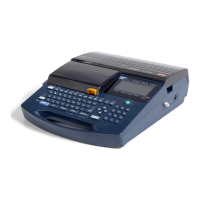
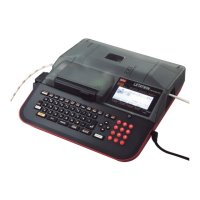
Introduction to the MAX TUBE MARKER LM-550E.
Indications and meanings for safe and proper operation.
Important safety warnings about potential hazards.
Precautions regarding potential damage or minor injuries.
Describes operations that may cause trouble or require resetting.
Overview of the machine's key features and capabilities.
Lists accessories included with the machine.
Identifies parts of the machine and its components.
Diagram of the machine's keyboard layout.
Detailed explanation of each key's function.
Explains functions like OPTION, MEMORY, COPY/PASTE, DELETE, INIT, CLEAR, Ten Key, Navigation, ENTER, BLOCK, CODE, DIACR, SPACE, A/a, SHIFT, PRINT, FEED, Character keys.
Diagram of the input screen layout.
Meanings of edit symbols displayed on the screen.
Table showing selectable screen languages for different models.
Step-by-step guide to change the screen language.
Procedure for cleaning the platen roller.
Procedure to remove jammed tubes using the FEED function.
How to adjust the half cutting depth using a lever.
Steps for installing or replacing the ink ribbon.
Instructions for loading tubes and ink ribbon case.
Instructions for loading tape cassette and ink ribbon case.
Procedure for replacing the half cutter.
Detailed steps for printing on tubes using pitch print.
Setting the printed material type and character size.
How to set the pitch length for printing on tubes.
How to set the repeat function for blocks of text.
Inputting text blocks and setting sequential numbers.
How to set the range of blocks to print.
Detailed steps for printing on tape using pitch print.
How to set the pitch length when printing on tape.
Inputting text blocks and setting sequences for tape printing.
How to set the total printing length for normal tape printing.
How to set left and right margins for tape printing.
Steps for inputting text for normal tape printing.
How to input capital, small letters and symbols.
How to delete characters using BS and DELET keys.
How to input characters using the CODE function with a table.
How to input diacritics for European languages.
Setting the character size for printing.
Lists available character sizes like 1.3, 2.0, 3.0, 4.0, 6.0.
Options for character width: STANDARD, CONDENSED, EXTENDED.
How to adjust character and line spacing for documents.
Explanation of the Pitch Print Mode and its behavior.
Explanation of the Normal Print Mode.
How to set the pitch length for printing, including AUTO option.
How to set the pitch cutting options: No, Line, Dots, Half-cutting.
How to set the total printing length for normal print mode.
How to set left and right margins for documents.
How to set the printing direction to vertical.
How to set the number of repeat copies for a block.
How to set start and end numbers for sequential numbering.
How to add a frame around the document text.
How to select and input symbols from different groups.
How to save words to the internal memory.
How to recall saved words from memory.
How to delete registered words from memory.
How to delete all registered words from memory.
How to preview documents before printing.
Lists selectable items within the OPTION menu.
How to adjust the darkness/clarity of the print.
How to activate low temperature mode for printing.
How to feed the tube head before printing.
How to set the printing style for 6 and 9.
How to adjust the vertical position of the printing line.
How to adjust the cutting position.
How to set the automatic power-off feature.
How to set the default pitch length value.
How to set the default repeat value.
How to set text justification: LEFT, CENTER, RIGHT.
How to select printing styles for REPEAT and SEQUENCE functions.
How to adjust the brightness of the LCD screen.
How to adjust the LCD backlight power level.
Steps to copy a block of text, including settings.
Steps to paste a copied block of text.
How to set the range of blocks and number of copies to print.
How to adjust the total printing length for accurate output.
Procedure to continue printing after replacing consumables like tube or ribbon.
List of error messages and their corresponding solutions.
Further list of error messages and their solutions.
Troubleshooting steps for power-related problems like no screen or dark screen.
Troubleshooting common issues when printing on tubes, like blur or stains.
Troubleshooting common issues when printing on tape, like setting or blur.
Troubleshooting problems with the half cutting function not working.
Troubleshooting problems with manual cutting.
Physical dimensions and weight of the machine.
Details on printing method, speed, and length.
Information on usable tubes, tapes, and memory capacity.
Power supply requirements and operating environment.
Lists of numerals and electrical installation symbols.
Lists of symbols, units, and office-related symbols.
Lists of superscript, subscript, italic, Greek, and Russian characters.