3. Gently place the Legend II in the pool.
Turn on the pool filtration pump.
4. Check to make sure the wheel RPM is
between 25-32. See section H-# on page 9
for instructions on wheel RPM.
G. Checking Operation
F. Hooking up the Legend II
1. Remove the Pressure Tester from the
free end of the Feeder Hose by unscrewing
the Hose Nut. Left hand thread (reverse)
(See illustration previous page).
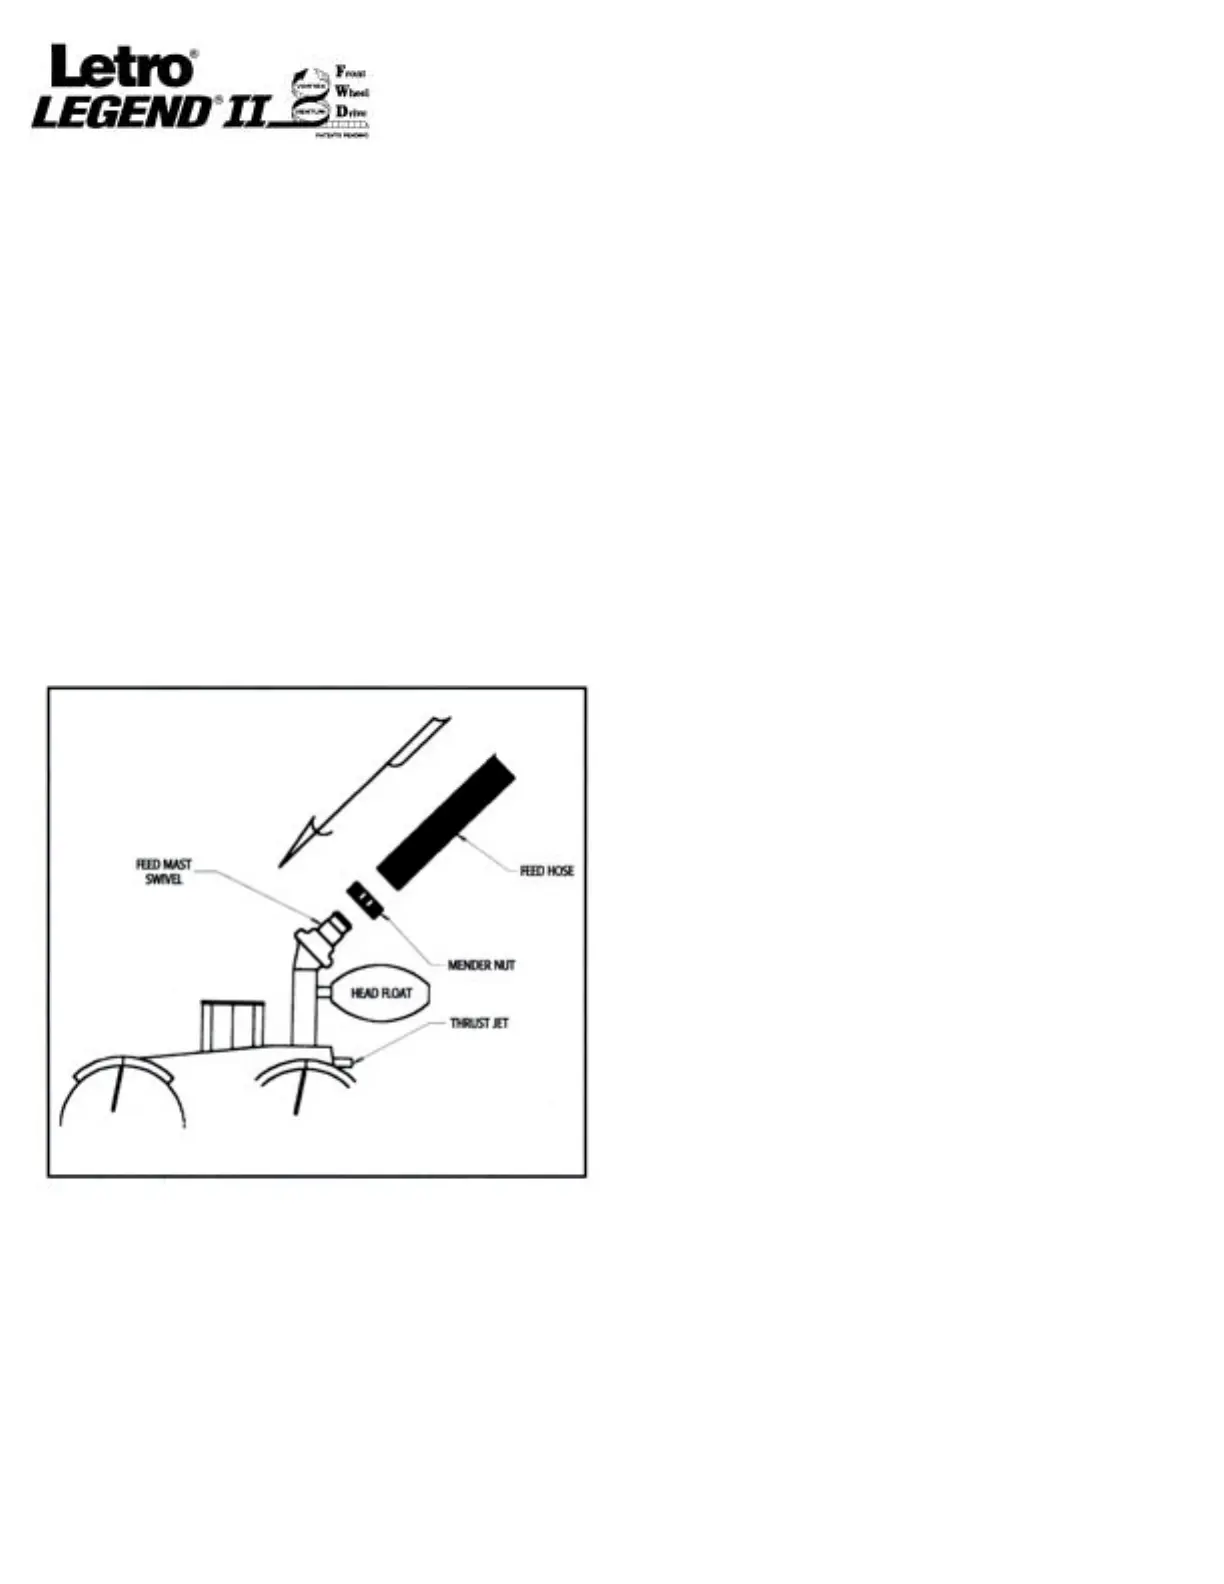
2. Place mender nut on Legend II Swivel
Mast. Connect the open end of the Feed
Hose to the top of the Legend II Swivel Mast
and secure with the mender nut. The arch
of the Feed Hose should align in the same
direction as the Swivel Mast, there should
be no twist in the Feed Hose after
connection. (See illustration below).
3. Carefully twist lock the Sand & Silt debris
bag onto the top of the Legend II Vacuum
Tube. Make sure there is a Rubber Debris
Valve attached to the top of the Vacuum
Tube before locking on the Sand & Silt bag,
(this valve is similar to a check valve to help
keep debris inside the bag when the water
pressure is off).
When operating correctly, the Legend II will
travel in a random pattern throughout the
pool, vacuuming and sweeping the bottom.
The climbing ability of the Legend II is
dependent on the pools structure and water
flow coming into the pool. It will perform
more efficiently in pools without sharp
angles or curves in the transition from the
floor of the pool to the wall.
The Legend II comes with a Twist Lock
Pressure Relief Valve (Wall Fitting). If the
Legend II is receiving too much water
pressure, the Relief Valve in the Wall Fitting
will release the excess water pressure.
Approximately every three minutes and 30
seconds the Legend II will go into a back-up
mode. The Back-Up Valve cycle time, while
in the back-up mode, is approximately 30
seconds, pulling the Legend II from problem
areas.
The Sweep Hose operates in a gentle
sweeping motion to prevent debris from
becoming trapped in hard to reach corners
of the pools.
If the Legend II does not travel to all areas of
the pool, turn off the pool filtration pump and
make the necessary adjustments from the
instructions on the next page.
 Loading...