Letus35 Mini User Guide
7
Remove the lens mount and lens from the tube.2.
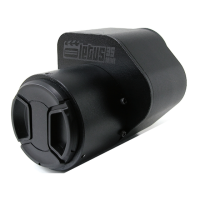
Located on the back of the lens mount 3.
are three (3) small screws. Carefully, one
at a time, loosen each one a small amount.
Each screw should be loosened an even
amount. About 0.2mm may do.
Re-insert the lens mount and attached 4.
lens into the tube.
Tighten the three (3) set screws.5.
Re-peat the6. Testing The Focus step,
checking your focal marks for accuracy.
If yes, you are done. If not, repeat this step until back focus is correct-7.
ed.
Case 2: If you cannot achieve innity focus at all, follow this method:
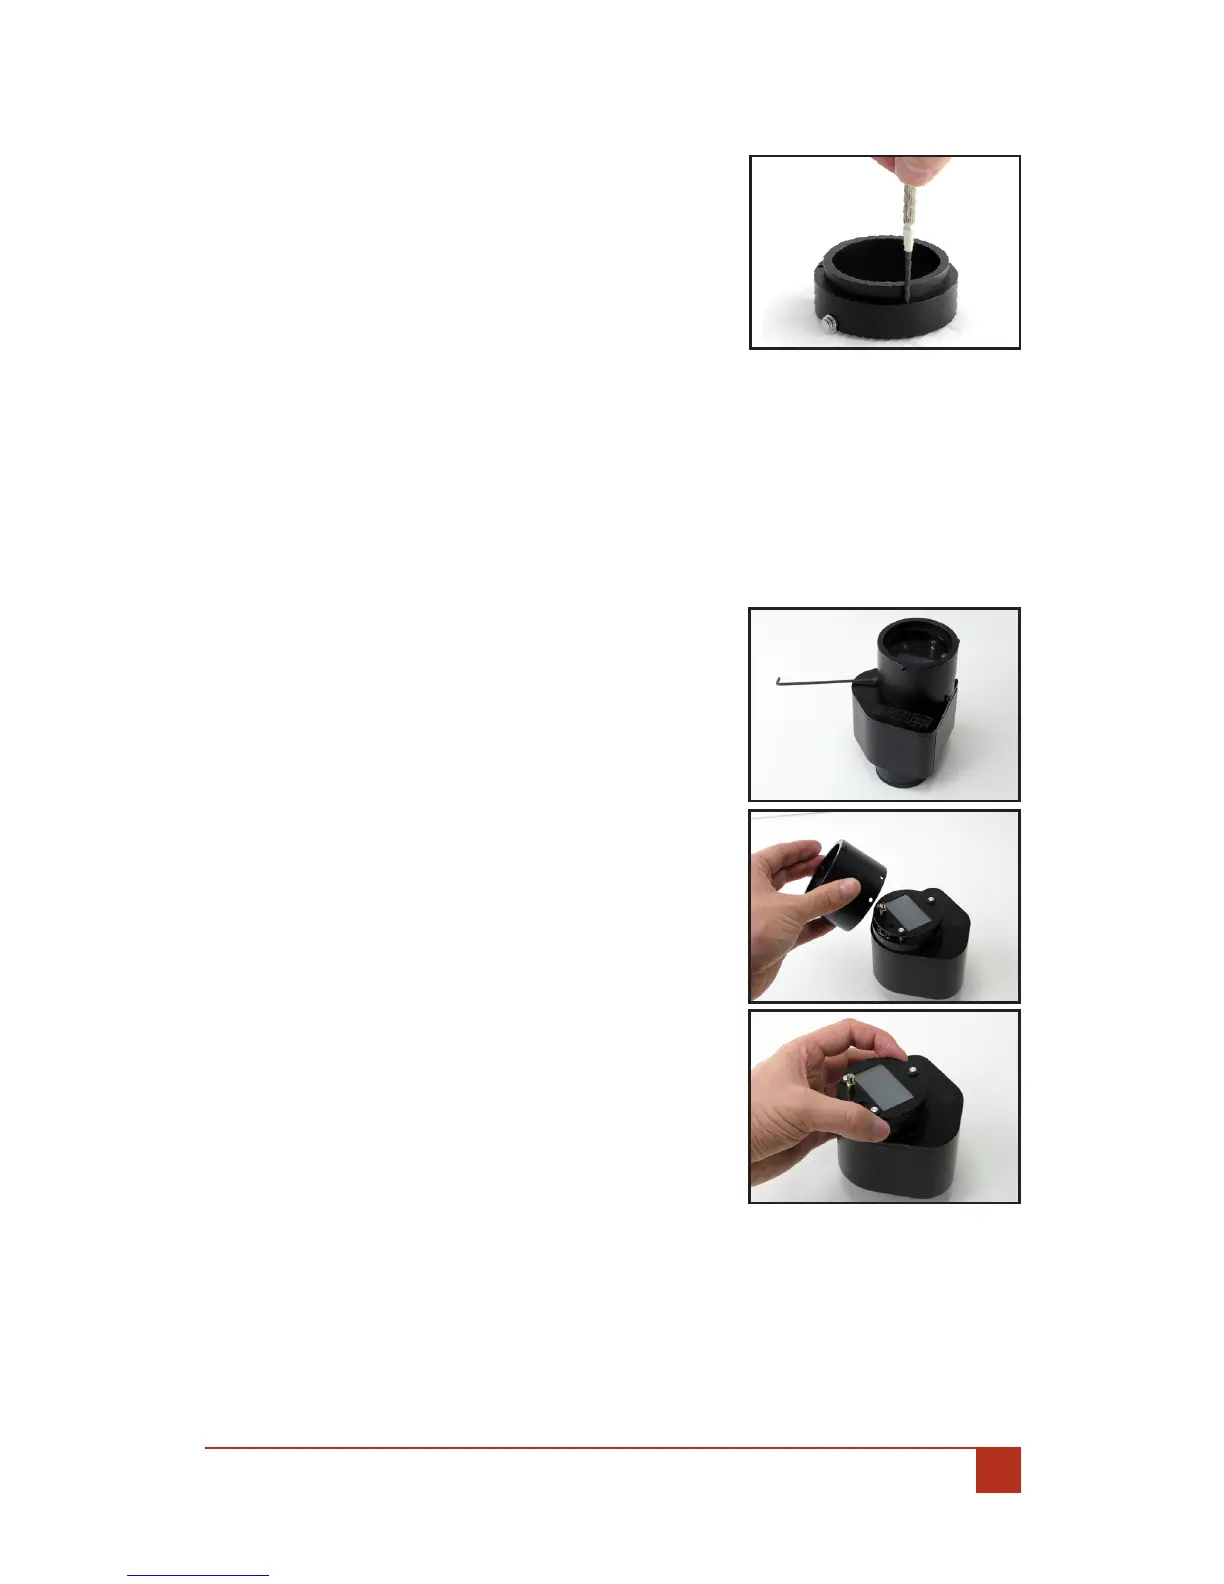
Remove the four (4) Allen Screws holding 1.
the front tube to the body of the adapter
VERY carefully and VERY gently remove the 2.
tube from the adapter. At this point you
should see the Ground Glass (GG) which is
mounted on three (3) Aluminum Posts.
VERY gently, and evenly, pull the three (3) 3.
Aluminum Posts outward away from the
Body about 0.2mm one at a time.
Replace the front tube.4.
Repeat the 5. Testing The Focus step.
If you do get innity focus, then see if the 6.
other markings are correct. If the markings
are also correct, you are done. If you can
get innity focus but the marking is not
correct, go to the steps in Case 1 to x it.
If you are still unable to achieve Innity 7.
Focus repeat these steps. Once you are
able to achieve Innity Focus, next, repeat
1. Checking The Focus for accuracy of your
lens Focal Marks. If the lens Focal Marks
are inaccurate, follow Case 1 adjustment
steps.
NOTES: Be VERY careful pulling the Ground Glass (GG) posts away from the
adapter body. Avoid touching the Ground Glass (GG) with bare ngers as it will
transfer oils to the Film Plane and may cause unwanted eects in your image.