Dip Switch Settings:
NOTE: To access dip switch settings, lift up the bottom of the switch pad.
Single Pole Wiring Application:
• WSS10ReceiverControlSwitchisonly
intendedasaSinglePoledevice.
Multiple Location Wiring Application:
• WSS0SWirelessRemoteSwitchcanbeusedforadditional
switches(3-wayand4-way),nowiresnecessary
.
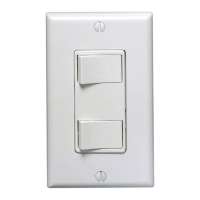
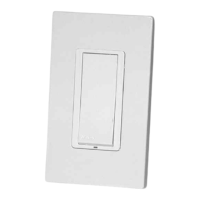
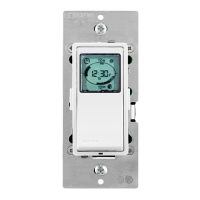
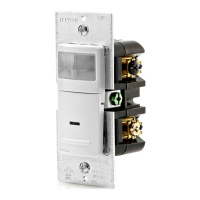
SinglePole(OneLocation)
Wireless Signal Receiver Switch
Cat.No.WSS10
Incandescent:800W@120V–Ballast:1200VA@120V,2700VA@277V
120-277VAC,50/60Hz,Motor:1/4HP@120V
INSTALLATION INSTRUCTIONS
WARNINGS AND CAUTIONS:
• Tobeinstalledand/orusedinaccordancewithappropriateelectricalcodesandregulations.
• Ifyouareunsureaboutanypartoftheseinstructions,consultanelectrician.
• WSS10-GDxproductsdonotrequireaneutralwire,thereisaminimumloadrequirementof25wattsfortheseproducts.
Tools needed
Description
Slotted/PhillipsScrewdriver ElectricalTape Pliers Pencil
Cutters Ruler WireNuts
Push in side at
tab to release
Line up tabs
and press in
side to attach
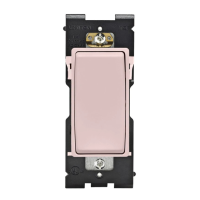
ColorchangeoptionsareavailablefromLeviton,consultyoulocalLeviton
Distributor.Tochangecolorofframe,proceedasfollows:
Changing the color of your Switch
Installation
NOTE:UsecheckboxeswhenStepsarecompleted.
√
Step 3
Step 4
Step 2
Identifying your wiring application
(most common):
NOTE:Ifthewiringinyour
wallboxdoesnotresemble
thisconguration,consultan
electrician.
2
4
3
1
WARNING: TO AVOID FIRE SHOCK OR DEATH; TURN
OFF POWERatcircuitbreakerorfuseandtestthatpoweris
offbeforewiring!
Step 1
WIRING SWITCH:
Connect wires per WIRING DIAGRAM
below as follows:
• Connect(Hot)wirefromwallboxto
blackwireonswitch.
• Connect(Load)wireinwallboxto
bluewireonswitch.
• Connect(Neutral)wireinwallboxto
whitewireonswitch.
NOTE:ForNoNeutralmodel,white
wirewillnotbeavailable(Figure 2).
BK
WH
2
Blue wire (BL)
White wire (WH)
1
3
4
BK
BL
Black
White
Load
Neutral (White)
Line
120-277VAC,
50/60 Hz
Hot (Black)
BK WH
BL
Switch
Black
White
Load
Neutral (White)
Line
120-277VAC,
50/60 Hz
Hot (Black)
Auto-On / Auto-Off mode:Automodecanbeenabledusingthedipswitches,product
comesfromthefactoryinManual-On/Auto-Off.
Walk-through:canbeusedonlyinAuto-Onmodeandisrecommendedonlywhen
usingbatteriesorlowvoltagepowerconnection.
Timeout:2(test),10,20,30min;(Longertimedelayisrecommendedforcontinuous
selfpoweringofthesensorandtoensurepacketsaresenttothereceiverswitch).
Dip switches 1-4
OPEN
ON
1 2 3 4
Cat.No.WSS10isthereceiverswitch.Thisswitchhasasingleswitchpadthat
togglestherelayanditscorrespondingload,ONandOFF.IftherelayisOFF,the
relaywillturnONwhenthepush-buttonispressed,andvice-versa.TheIndicator
LEDwillblinkRedwhenaag/packetisreceivedfromthesensororremoteswitch.
NOTE:theno-neutralversionhasaminimumloadrequirementof25watts.
Cat.No.WSCxxisthesensor(s).TheSensorUnitsendsaag/packetwiththe
presenceofmotiontothereceiverswitchwhichthenkeepstheloadON.Inthe
absenceofmotion,theSensorUnitwillstopsendingag/packetstothereceiver
switch;whenthereceiverswitchnolongerreceivesapacket,theTimeOutwill
start,thentime-outandturntherelayOFF.TimeDelaystartsasofthelastmotion
detectedinthespace.TheMotionIndicatorLEDwillblinkRed(1blinkperminute)
everytimemotionisdetected,sendingaag/packettothereceiver.TheLEDon
theWSS10receiverwillblinkRed,acknowledgingthereceptionofaag/packet.
• WSCxx & WSS10 (together):InManual-On/Auto-Offmode,thebuttonmust
bepressedtoturnthelightsON.Intheabsenceofags/packetssentfromthe
sensor,thereceiverswitchwillTime-OutandturnthelightsOFF.
• WSCxx & WSS10 (together):InAuto-On/Auto-Offmode,thesensorwillsenda
ag/packettothereceivertoturnthelightsON.Intheabsenceofags/packets
sentfromthesensor,thereceiverswitchwillTime-OutandturnthelightsOFF.
NOTE:Thesensormustsensemotionandsendapackettostartthetimedelay
andenableAuto-Off.
• WSCxx & WSS10 (together):Allowthe30secondvacancyconrmation
featurewhichexiststoturntherelaybackONincaseoffalseOFF.
Self Powered Products:Thesensorandremoteswitchareselfpowereddevices
usingEnOceantechnology.
• TheSensorutilizesasolarpanelwhichpowersthesensorfromtherooms
ambientlight.Thesensorwillstarttofunctionwithinaminuteofexposureto
light.Thetotalchargetimeforthesensorwillvarydependingonintensityof
lightandlengthofexposuretolight.Theminimumlightrequirementforthe
sensoris40LUX(4FC).
• Theremoteswitchutilizeskineticenergyfromthemechanicalswitchwhen
pushingthepad.Thisfrictionthenstoresenoughenergytotransmitanother
signalonthenextpressactionofthepad,testedover50,000cycles.
Battery option:Theuseof(3)AAAbatteries(notincluded)isnotrequiredbutcan
beusedinareaswherenolightisexpectedforlongperiodsoftime.
Low Voltage option:The5-24VDCconnection,isprovidedandrecommended
whenusedinareaswherenolightisexpectedforlongperiodsoftime.
Factory settings:
WSS10:ManualOn/AutoOff,Walkthru=disabled,Timedelay=10min.
WSCxx:Range(PIRsensitivity)=75%
Factory setting operation:
Whenenteringtheroom,thewirelessreceivercontrolswitchwillneedtobemanually
turnedON.Oncelearnedintothereceiverswitch,theWirelessoccupancysensorwill
sendag/packetstothereceiverswitch,keepingthelightsonuntiltheroomisvacant.
Oncethesensorstopssendingag/packets,thereceivertimeoutwillstart,thenturn
thelightsOFFaftertimeoutperiod.
WARNINGS AND CAUTIONS:
•Disconnectpoweratcircuitbreakerorfusewhenservicing,installingorremovingtheWSS10.
•Usethisdevicewithcopper or copper clad wire only.
•Recommendedminimumwallboxdepthis2-1/2”.
PK-93664-10-00-0C
Programming Instructions:
Step 5
3
3
4
1
2
4
3
4
3
4
Dip Switch
10 Min Time-Out
30 Min Time-Out
20 Min Time-Out
2 Min Time-Out
-
-
X
ON Position
ON Position
-
ON Position
ON Position
X
-
ON Position
X
X
Manual-On/Auto-Off
Walk Through On
X
X
-
OFF Position
OFF Position
OFF Position
X
OFF Position
OFF Position
-
X
-
Auto-ON/Auto-Off
Walk Through Off
Time-Outs:
TheSensorhasfourtime-outsettings:2(test),10,20,or30min.(longertimeout
isrecommendedforselfpoweringindarkspaces).Thevaluesoftime-outisuser
selectedthroughtheuseoftheDipSwitchSettings.NOTE:Sincethesensoris
onlysendingapacketeveryminute,the2minutetimedelayisnotsufcientfor
normaloperation.
Walk-Through Time Delay:
Thewalk-throughfeatureisonlyactiveintheAuto-On/Auto-Offmodewithtime
delayof10,20or30min,isusefulwhenaroomismomentarilyoccupied.Withthis
feature,theSensorwillturnthelightsOFFshortlyafterthepersonleavestheroom.
Thewalk-throughfeatureworksinthefollowingmanner:Whenapersonentersthe
room,thelightswillturnON.Ifthepersonleavestheroombeforethewalk-through
time-outof2.5minutes,theSensorwillturnthelightsOFFwithin2.5minutesof
nooccupancydetected.Iftheroomisoccupiedforlongerthan2.5minutes,the
SensorwillentertheOccupiedModewiththetime-outdurationspeciedbythe
DipSwitchsetting.
1. ReadalltheProgrammingstepsbeforetakinganyactiontoprogramthe
receiver.
2. EnterProgrammingModebypressingandholdingtheswitchbuttonfor15
Seconds,TheLEDontheswitchwillbeginashingAmberslowly1xper
second.ThisistheModeSelectionareaofprogramming.Releasethebutton.
3. ProceedtoreadingRocker Mode, Momentary Mode, Toggle Mode and then
Scene Mode instructions.
NOTE: Amber flashing LED represents the Mode Selection Area of programming,
no buttons can be learned into a receiver with Amber flashing lights.
Rocker Mode Programming Instructions
(LED flashing Amber 1x per second)
1. ReadallRockerModeprogrammingstepsbeforetakinganyactiontoprogram
receiverinRockerMode.
2. Upon entering programming, the device will automatically begin in
Rocker Mode (Amber flash 1x per sec).
3. ToLearnatransmitterswitchinRockerModepressandholdthebuttonfor5
seconds.TheLEDwillchangefromAmbertoGreen*orRed**tosignifyyou
arenowintheLearnareaofprogramming.Releasethebutton.
4. WhenlearningawirelessDecora
®
stylelightswitchtothereceiver,press
oneendofaswitchrocker.Whenlearningatransmitterotherthanawireless
lightswitch,presstheLEARNbuttononthetransmitter(see appropriate
transmitter instruction sheet).TheLEDwillchange/increaseGreen*
ashingandtheloadwillstayONforabout3secondsindicatingthatthe
receiverhasstoredthetransmitter’suniqueIDinitsmemory.
NOTE: Pressing the transmitter switch again will unlearn the unique ID. (refer
to below: Clear One Transmitter from Programming Mode).
NOTE: (If only one transmitter is desired then skip Step 5 and exit Learn
Mode by following Step 7).
5. ToprogramadditionaltransmitterstocommunicatewiththisreceiverinRocker
Mode,waituntilLEDashingresumes.RepeattheinstructionsinStep 4
untiltheuniqueIDsofalldesiredtransmittersarestoredintheRockerMode
memoryofthereceiver(upto10).
6.
To program a additional transmitters to communicate with this receiver
in another Mode, press the receiver button and return to Mode Selection
area (Amber LED flashing).TheAmberLEDwillbeashing1xpersecond
forRockerMode.PressingthereceiverswitchbuttonwilladvancetheAmber
ashingtothenextProgrammingMode,MomentaryMode(Amberash2xper
second).FollowSteps 3 and 4toprogramtransmitterstoMomentaryMode.
7.
ToexitLearnMode,justwait;thereceiverautomaticallyexitsLearnModeafter
30seconds(indicatedbytheceasingoftheLEDashing).
Single Pole
1. Line
2. Neutral
3. Ground
4. Load
Figure 1 - WithNeutral
(whitewire)
Figure 2 - NoNeutral
(nowhitewire)