Hardware & Software Upgrade Instructions Lexicon
1-6
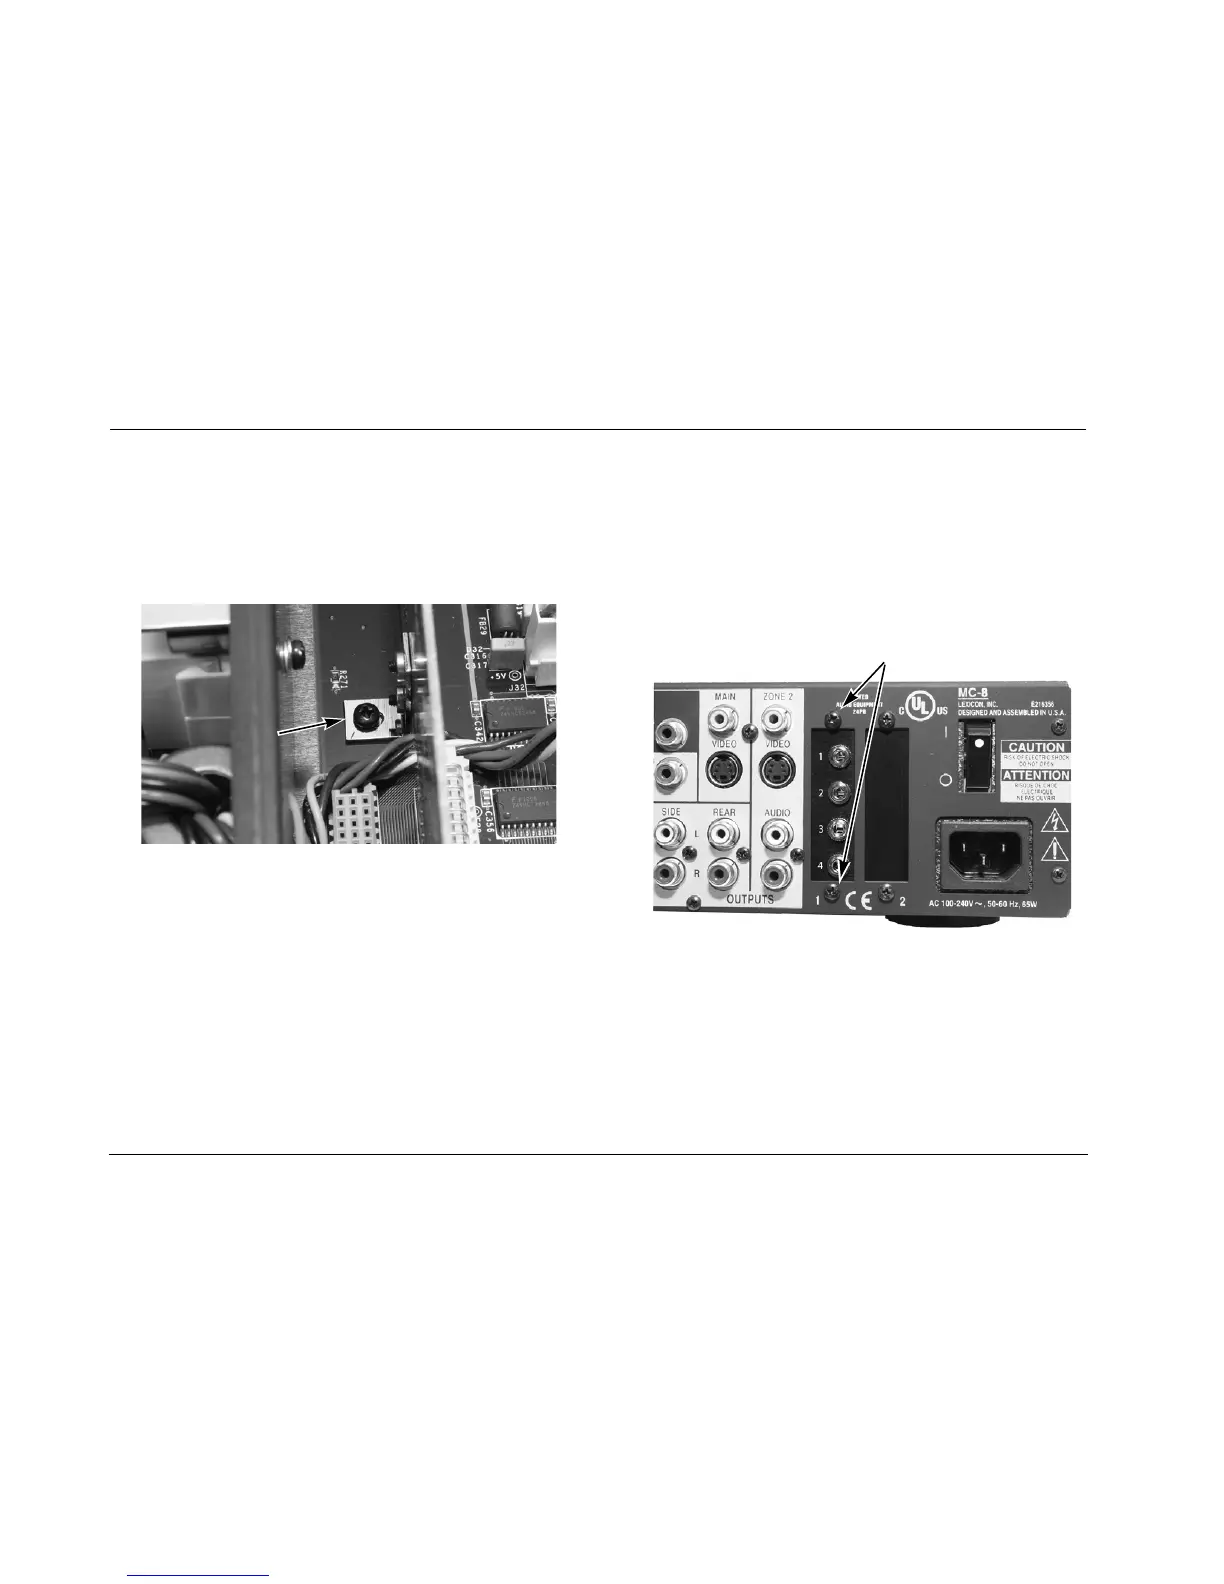
17. Attach the Microphone Board bracket to the main board using
the previously removed 3x6mm screw as shown in Figure 1-8.
It may be helpful to insert the screw into the hole with a pair of
pliers or a third hand tool.
Figure 1-8: Screw inserted into Microphone Board bracket.
18. Place the MC-8 so the rear panel is facing you. Using the previ-
ously removed screws, attach the Microphone Board to the rear
panel as shown in Figure 1-9. Screw in the bottom screw first.
Note
Be careful to properly align the screw threads on the Microphone
Board with the holes on the back panel.
Figure 1-9: Rear view of installed Microphone Board.
19. Slide the MC-8 cover onto the unit and secure with the 13 hex
screws.
Screws

 Loading...