EasyManua.ls Logo

Lexmark CX82 Series - User Manual

Lexmark CX82 Series
14 pages
Print Icon
To Next Page IconTo Next Page
Loading...
Quick Reference
Copying
Making copies
1
Load an original document into the ADF tray or on the scanner
glass.
Note: To avoid a cropped image, make sure that the original
document and output have the same paper size.
2
From the home screen, touch Copy, and then specify the
number of copies.
If necessary, adjust the copy settings.
3
Copy the document.
Note: To make a quick copy, from the control panel, press
.
Copying on both sides of the paper
1
Load an original document into the ADF tray or on the scanner
glass.
2
From the home screen, touch Copy > Paper Setup.
3
Adjust the settings.
4
Copy the document.
Copying multiple pages onto a single
sheet
1
Load an original document into the ADF tray or on the scanner
glass.
2
From the home screen, touch Copy > Pages per Side.
3
Adjust the settings.
4
Copy the document.
Faxing
Sending a fax
Using the control panel
1
Load the original document into the ADF tray or on the scanner
glass.
2
From the home screen, touch Fax, and then enter the needed
information.
3
If necessary, configure other fax settings.
4
Send the fax job.
Using the computer
Note: Make sure that the Universal Fax driver is installed.
For Windows users
1
With a document open, click File > Print.
2
Select the printer, and then click Properties, Preferences,
Options, or Setup.
3
Click Fax > Enable fax, and then enter the recipient number.
4
If necessary,
configure
other fax settings.
5
Send the fax job.
For Macintosh users
1
With a document open, choose File > Print.
2
Select the printer and enter the recipient number.
3
If necessary,
configure
other fax settings.
4
Send the fax job.
E-mailing
Sending an e-mail
Using the control panel
1
Load an original document into the ADF tray or on the scanner
glass.
2
From the home screen, touch E-mail, and then enter the
needed information.
Note: You can also enter the recipient using the address
book or shortcut number.
3
If necessary, configure the output file type settings.
4
Send the e-mail.
Using the shortcut number
1
From the control panel, press #, and then enter the shortcut
number using the keypad.
2
Send the e
mail.
Printing
Printing from a computer
Note: For labels, card stock, and envelopes, set the paper size
and type in the printer before printing the document.
1
From the document that you are trying to print, open the Print
dialog.
2
If necessary, adjust the settings.
3
Print the document.
Printing confidential and other held
jobs
For Windows users
1
With a document open, click File > Print.
1
Question and Answer IconNeed help?

Do you have a question about the Lexmark CX82 Series and is the answer not in the manual?

Overview

This document provides a quick reference guide for a multifunction printer, covering its core functions, usage, and maintenance.

Function Description

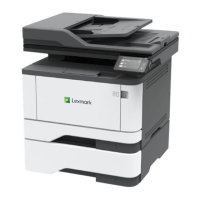
The device is a multifunction printer capable of copying, faxing, e-mailing, and printing. It supports various paper handling options, including single-sided and double-sided printing, as well as printing multiple pages onto a single sheet. The device also features advanced printing capabilities such as holding confidential jobs, which require a PIN for release, and other held jobs like repeat, reserve, or verify jobs.

Important Technical Specifications

The manual does not explicitly list detailed technical specifications such as print speed, resolution, or memory. However, it implies the following capabilities:

  • Automatic Document Feeder (ADF): For loading multiple original documents for copying, faxing, or e-mailing.
  • Scanner Glass: For single-page originals.
  • Multiple Paper Trays: Including a standard tray, a multipurpose feeder, and optional envelope trays.
  • Finisher Bin: For collating and stapling printed documents.
  • Duplex Unit: For automatic two-sided printing.
  • Toner Cartridge System: Indicating a laser printing technology.
  • Control Panel: For direct interaction and configuration of tasks.
  • Connectivity: Implied through "Using the computer" sections for Windows and Macintosh, suggesting USB, network, or wireless connections.

Usage Features

Copying:

  • Basic Copying: Load originals into the ADF or on the scanner glass, select "Copy" from the home screen, specify the number of copies, adjust settings, and then copy. A quick copy can be initiated by pressing the dedicated copy button on the control panel.
  • Two-Sided Copying: Load originals, touch "Copy" > "Paper Setup," adjust settings, and copy.
  • Multiple Pages per Side: Load originals, touch "Copy" > "Pages per Side," adjust settings, and copy.

Faxing:

  • Using the Control Panel: Load originals, touch "Fax," enter recipient information, configure settings, and send.
  • Using the Computer:
    • Windows: With a document open, click "File" > "Print," select the printer, click "Properties/Preferences/Options/Setup," click "Fax" > "Enable fax," enter recipient number, configure settings, and send. Requires the Universal Fax driver.
    • Macintosh: With a document open, choose "File" > "Print," select the printer, enter recipient number, configure settings, and send.

E-mailing:

  • Using the Control Panel: Load originals, touch "E-mail," enter recipient information (can use address book or shortcut number), configure output file type, and send.
  • Using the Shortcut Number: From the control panel, press "#," enter the shortcut number using the keypad, and send.

Printing from a Computer:

  • Open the print dialog from the document, adjust settings if necessary, and print.
  • Specialty Media: For labels, card stock, and envelopes, set the paper size and type in the printer before printing.

Printing Confidential and Other Held Jobs:

  • Windows: With a document open, click "File" > "Print," "Properties/Preferences/Options/Setup," "Print and Hold," select "Use Print and Hold," assign a user name, select job type (Confidential, Repeat, Reserve, or Verify). For confidential jobs, enter a four-digit PIN. Click "OK" or "Print." Release from the printer home screen by navigating to "Held jobs" > user name > job type > enter PIN (if confidential) > select job > configure settings > "Print."
  • Macintosh: With a document open, choose "File" > "Print," "Job Routing," select job type, assign user name and PIN (if confidential). Click "OK" or "Print." Release from the printer home screen similarly to Windows.

Canceling a Print Job:

  • From the Control Panel: From the home screen, touch "Job Queue" (or the top section of the home screen), and select the job to cancel.
  • From the Computer: Depending on the OS, open the printers folder or System Preferences, navigate to the printer, and select the job to cancel.

Loading Paper:

  • Loading Trays: Pull out the tray, adjust guides to match paper size, flex, fan, and align paper edges, then load paper faceup. Ensure stack height is below the maximum fill indicator to prevent jams. Avoid removing trays while the printer is busy.
    • Letterhead: Load faceup with header on left for one-sided printing; facedown with header on right for two-sided printing.
    • Pre-punched paper: Holes toward the front or left.
    • Envelopes: Flap side down, against the back (European envelopes against the left side).
  • Loading Multipurpose Feeder: Open the feeder, adjust guides, flex, fan, and align paper edges, then load paper facedown with the top edge entering first.
  • Setting Specialty Media Size/Type: From the home screen, navigate to "Settings" > "Paper" > "Tray Configuration" > "Paper Size/Type" > select paper source, then set size and type.

Maintenance Features

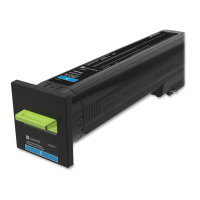
Replacing a Toner Cartridge:

  1. Open door A.
  2. Remove the old toner cartridge.
  3. Unpack the new toner cartridge.
  4. Insert the new cartridge until it clicks into place.
  5. Close door A.

Cleaning the Scanner:

  1. Open the scanner cover.
  2. Using a damp, soft, lint-free cloth, wipe the ADF glass, ADF glass pad, and scanner glass.
  3. Close the scanner cover.

Clearing Jams: The manual provides detailed instructions and illustrations for clearing jams in various locations, including:

  • Multipurpose feeder
  • Door B
  • Automatic document feeder (ADF)
  • Standard bin
  • Door G
  • Finisher bin
  • Trays
  • Duplex unit
  • Fuser
  • Door K
  • Door J
  • Door L
  • Door N
  • Staple finisher bin

General Jam Avoidance Tips:

  • Load paper flat in the tray, with guides positioned correctly but not too tightly.
  • Push trays firmly into the printer.
  • Use recommended paper; avoid wrinkled, creased, damp, bent, or curled paper.
  • Flex, fan, and align paper edges before loading.
  • Do not slide paper into the tray.
  • Do not load or remove trays while printing.
  • Do not overfill trays.
  • Do not use hand-cut or trimmed paper.
  • Do not mix paper sizes, weights, or types in the same tray.
  • Ensure paper size and type settings match on the computer or control panel.
  • Store paper according to manufacturer recommendations.

Safety Warnings:

  • Tipping Hazard: Load trays separately and keep others closed to prevent equipment instability.
  • Potential Damage (Envelopes): Do not use envelopes with stamps, clasps, snaps, windows, coated linings, or self-stick adhesives in the optional envelope tray.
  • Hot Surface: Be cautious of hot surfaces inside the printer when clearing jams (e.g., fuser, door B). Allow surfaces to cool before touching.
  • Static Electricity: Some parts are sensitive to static. Touch a metal surface in an area away from the static-sensitive symbol before touching marked components.
  • Pinch Hazard: Keep hands clear of labeled areas when closing doors (e.g., door C) to avoid pinch injuries.

Lexmark CX82 Series Specifications

General IconGeneral
BrandLexmark
ModelCX82 Series
CategoryPrinter Accessories
LanguageEnglish

Related product manuals