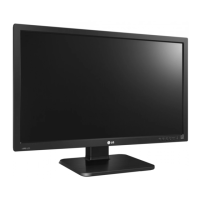
This document is an owner's manual for an LG IPS LED Monitor, model 27MB65PY. It provides comprehensive instructions for assembling, operating, customizing settings, and troubleshooting the monitor.
Function Description
The LG IPS LED Monitor is designed to display visual content from a connected PC or other peripheral devices. It features an IPS (In-Plane Switching) panel, which typically offers wide viewing angles and accurate color reproduction. The monitor supports various input signals, including D-SUB (analog), DVI-D (digital), and DisplayPort (digital), allowing connectivity with a range of computers and devices. It also includes USB ports for connecting peripherals like a mouse, keyboard, or memory stick, enhancing its utility as a central display hub. The monitor is equipped with built-in speakers, providing an integrated audio solution.
Usage Features
The monitor offers a variety of features to enhance user experience and comfort:
- Assembly and Setup: The manual details how to unpack the monitor, identify all parts and buttons, and set it up on a table. This includes attaching the stand base, detaching the stand body, and using a cable holder to manage cables neatly.
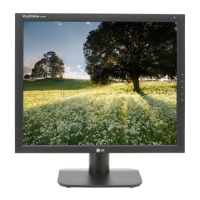
- Ergonomic Adjustments: The monitor stand is highly adjustable to promote proper posture and comfortable viewing. Users can adjust the screen angle (5° forwards to 35° backwards), adjust the stand height (up to 130 mm), and swivel the monitor 355 degrees. A unique pivot function allows the screen to rotate 90 degrees clockwise, enabling a portrait orientation, which is particularly useful for tasks like reading documents or coding.
- Connectivity:
- PC Connection: The monitor supports Plug & Play functionality, automatically recognizing connected devices. It can connect to a PC via D-SUB, DVI-D, or DisplayPort cables.
- Peripheral Device Connection: Two USB downstream ports are available for connecting low-power USB devices (under 100mA), such as a mouse or keyboard. A USB upstream port connects the monitor to a computer, laptop, or USB monitor that supports USB.
- On-Screen Display (OSD) Menu: The OSD menu, accessed via buttons on the bottom panel, allows users to customize various display settings.
- Picture Settings: Adjust contrast and sharpness.
- Color Settings: Fine-tune gamma, color temperature (warm, medium, cool, or custom RGB levels), and individual six colors (Red, Green, Blue, Cyan, Magenta, Yellow) for hue and saturation. A color reset option is also available.
- Display Settings: Adjust horizontal and vertical position, clock, and phase to optimize image clarity and stability, especially for analog signals.
- Audio Settings: Select the audio input source (Audio-In, DP, or Auto) for the built-in speakers or connected headphones.
- Other Settings: Change the OSD language, control the power indicator light (on/off), and set an off-time for the monitor (1-24 hours) to automatically switch to power-off mode.
- Self Image Setting Function (Analog Mode Only): When the monitor is first connected and powered on, this function automatically adjusts display settings for optimal performance.
- 'AUTO' Function (Analog Mode Only): A dedicated AUTO button helps resolve common display issues like blurry screens, blurred text, screen flicker, or tilted screens by automatically adjusting resolution.
- Reader Mode: This feature provides pre-set display modes (Reader 1 and Reader 2) that adjust the screen to a paper-like picture, reducing eye strain for tasks like reading newspapers or cartoons. When Reader Mode is active, Picture Mode automatically switches to Custom, and SMART ENERGY SAVING is turned off.
- SMART ENERGY SAVING: This function helps conserve energy by using a luminance compensation algorithm. Users can select High, Low, or Off settings. When set to High or Low, Picture Mode automatically switches to Custom, and Reader Mode is turned off.
Maintenance Features
The manual includes important information for maintaining the monitor and ensuring its longevity:
- Safety Precautions: Users are advised to read safety precautions before using the product and to use only approved accessories to ensure safety and product life span.
- Screen Protection: Instructions emphasize protecting the screen from scratches during assembly and movement by placing it face down on a soft, cushioned surface. Users are also warned not to press the screen with fingers for extended periods to prevent temporary distortion and to avoid displaying fixed images for long durations to prevent image burn-in, recommending the use of a screensaver.
- Cable Management: The included cable holder helps organize cables, preventing clutter and potential damage.
- Wall Mounting: For wall mounting, the manual provides VESA standard specifications for screws and wall mount interfaces, emphasizing the importance of using authorized LG wall mounts and proper screw lengths to prevent damage or injury. It also advises disconnecting the power cord before moving or installing the monitor for safety.
- Troubleshooting Guide: A dedicated section helps users diagnose and resolve common issues such as no image, incorrect display position, flickering, or "OUT OF RANGE" messages. It suggests checking cable connections, adjusting brightness/contrast, using the AUTO button, and verifying display settings.
- Kensington Lock: The monitor includes a connector for a Kensington lock, allowing users to secure the monitor to a table and deter theft.
- OSD Lock/Unlock: The OSD menu can be locked to prevent inadvertent changes to settings, and unlocked when adjustments are needed.