Do you have a question about the LG L1918S and is the answer not in the manual?
General safety guidelines for electrical shock, fire hazards, personal injury, and operational safety.
Guidelines for proper placement, ventilation, and avoiding screen damage.
Instructions for safely cleaning the display screen using a damp cloth.
Recommendations for using original packaging for transport.
Information on proper disposal of the product containing mercury.
Step-by-step instructions to attach the monitor stand securely to the display.
Procedure for safely detaching the monitor stand from the display unit.
Steps to detach the stand base from the monitor stand assembly.
Adjusting the panel tilt for optimal viewing comfort and ergonomic position.
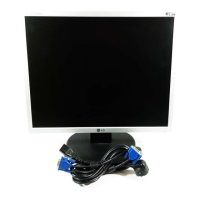
Instructions for connecting signal and power cables, and powering on the monitor.
Automatic adjustment of display settings for optimal input signals.
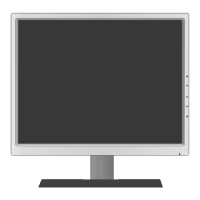
Identifies the buttons and indicators on the monitor's front panel.
Details the functions of the side-mounted control buttons.
Feature for selecting preset image conditions based on environment or content.
Describes the AUTO/SET button for image adjustment and selection in OSD.
Explains the power button operation and the power indicator's status lights.
Introduction to adjusting image size, position, and parameters using the OSD system.
Step-by-step guide on how to navigate and use the OSD menu for adjustments.
Details all available On Screen Display controls, adjustments, and settings.
Description of OSD menu names, icons, sub-menus, and button tips.
Adjusts brightness, contrast, and gamma for optimal screen image quality.
Customizes color temperature and individual RGB levels.
Adjusts the horizontal and vertical position of the displayed image.
Controls clock, phase, and sharpness for image clarity and stability.
Configures language, OSD position, white balance, power indicator, and factory reset.
Checks power, indicator, and signal messages for troubleshooting no-image issues.
Explains how to secure and unlock OSD control settings.
Adjusts image position and checks resolution/frequency for incorrect display positioning.
Addresses vertical bars, horizontal noise, abnormal color, and screen blinking.
Ensures proper installation of the display driver for correct functionality.
Checks video card support for Plug&Play function for monitor recognition.
Details display size, pitch, sync input, video input, resolution, and Plug&Play.
Lists power consumption, dimensions, weight, tilt range, power input, and environmental conditions.
Lists supported display modes with corresponding horizontal and vertical frequencies.
Explains the LED color indicators for different operating modes.
Steps to remove the monitor stand for wall mounting.
Information on stand-type or mount-type compatibility with wall mount plates.
Details the function of the Kensington Security Slot for device security.
| Pixel pitch | 0.294 x 0.294 mm |
|---|---|
| Display diagonal | 19 \ |
| Separate H/V sync | Yes |
| Display resolution | 1280 x 1024 pixels |
| Vertical scan range | 56 - 75 Hz |
| Horizontal scan range | 30 - 83 kHz |
| Display number of colors | 16.78 million colors |
| Viewing angle, horizontal | 160 ° |
| Display brightness (typical) | 300 cd/m² |
| Display viewable area (HxV) | 376 x 301 mm |
| Panel mounting interface | 75 x 75 mm |
| USB Type-A downstream ports quantity | 0 |
| Certification | TCO'99, EPA, GOST, C-TICK, UL, UL-CUL, SEMKO, FCC-B, CE, VCCI-2, TUV-GS |
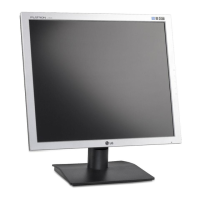
| Product color | Silver |
| Market positioning | - |
| Power consumption (standby) | 1 W |
| Power consumption (typical) | 33 W |
| Sustainability certificates | ENERGY STAR |
| Depth (without stand) | 180 mm |
|---|---|
| Width (without stand) | 416 mm |
| Height (without stand) | 420 mm |
| Weight (without stand) | 4000 g |