This document serves as a User's Guide for the LG L1752S and L1952S display units, providing comprehensive instructions for installation, operation, maintenance, and troubleshooting. It emphasizes safety precautions and optimal usage practices to ensure the longevity and proper functioning of the device.
Function Description
The LG L1752S and L1952S are flat panel active matrix-TFT LCD displays designed to provide visual output from a computer system. They function as an interface between the user and the computer, displaying images, text, and video content. The displays are equipped with an On Screen Display (OSD) control system, allowing users to adjust various image parameters and operating settings for a customized viewing experience. They support both analog input signals and are designed for general computing tasks, including text processing, image viewing, and video playback. The displays are also designed to be compatible with various operating environments and can be integrated into different setups, including wall-mounted configurations.
Usage Features
The display units offer several features to enhance user experience and flexibility.
- Stand Assembly and Removal: The manual provides detailed, step-by-step instructions with illustrations for assembling and disassembling the display stand. This includes attaching the stand body and base, ensuring a secure connection, and then reversing the process for removal. This modular design allows for easy setup and potential wall-mounting.
- Ergonomic Positioning: Users can adjust the tilt angle of the display panel from -5° to 20° to achieve maximum comfort and an ergonomic viewing position. A warning is included to prevent finger injury during adjustment.
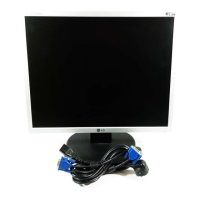
- Computer Connection: The displays connect to a computer system via a signal cable (D-Sub VGA connector) and a power cord. Instructions emphasize ensuring proper connections and securing cables. For Apple Macintosh users, a separate plug adapter may be required.
- Power Management: The display includes a power button and a power indicator. The indicator lights green or blue during normal operation and changes to amber in sleep mode (energy saving), providing a visual cue of the display's power status.
- On Screen Display (OSD) Control System: This is a core feature for managing display settings.
- Menu Navigation: The OSD is accessed via the MENU button, and settings are adjusted using arrow buttons and confirmed with the AUTO/SET button. This intuitive interface allows users to navigate through various menus and sub-menus.
- Image Adjustment: Users can control essential image parameters such as brightness, contrast, and gamma to optimize visual quality.
- Color Customization: The COLOR menu offers presets like sRGB, 6500K, and 9300K, as well as individual adjustments for red, green, and blue color levels, allowing for precise color calibration.
- Position Adjustment: Horizontal and vertical positioning of the image can be fine-tuned to ensure the display content is centered and aligned correctly on the screen.
- Tracking and Clarity: The TRACKING menu includes CLOCK and PHASE adjustments to minimize vertical bars or stripes and improve image clarity and sharpness, especially for text. SHARPNESS can also be adjusted.
- Setup Options: This menu allows users to customize the OSD itself, including language selection, OSD position on the screen, and white balance. The white balance function helps adjust signal levels to fit standard output levels of the video card, ensuring optimal image quality.
- Power Indicator Control: Users can choose to turn the front power indicator ON or OFF.
- Factory Reset: A factory reset option is available to restore all default settings, excluding language, which can be useful for troubleshooting or starting fresh with settings.
- FLATRON f-ENGINE: This feature allows users to select optimized image conditions based on the environment and content type (e.g., MOVIE for videos, TEXT for documents). It also includes a USER mode for manual adjustments of brightness, ACE (Adaptive Clarity Enhancer), and RCM (Real Color Management), with the ability to save custom settings.
- Self Image Setting Function: In analog mode, the display automatically adjusts to optimal settings for individual input signals when first connected or when the AUTO/SET button is pressed. This simplifies initial setup and ensures a good starting image.
- OSD Lock/Unlock: A security feature that allows users to lock the current OSD control settings by holding the MENU button for several seconds, preventing inadvertent changes. The OSD can be unlocked by repeating the action.
- Plug&Play (DDC 2B): The display supports Plug&Play functionality, which simplifies installation by allowing the computer to automatically detect and configure the monitor.
Maintenance Features
The manual outlines several maintenance guidelines to ensure the display's longevity and safe operation.
- Cleaning:
- Users are instructed to unplug the display before cleaning.
- A slightly damp (not wet) cloth should be used for cleaning the screen.
- Aerosol sprays should not be applied directly to the display screen to avoid electrical shock.
- Repacking:
- Users are advised to retain the original carton and packing materials.
- These materials serve as an ideal container for transporting the unit, ensuring its protection during relocation.
- Disposal:
- The fluorescent lamp in the product contains mercury, and thus, the display should not be disposed of with general household waste.
- Disposal must comply with local authority regulations, emphasizing environmental responsibility.
- General Precautions:
- Power Cord Care: The power cord should be protected from damage, and only the supplied or certified power cord should be used. It also serves as the main disconnection device, so it should be easily accessible.
- Environmental Safety: The display should not be used near water sources (bathtubs, sinks, pools) or in wet basements.
- Ventilation: The display cabinet has ventilation openings to release heat. These openings must not be blocked by placing the display on soft surfaces (bed, sofa, rug), in built-in enclosures without proper ventilation, or near heat sources. Covering the openings with cloth or other materials is also prohibited.
- Screen Handling: Users are warned against rubbing or striking the LCD with hard objects to prevent permanent damage. Prolonged pressing of the screen with a finger may cause afterimages.
- Internal Access: The display should not be opened as it contains no user-serviceable components and dangerous high voltages are present even when off. Any issues should be addressed by a dealer.
- Personal Safety: The display should be placed on a secure, non-sloping surface, and only manufacturer-recommended stands should be used.
- Fire and Hazard Prevention: The display should be turned off when leaving the room or house. Children should be prevented from dropping objects into cabinet openings. Non-designed accessories should not be added. During lightning storms or extended periods of non-use, the display should be unplugged from the wall outlet.
- Troubleshooting Guide: The manual includes a comprehensive troubleshooting section to help users diagnose and resolve common issues such as:
- No image appearing (power cord, indicator light, brightness/contrast, power saving mode, "OUT OF RANGE" or "CHECK SIGNAL CABLE" messages).
- "OSD LOCKED" message appearing.
- Incorrect display image (position, vertical bars/stripes, horizontal noise, screen color, screen blinking).
- Issues related to display driver installation ("Unrecognized monitor, Plug&Play (VESA DDC) monitor found" message).
This guide provides practical steps, often involving OSD adjustments or checking physical connections, to address these problems before seeking professional service.